
This post is also available in:


Samba’s Flow Campaigns helps you to reach your customers on multiple levels. You can break down an omnichannel campaign, use segmentation options, custom actions, touchpoints, and more.
A flow campaign works like a slot machine
- the customer enters through an activation node
- the customer then proceeds to downstream nodes when conditions are met (Segmentation node, Split node, Automatic A/B testing, Campaign Activity, Delay)
- the customer can be targeted using several channels (Email node, Facebook node, Push notification node, SMS message, Webhook)
Use cases examples
Flow campaign running every day.
The flow campaign is best suited for checking a certain condition every day:
- Who’s birthday is today? Send him an email.
- Who registered in my e-shop yesterday? Send him a welcome message with a gift. Wait 5 days and send a follow-up to all those who haven’t opened the email.
- Who bought a product of the brand XY 14 days ago and will likely need a complementary product? Send him an offer with a discount coupon.
You can create more complicated campaigns with segmentation using splits or automated A/B tests, for which one-off email campaigns aren’t suitable. Reuse them later with the possibility to duplicate the campaigns.
Campaigns that run once every one or more weeks.
- Send mailing with new arrivals to my customers with a personalized template once in 4 weeks (Be aware that this is possible only when the amount of new arrivals changes often).
Designing Omnichannel Flows
The flow campaign can be also used to check the campaign activity of other flow or one-off campaigns. Here are some examples:
- Send a push notification to all my customers who haven’t opened the email XYZ sent a week ago.
- Fill Facebook Audience with customers who haven’t purchased in more than 180 days.
Overview
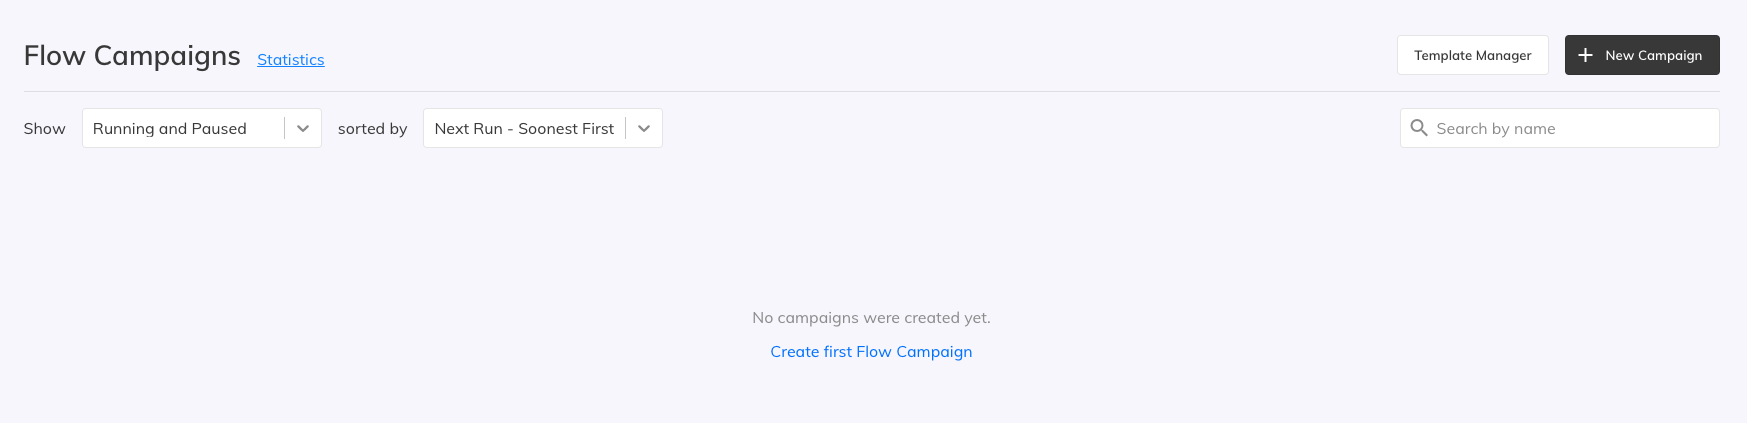
By clicking on Flow Campaigns on the left side menu, you’ll get to the administration of your flow campaigns. Create a new Flow campaign, by selecting “New campaign” in the top right corner.
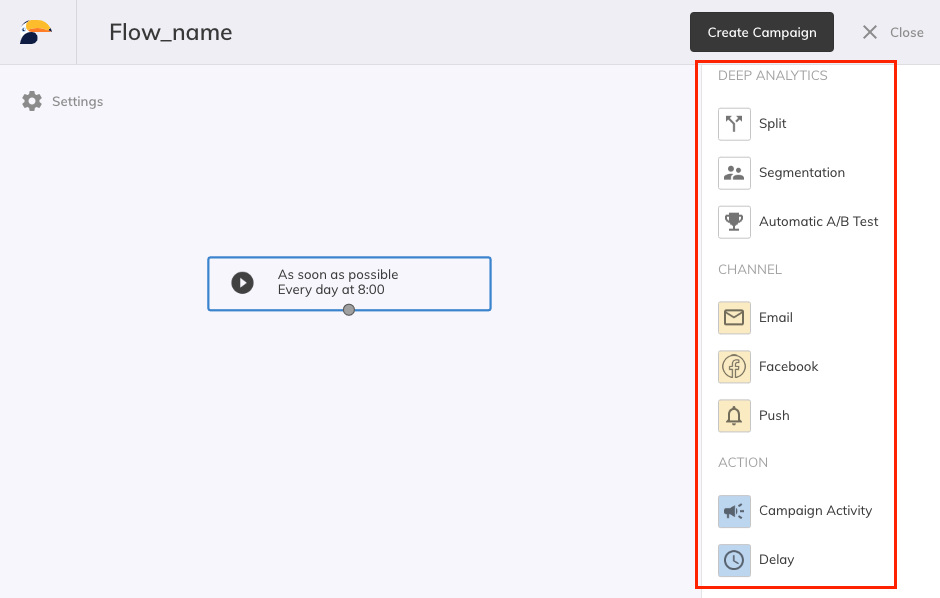
Now you are in the Flow dashboard. Start your campaign by selecting a name and UTM tracking code.
Flow modules description and usage
Flow activation node
This is the flow starting point where you can manage the sending properties of your campaign. Click on the node to edit:

Campaign activation:
- As soon as possible – the campaign is evaluated always when the status is Running
- Specific date (from, to, from-to) – use this option if you want to evaluate the campaign only in the specific date range
- On specific date – this can be useful for one-time campaigns
Execution conditions:
- Campaign flow initiates on the specified date and continues each time the activation rule in the Activation node is triggered
Targeting frequency:
- Minimum delay between the next entry of the same customer into the Flow campaign after he has been targeted by any Email node or SMS node within this Flow campaign
Define the flow of your campaign
You have to define the course of your campaign. Drag & Drop selected actions into your campaign. Use connecting lines to create connections between actions.
Segmentation node
With this node, you can use more than 60 audience filters. Create a new one or upload an already existing one from your database.

All the customers that do not fulfil the criteria will fall into the“Others” and their numbers will be counted every day the campaign is running.
You can find some additional tips here.
Split node
It is used to select a certain part of the audience completely at random, e.g. for long-term A/B testing on a certain group. The selection is completely random for a given Split node, but always the same for a given customer.
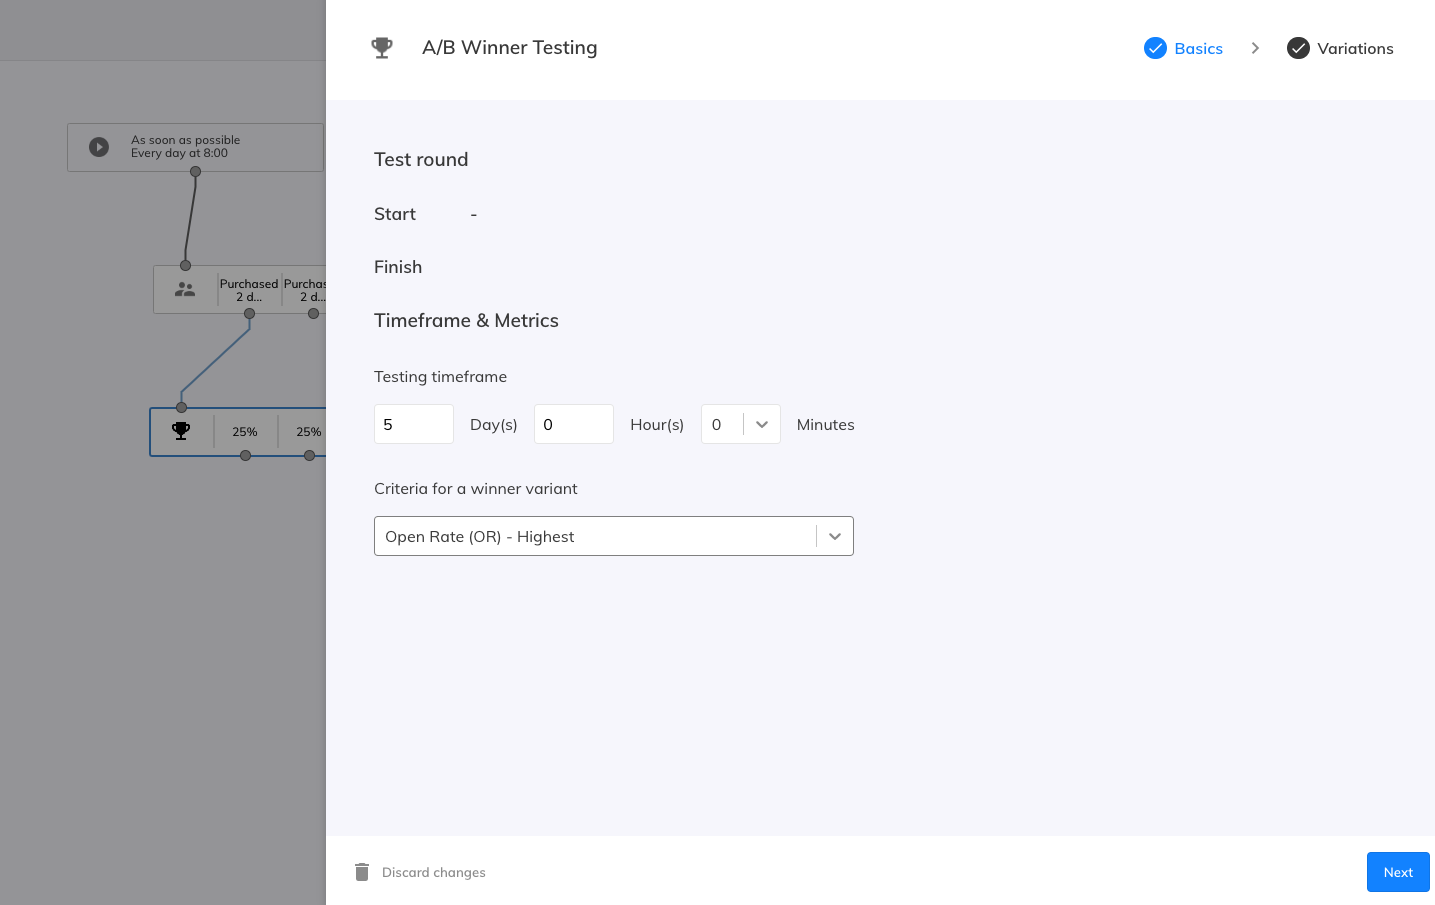
Automatic A/B Test node
This node allows you to run A/B tests for a defined period of time with a maximum of ten variants. Please read more about automatic A/B testing here
Date Condition node
This node within the flow of campaigns allows you to have all steps following this node triggered only if the Date Condition is met.
So with this node you can, for example, warm up your database directly in a flow campaign, or use delayed follow-up emails within a single campaign.
Within the node settings you can select a condition for a specific:
- Date
- Day of the week
- Day of the month
- Month
Example:
We’ll use the node as an example of a follow-up email in a flow campaign.
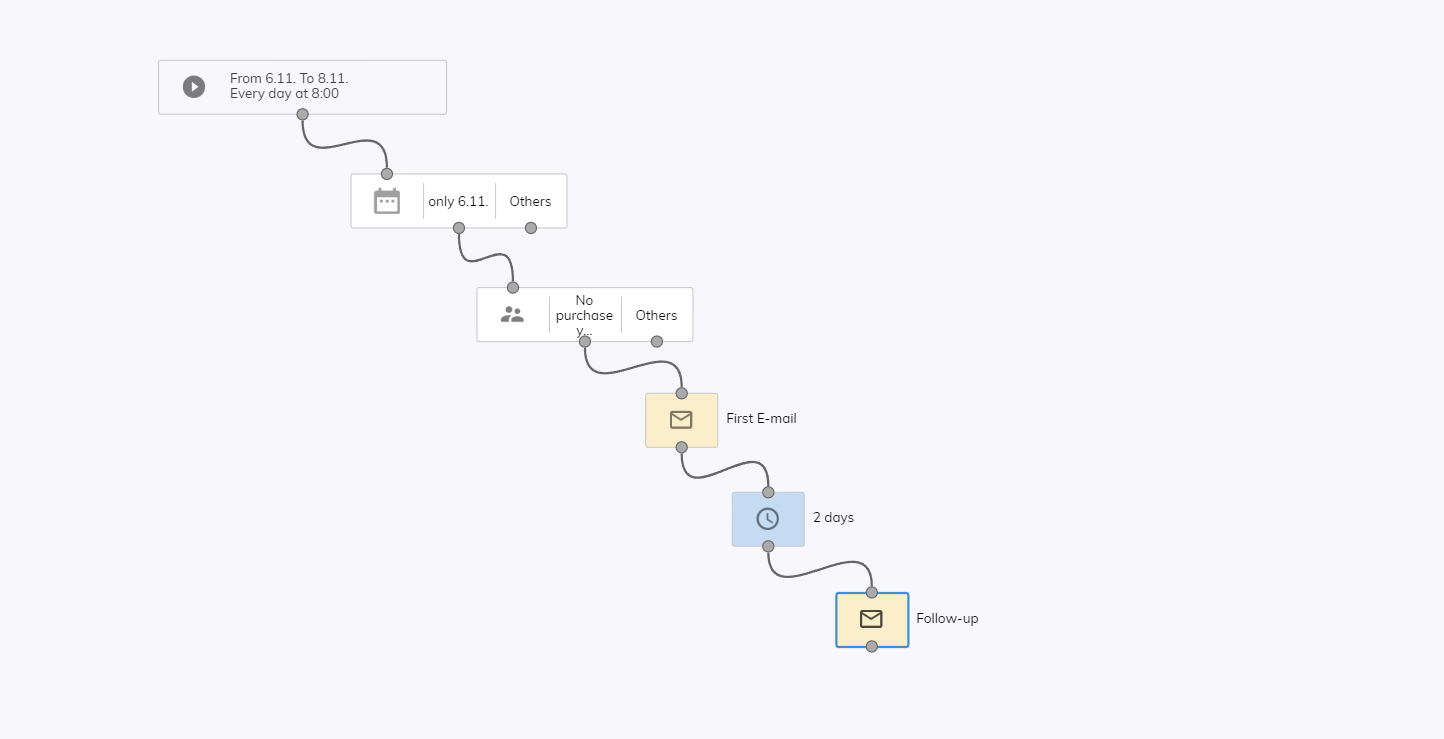
In our example, we want to send an email to selected customers on 6.11. and send a follow-up email 2 days later (8.11.).
So, in the Activation node, we will set the activation in the interval from 6.11. to 8.11. We will leave the Execution conditions set to Daily at 8:00.
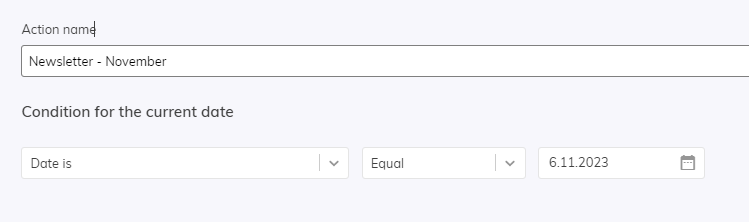
We then connect our Date Condition node. Here we set the condition to Date – Equal – 6.11.
After that, we will connect a Segmentation node filtering for example customers who placed an order the previous day.
Next, we link an Email node, a Delay node with the setting to 2 days and a second Email node.
Due to the settings that are in the Activation node, the flow campaign including all its nodes will be evaluated every day between 6.11. and 8.11. However, due to the settings of the Date Condition node, new customers will only be dropped into the flow campaign on 6.11. and so will the sending of the first Email.
This means that on 7.11. and 8.11. only those customers who are already somewhere in the flow graph will be processed. Then, after the 2-day timeout in the Delay node, an Email follow-up is sent on 8.11. to all those who received the first email on 6.11. You are thus guaranteed that the first Email will only sent on 6.11. to customers who met your conditions at that moment.
Email node
With this node, Samba will initialize and send personalized emails.
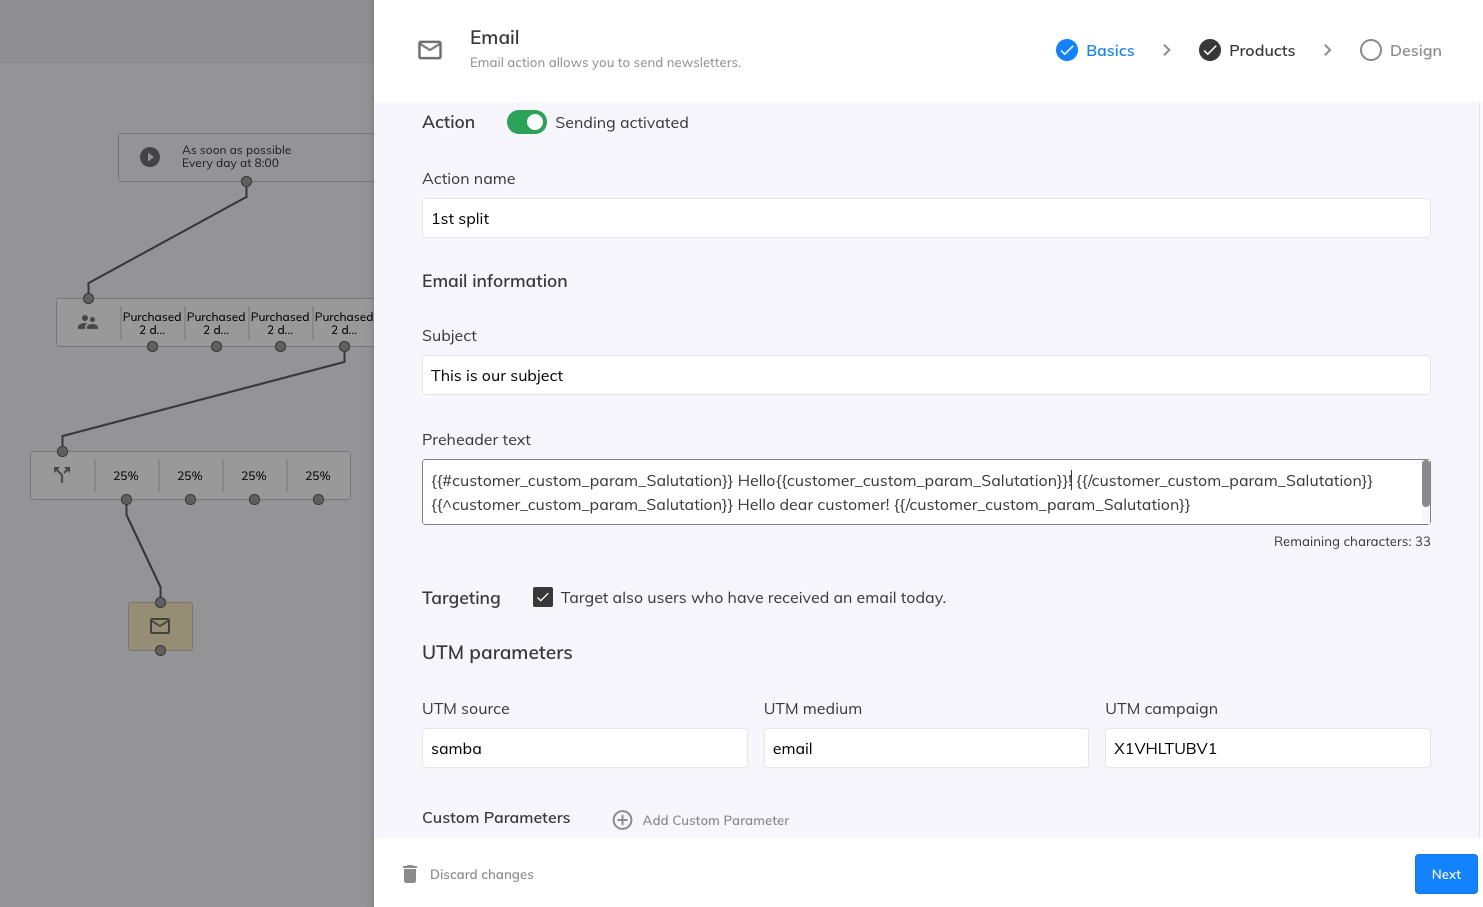
Basics:
- The Action is set to “Sending Activated” automatically. Deactivate it, if you do not wish to send this particular mailing at the moment. Otherwise, leave it activated.
- Name your node in the Action name field, this won’t appear anywhere in the mailing.
- Select a subject and a preheader text. Use merge tags for personalized greetings in the subject field. More about custom salutations here.
- The Sender Details are set to default. You can also add and select custom contacts.
- Targeting: Uncheck this field if you do not want to target customers, who have already received a mailing on the same day. If you leave it checked, the same customers might receive more than one mailing in a single day. Be aware of this if you have multiple flow campaigns running simultaneously.
- UTM parameters are filled in automatically, but you can change them according to your needs.
Optionally, you can add the Custom Parameters, which will help you to find this campaign easier in Google Analytics.
Products:
Use personalized templates with product placeholders and Samba will add specific products for each of your customers.
By using product filters you can choose which products will be recommended to a specific segment of your customers.
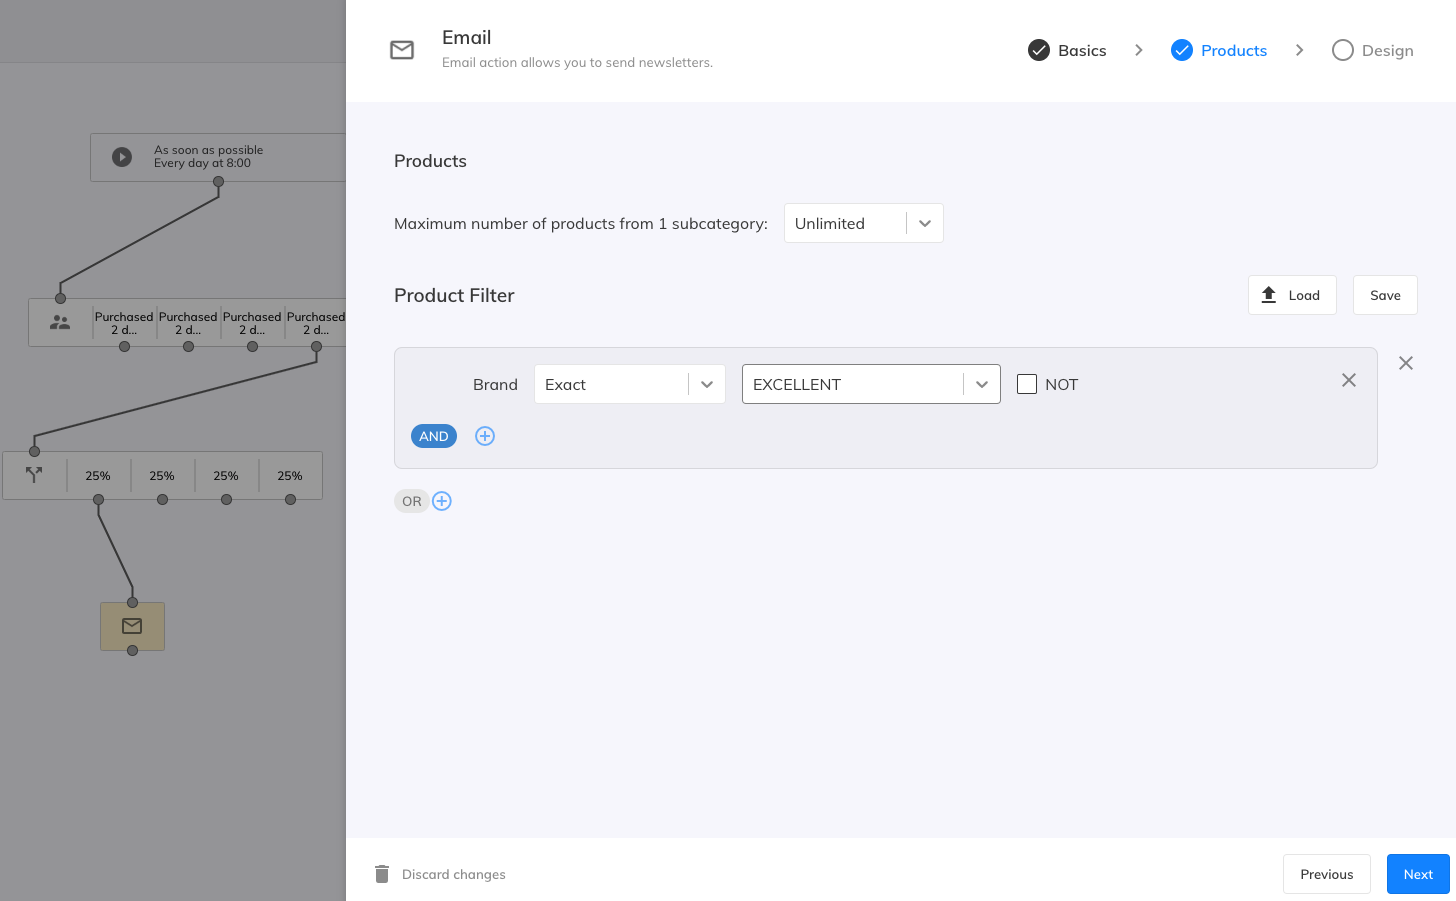
The maximum number of products from 1 subcategory:
- This setting allows you to control the diversity of personalized products across categories
- The selected number represents max. number of products from the same subcategory
- By selecting unlimited you are leaving this process onto the Sambas algorithm
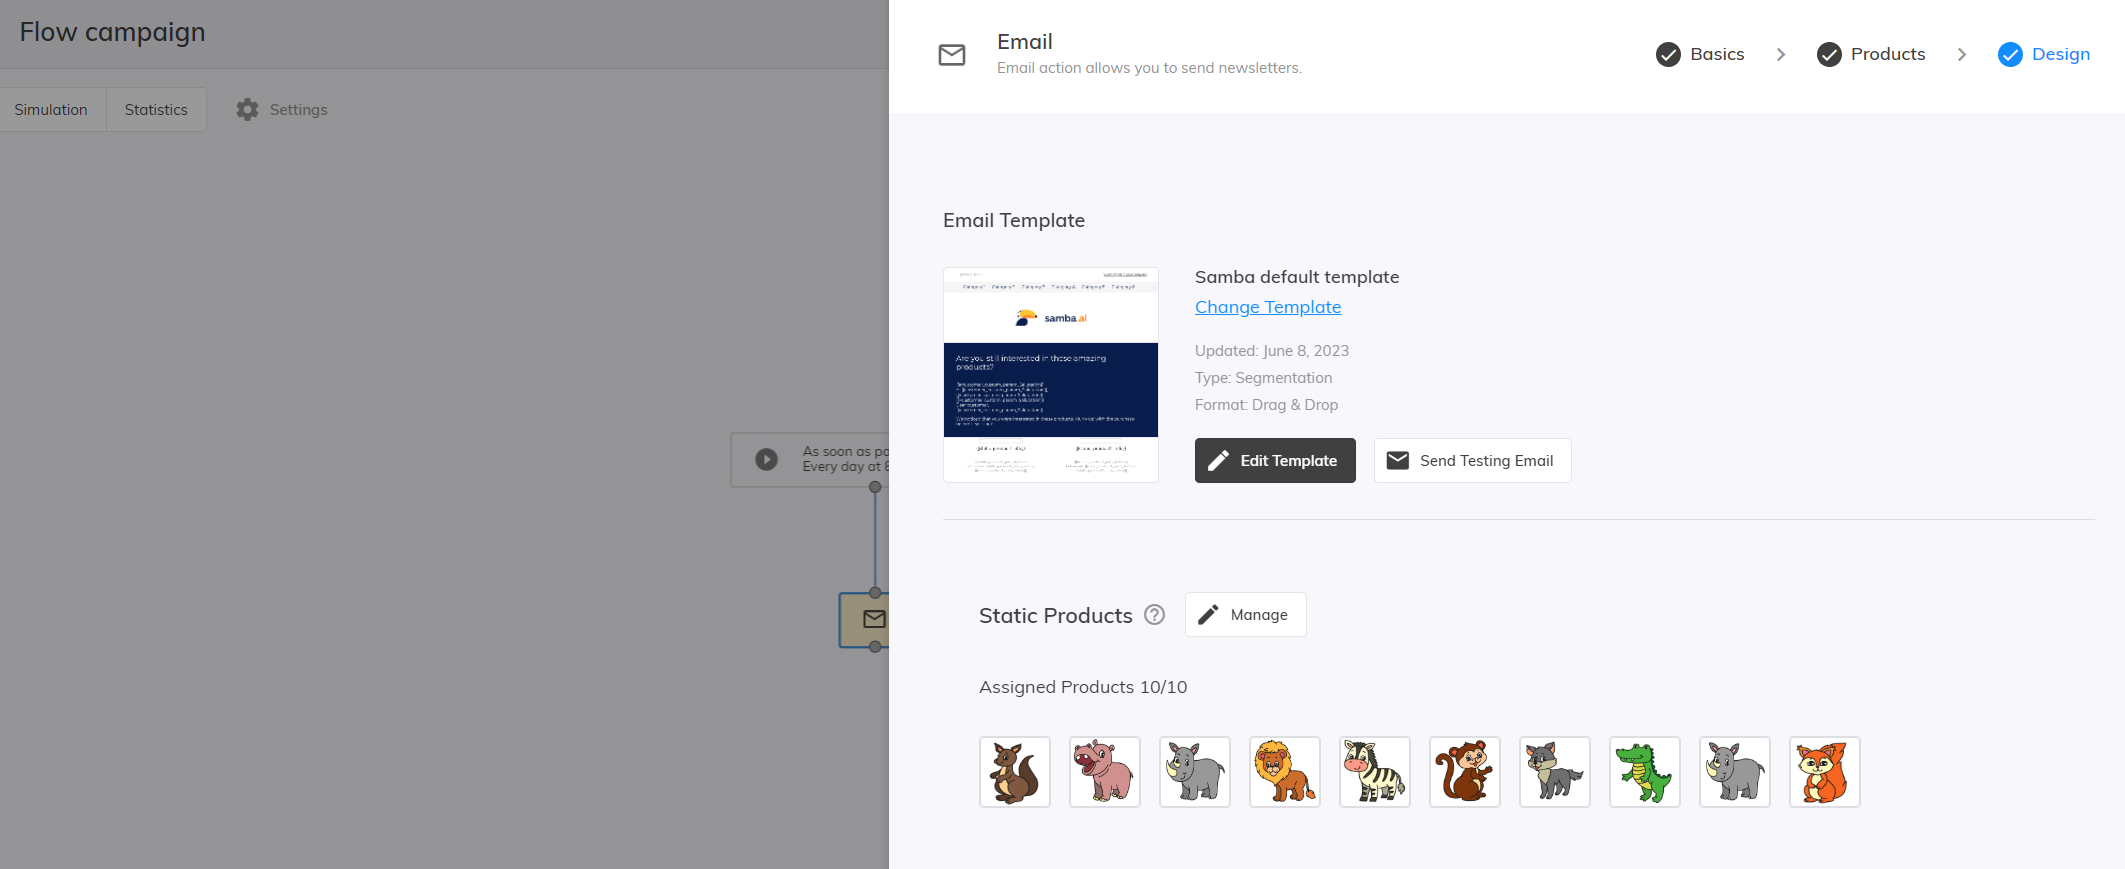
Design:
Use our ready-made static or personalized template with product placeholders and just customize the visual style.
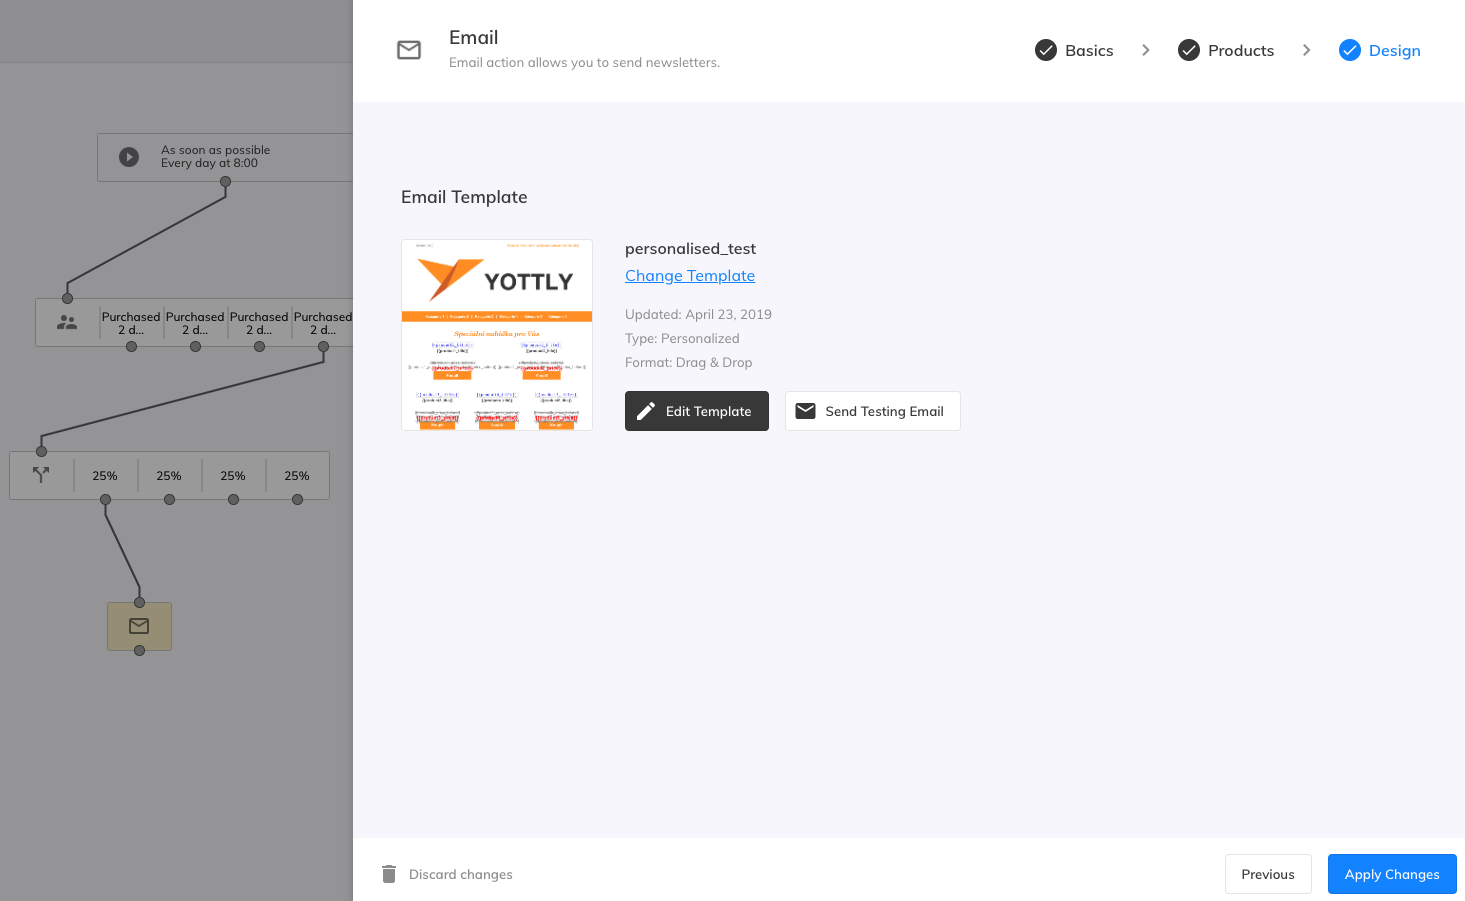
If you use a static template with static product placeholders, you can set up your product directly in the email node.
Pro tip: Copy your prepared email node and adjust it for the next segment:
Facebook node
Use custom audiences of your Facebook AD accounts as a channel.
Before using this node, make sure that your Facebook connection is active under Settings -> Extensions-> Facebook. Find further information here.
Add an account and select a custom audience:
- New custom audience – Samba automatically creates a new custom audience in your Facebook Ad account
- Choose an existing custom audience – Samba will use your previously created custom audience in your Facebook Ad account
Re-evaluate audience member inclusion
- Use this option if you want to regularly refresh your audience and delete no longer relevant customers from your custom audience.
- It can be useful for example for keeping only those customers who have had a name day in the last 7 days.

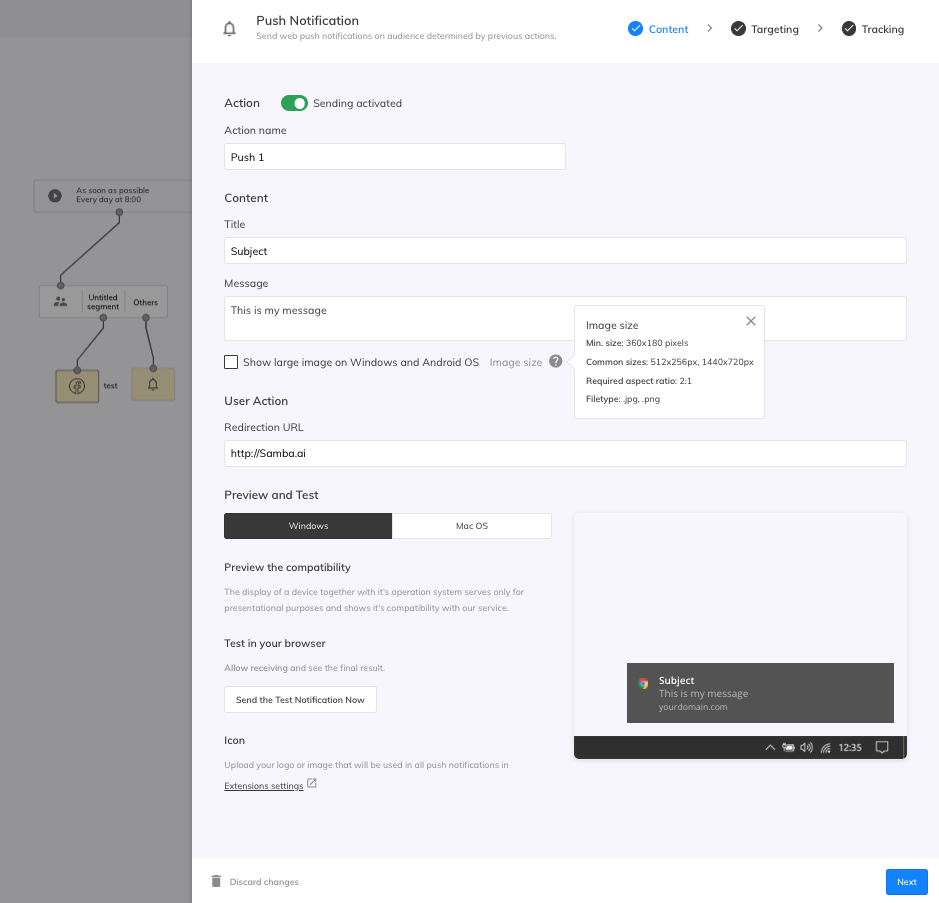
Push Notification node
Before using this node, make sure that your push notification service has been implemented and is enabled under Settings -> Extensions -> Push Notifications. Read more about Push notifications here.
This node allows you to send push notifications to selected segments. Notifications will appear on desktops no matter if customers are surfing your website or not.
Content:
- Action: Sending activated is set automatically
- Select a title and message for your push notification
- Optionally, you can add a picture
- You should include the URL link in the User Action
- Check the setup with Preview and Test before starting your campaign
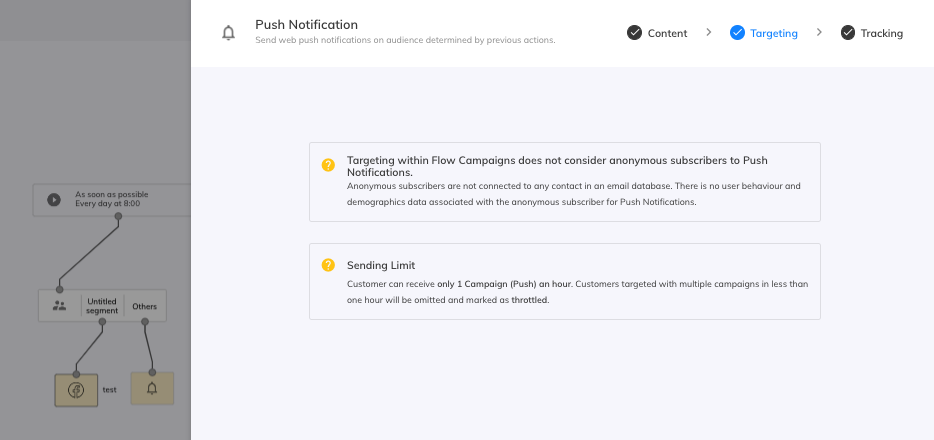
Targeting:
The time validity of the campaign defines how long after sending the campaign can still be displayed to the user. For example, in the case of time-limited promotions, it may be appropriate to shorten the time validity period to match the duration of the promotion. By default the time validity is set to 28 days.
The minimum time between targeting the same customer with a push notification is one hour:
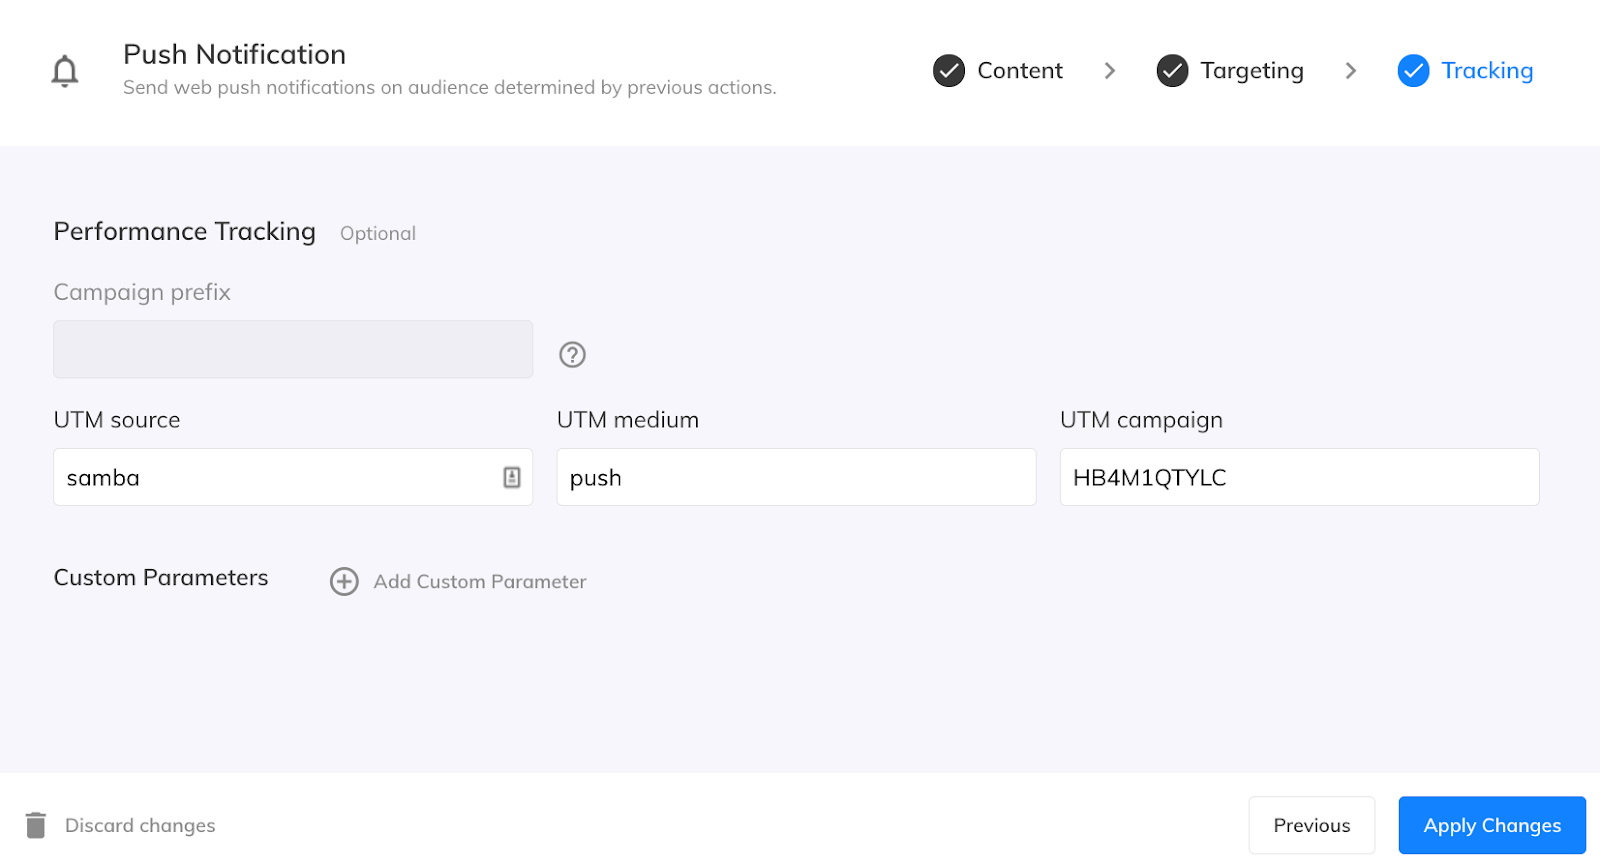
Tracking:
Samba fills in the UTM parameters automatically, but they can be adjusted if needed and you can also optionally add Custom Parameters. Click on Apply Changes to save your Settings:
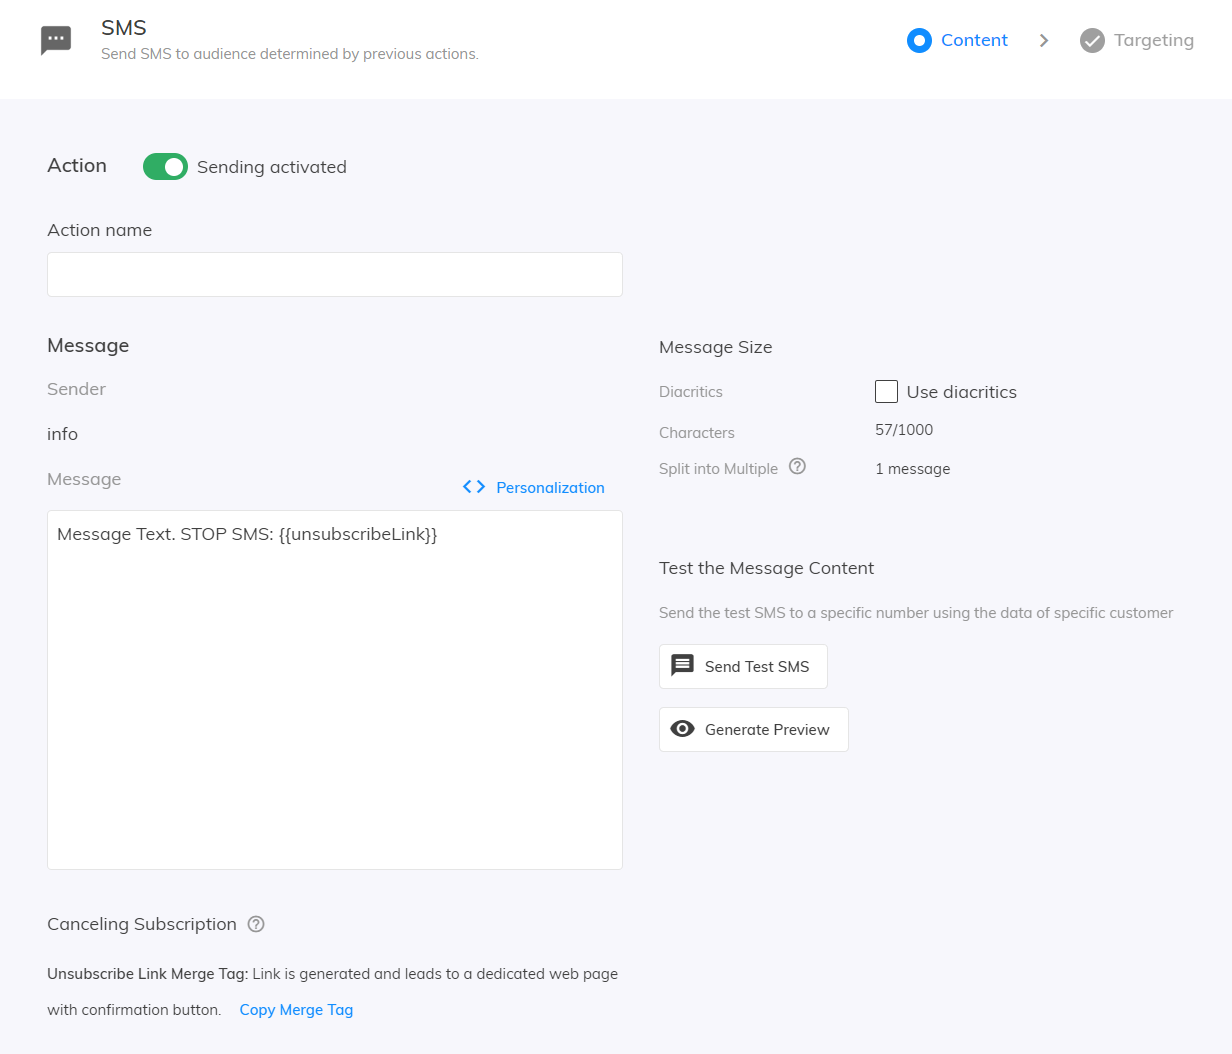
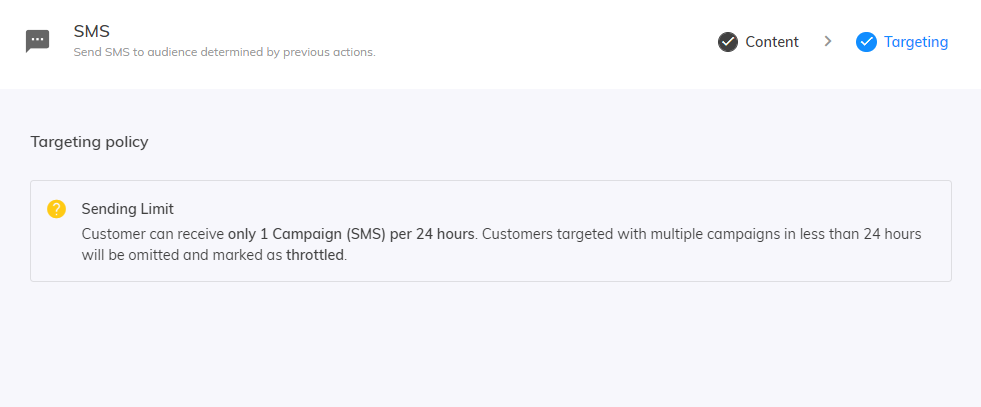
SMS node
This node allows you to send SMS to selected segments.
Content:
- Action: Sending activated is set automatically
- Select an action name and message for your SMS
- Optionally, you can add a personalization Merge Tags into your message
- Don’t forget to always include an unsubscribe link in your message
- Check the setup with Send test SMS before starting your campaign
- Generate a preview of your SMS message and check if everything is correct.
Targeting:
The minimum time between targeting the same customer with an SMS is 24 hours.
.
Webhook node
Webhook is used to connect Samba to any third-party application using an API. More information can be found in this related article.
Sklik Node
The Sklik node allows you to send selected customer audiences from Samba directly to your Sklik administration, where you can further engage with customers through retargeting. More information can be found in this related article.
Delay node
Sets how long Samba will wait until taking the following action.
Processing of customers waiting for the Delay evaluation takes place only on days when the Flow campaign is Running and activated within the Flow Activation settings. (Remember that one day of delay equals 24 hours, two days equal 48 hours, and so on.)
If a customer has already “fallen” into a Delay with a certain setting, it will wait in that node until that time expires. Changing the value of the number of days in the Delay only affects future runs of the campaign, i.e. newly processed customers.

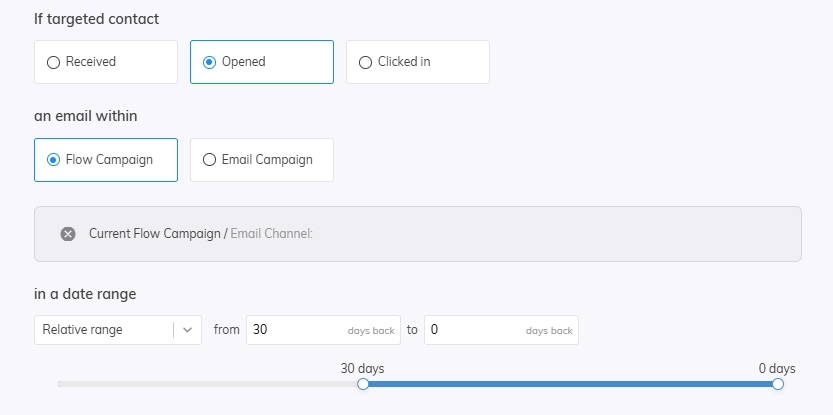
Campaign Activity node
This node allows you to react to customers’ actions with emails such as:
- Delivered
- Opened
- Clicked
You can also select a date range, in which the receiving, opening, or clicking occurred:
- Anytime, which means that this activity occurred at any time before the activity was checked
- Specific date range
- Relative date range (e.g. from 5 days back to 3 days back)
In every Campaign Activity node we have to search the campaign using Select Campaign:

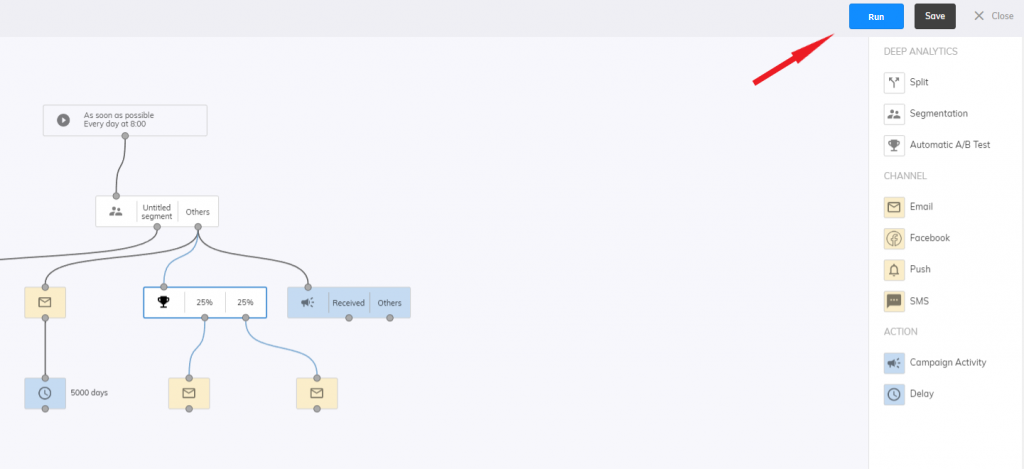
Saving and activating the campaign
By clicking one of the two buttons in the right top corner you can Run or Save your flow campaign. After saving you can run your campaign from the Flow campaigns dashboard.
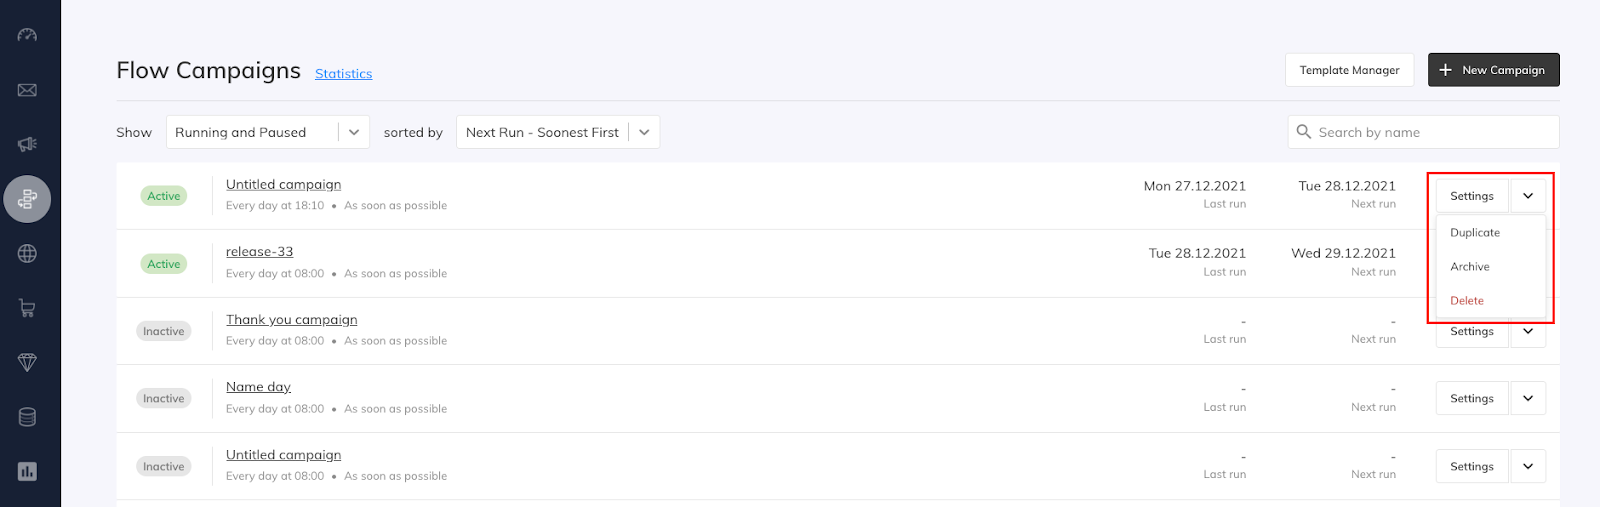
Archive, Duplicate, Delete
If a certain campaign is not needed at the moment and you do not want to delete it, simply archive it. A big advantage of flow campaigns is the possibility to duplicate them.
Performance simulation and statistics
Until now, we have been Designing the campaign. Switch the view to Simulation in the top left to see how many customers would fulfil the criteria of different branches of your campaign. By recomputing you can refresh the numbers.
The number of parallel runs of Flow campaigns and their simulations is limited, so the simulation calculation speed can be affected by the current run of another Flow campaign. The computation will automatically complete when the previous requests are successfully completed.

If your campaign has been running already, you can check the Statistics here:

A heatmap is also available for the e-mail node. Keep in mind, that the statistics for clicks through each template element refer to the current form of the email template set up.
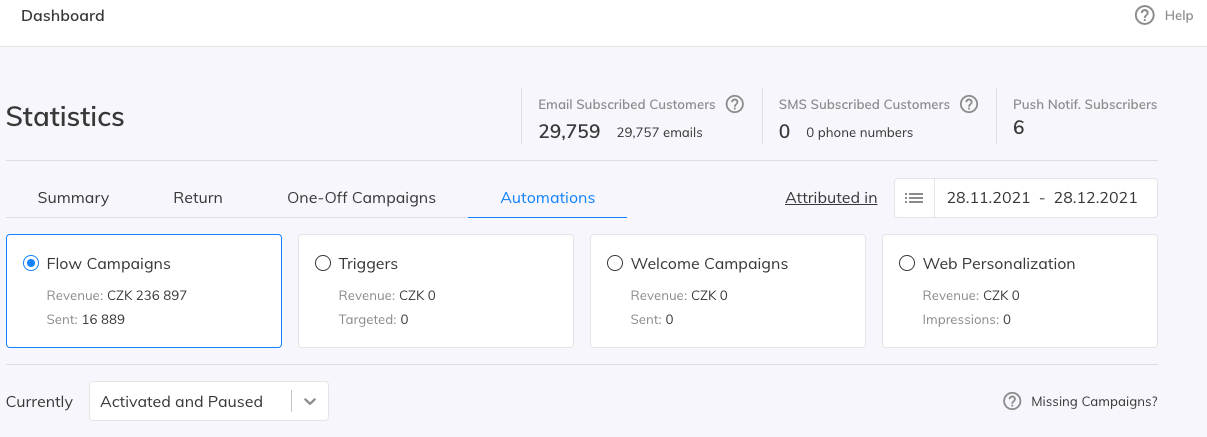
By clicking on “Statistics” next to the title of the Flow Campaigns section you will be redirected to the main Samba Dashboard.

Select the dates under “Attributed in” to see the desired statistics of your flow campaigns:
To see Flow Campaigns examples and Advanced Segmentation, continue here.
This post is also available in: