
This post is also available in:


Use Samba’s tremendous analytics capabilities to segment your customers and use webhooks to connect it to the API of any third-party application. Based on the logic set in the Flow campaign, Samba sends an HTTP request at the moment it is evaluated, which can contain any of your customers’ data. This way, you can easily, for example, send the data of important customers who have not yet responded to a retention email campaign to your contact centre and launch a phone campaign for them.
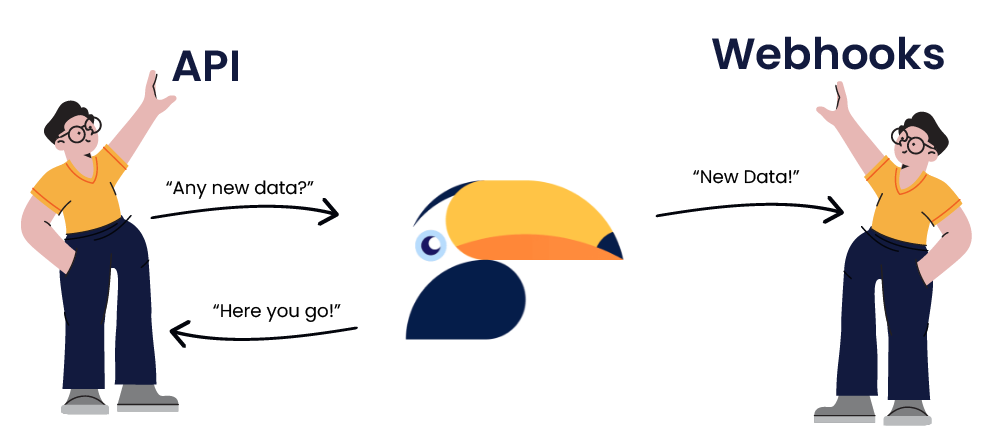
Webhook works like other channels in a Flow campaign, i.e. it processes all customers who reach it from other nodes connected to it. In the webhook settings, you can then choose not only the API address but also define in detail the format of the request, and how the data should be sent via the API.
See the details on how we charge for this feature in our Payment Plans article.
Webhook settings
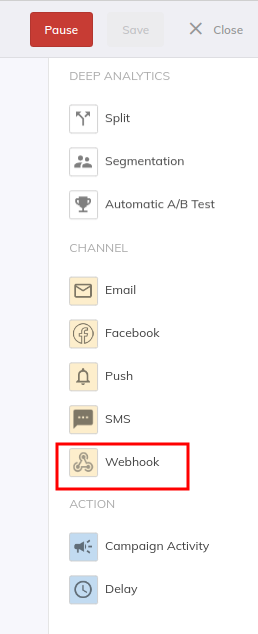
In the Flow campaign, select the Webhook node from the right-side menu.
Basic settings
In the webhook settings, you can name the webhook for easier campaign management, or you can simply disable its activation using the toggle switch.
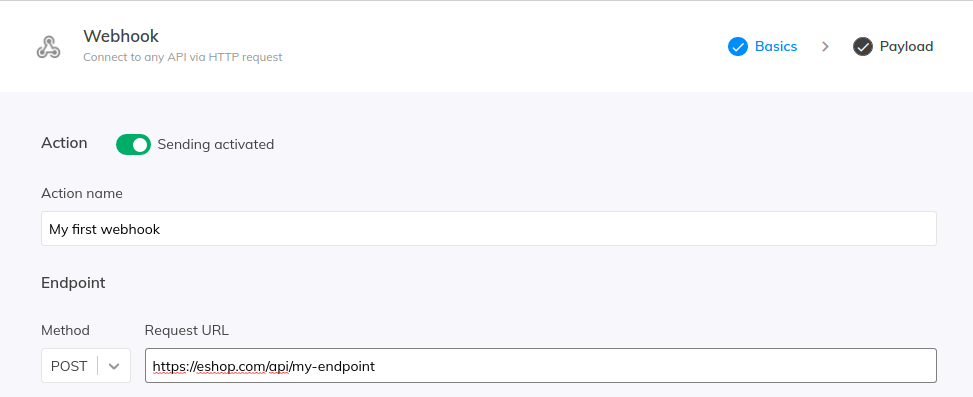
Endpoint
Select the method for the HTTP request, you can choose between GET, POST, PUT, PATCH, or DELETE.
In the request URL field, enter a valid address for the API connection including the protocol (HTTP/HTTPS).
Authentication
To secure your communication, you can use one of the offered options – No Authentication, Basic Authentication ( name + password ) or Bearer Token.
In the Custom Headers you can also enter any additional data in the form of Name + Value.

Pre-request
Pre-request represents the phase during which certain operations are performed prior to the main request within the webhook node itself.
During a pre-request, a separate request can be sent to another server or service, and its response can then be used for subsequent authentication and configuration of custom headers for the main request, such as when using Bearer Token authentication.
Copy pre-request response
The Pre-Request response can be copied as a merge tag using the “Copy Pre-Request Response to Clipboard” button and pasted into custom headers in the following format:{{ dynamic.[0] }} This allows you to extract specific information from the response and use it dynamically in the pre-request headers for the next request.

For example, if the response contains a token and an expiration date in this format
{"token": "this is the current token value, "expiration": "2024-01-10T19:21:46.385Z" }
so we can use the dot notation {{ dynamic.[0].token }} to get the current token value and insert it into the custom header settings for the main request.
You can read more about dot notation in our documentation.
Pre-request settings
The Pre-request settings are no different from the main request settings, i.e. you choose the request method and insert a valid address for the API connection including the protocol (http/https).
You then select the appropriate Authentication and fill in the data content, which we will cover in more detail later in this article.
Cache response
Response caching provides the ability to influence the frequency of pre-request execution. This determines how often this pre-query should be executed. During this period, the last saved response is used for the main request.
We recommend using response caching. Disabling it can have a significant performance impact on both the API side of the connected service and the Samba side.
Payload
Here you define the format in which the request should be sent, and also construct the request body with customer data.
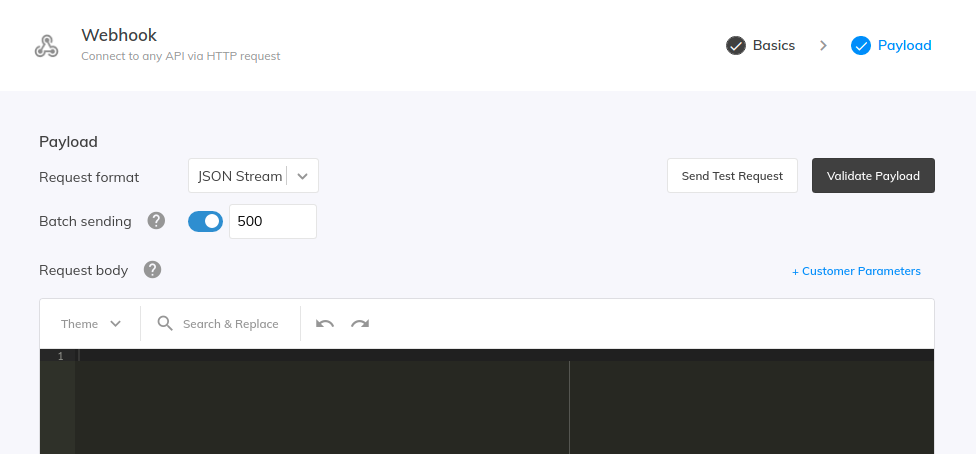
Request format
You can choose from the following basic MIME types: JSON, JSON stream, CSV and XML.
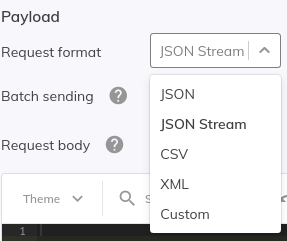
If you need to select a different type not found in the basic selection, please select Custom and enter the desired type in the input field, e.g.
-
text/plain -
multipart/form-data -
application/x-www-form-urlencoded
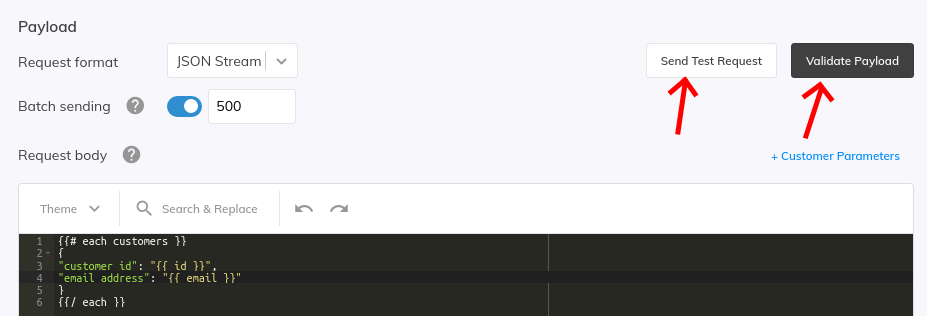
Batch sending
Batch sending allows efficient communication with the API so that each individual customer does not have to be sent in a separate request. Instead, with batch sending, Samba sends multiple customers at once in a single request, minimizing the number of connections to third parties. A maximum of 1000 customers can be sent in a single batch.

To create a correct resulting format, you may need to separate each customer with a comma, newline or other symbol. See an example of using the unless function.
Request body
The Handlebars.js templating language is used to create the request body.
The basic form of the request must always contain an iteration through customers in the following form:
{{# each customers }}

...

{{/ each }}
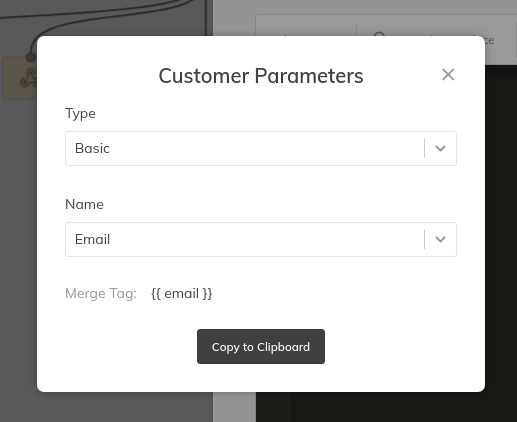
Customer attributes
The following customer attributes can be inserted into a request in the form of merge tags, similar to an email template (just beware that the notation may differ from email merge tags). Simply copy the merge tag to your clipboard using Copy to clipboard and then use Ctrl+V to paste it into the desired location in the request body.
- Basic
- Customer ID:
{{ id }} - Email address:
{{ email }} - Phone number:
{{ phone }} - First Name:
{{ firstName }} - Last name:
{{ lastName }} - Registration date:
{{ registeredOn }} - Zip code:
{{ zipCode }}
- Customer ID:
- Custom parameters
- Here you can find all the custom parameters that are listed in the customer feed.
- Merge tag:
{{ lookup parameters "PARAMETER NAME" }}
A simple construction of the request body containing the customer ID, email address, and custom parameter “Bonus points” would look like this:
{{# each customers }}
{
  "customer_id": "{{ id }}",
  "email_address": "{{ email }}",
  "bonus_points": "{{ lookup parameters "Bonus points" }}"
}
{{/ each }}
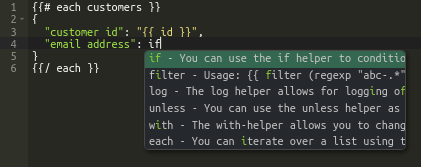
Handlebars.js functions
There are basic Handlebars.js templating language functions as well as selected helper functions (so-called helpers) that can be used to transform customer attributes and the request itself. Documentation for these functions can be found in this article.
There is also an interactive whisperer of available functions and attributes in the interface
Validation and testing
You can use Validate Payload to check that you have everything correct in terms of syntax before attempting to call the API.
Use the Send Test Request button to send a test request with the current endpoint and data content format. If the submission is successful, you will also see an output with a specific response to the submitted request.
Evaluating webhooks
Detailed results with the total number of API calls as well as the number of successfully and unsuccessfully exported customers can be found in the Webhook node details in the Results mode of the Flow campaign.
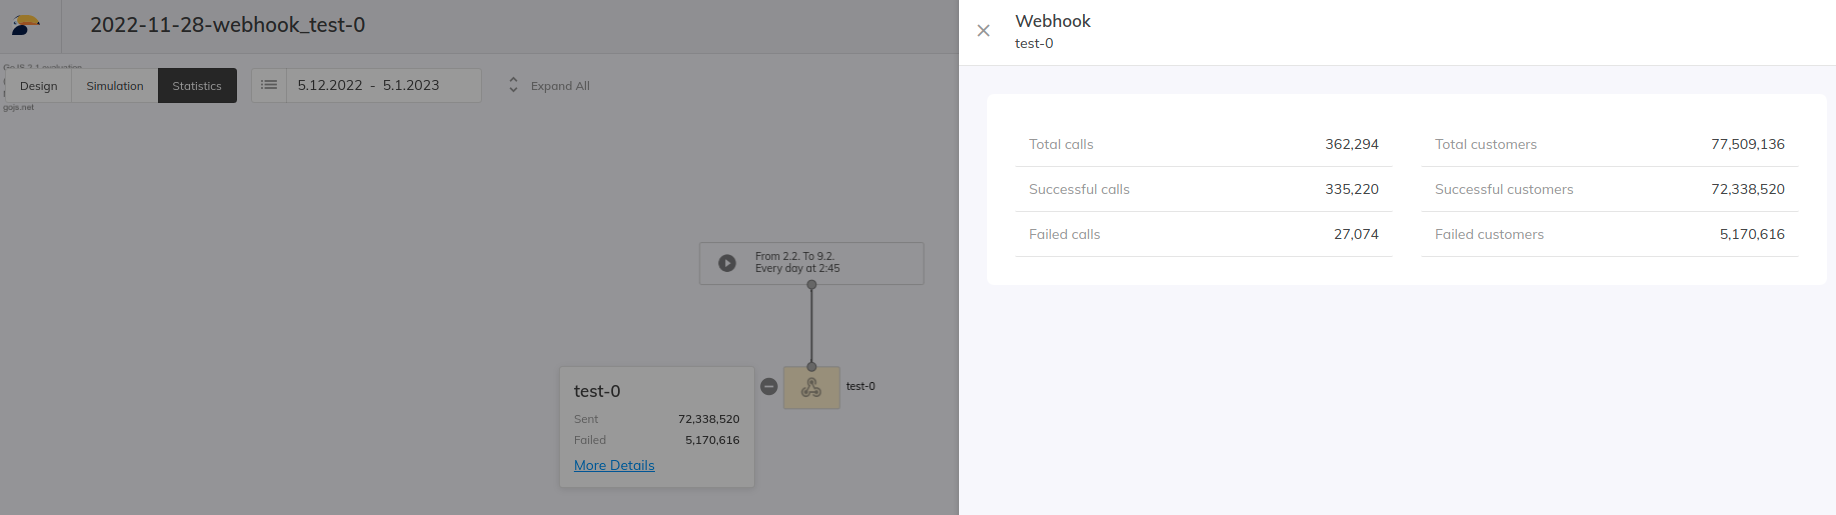
The following statistics are available
- Total number of calls = number of API requests sent.
- Number of successful calls
- Number of failed calls
- Failed requests due to an invalid request, exceeding third-party rate limits, or other errors.
- The total number of customers = the number of customers in the API requests sent.
- Number of successful customers
- Only these entries are subject to a fee.
- Number of unsuccessful customers
- Number of successful customers
For example, 2 sent batches with 1000 customers mean 2 calls and 2000 customers in total.
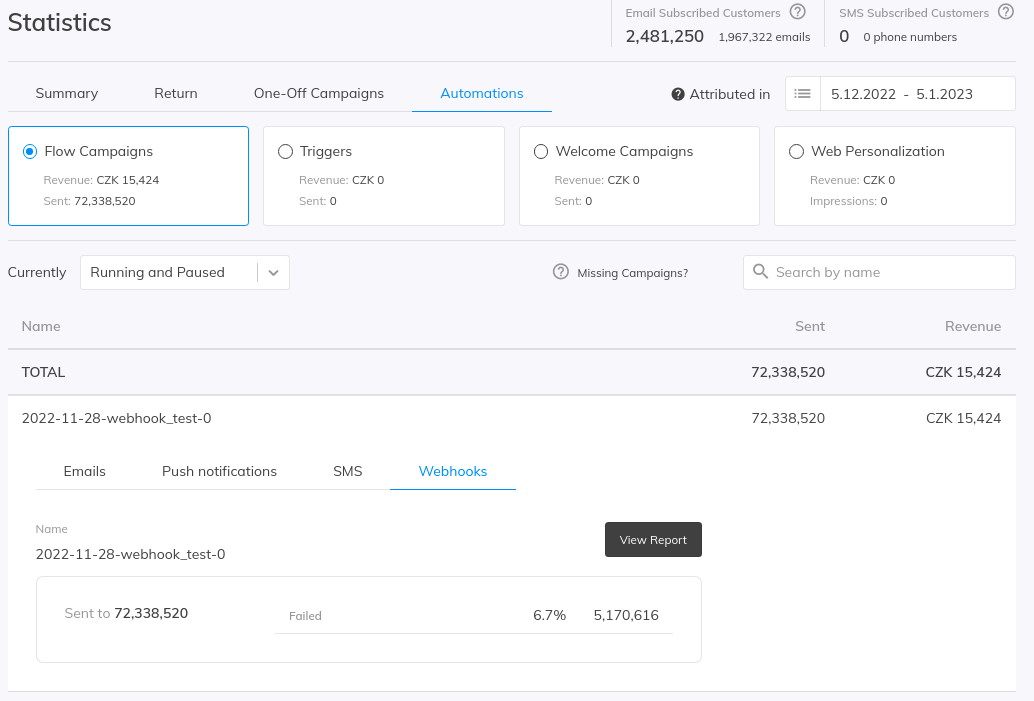
You can also find summary results in the dashboard for Flow campaigns.
 Examples
Audience List API
A specific example of use could be a situation where you need to tag customers or select them based on whether they have already been targeted in a specific campaign. This allows you to subsequently exclude them from further mailings or, conversely, move them to the next phase of your communication strategy.
For this, you can use the Audience list API, specifically the add-contacts endpoint. With its help, you can add your customers’ IDs or email addresses to a selected audience list as needed. You can then use this audience list as a filter in your campaigns.
In this case, you will need to add a webhook node to your campaign and connect it to the location where the customers you want to export to your audience list are located.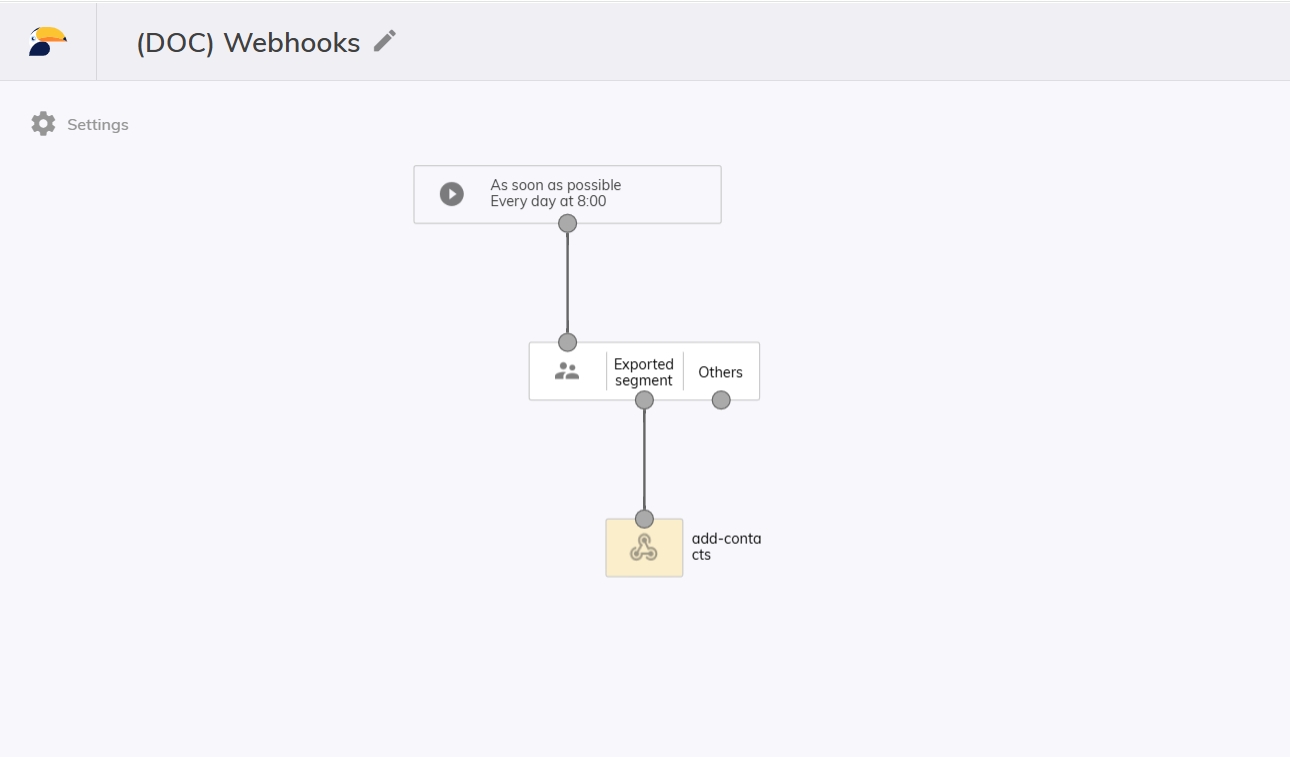 Select the webhook node and set it up correctly. There are two parts in the webhooks settings – Basics and Payload.
Basics
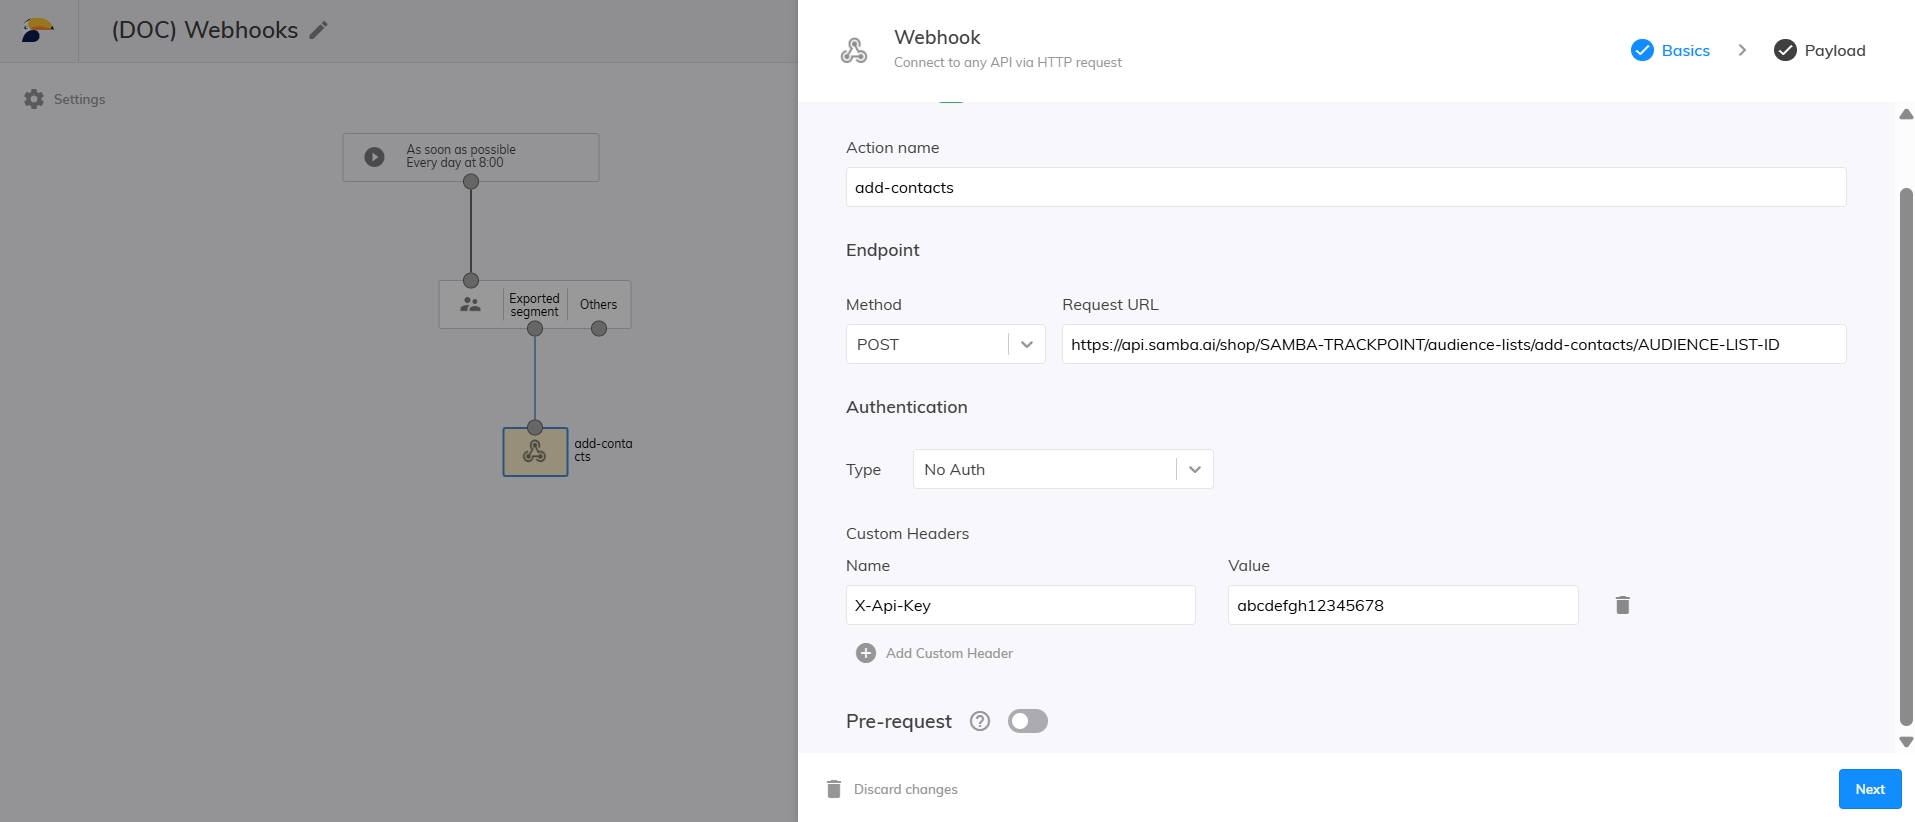
Action name: Just for your better orientation in the flow campaign. It does not affect the webhook directly. Use any name you wish.
Method: POST
The request URL: https://api.samba.ai/shop/SAMBA-TRACKPOINT/audience-lists/add-contacts/AUDIENCE-LIST-ID
Here you just need to replace:
SAMBA-TRACKPOINT: your actual trackpoint, which you can find in your account settings.AUDIENCE-LIST-ID: the actual ID of the audience list where you wish to export the customers to.
You can find the audience list ID here:
Next click on “Add custom header”, write “X-Api-Key” as a Name and for the value use your actual API key. If you don’t have one yet, reach out to us at support@samba.ai and we will send you the API key.
Payload
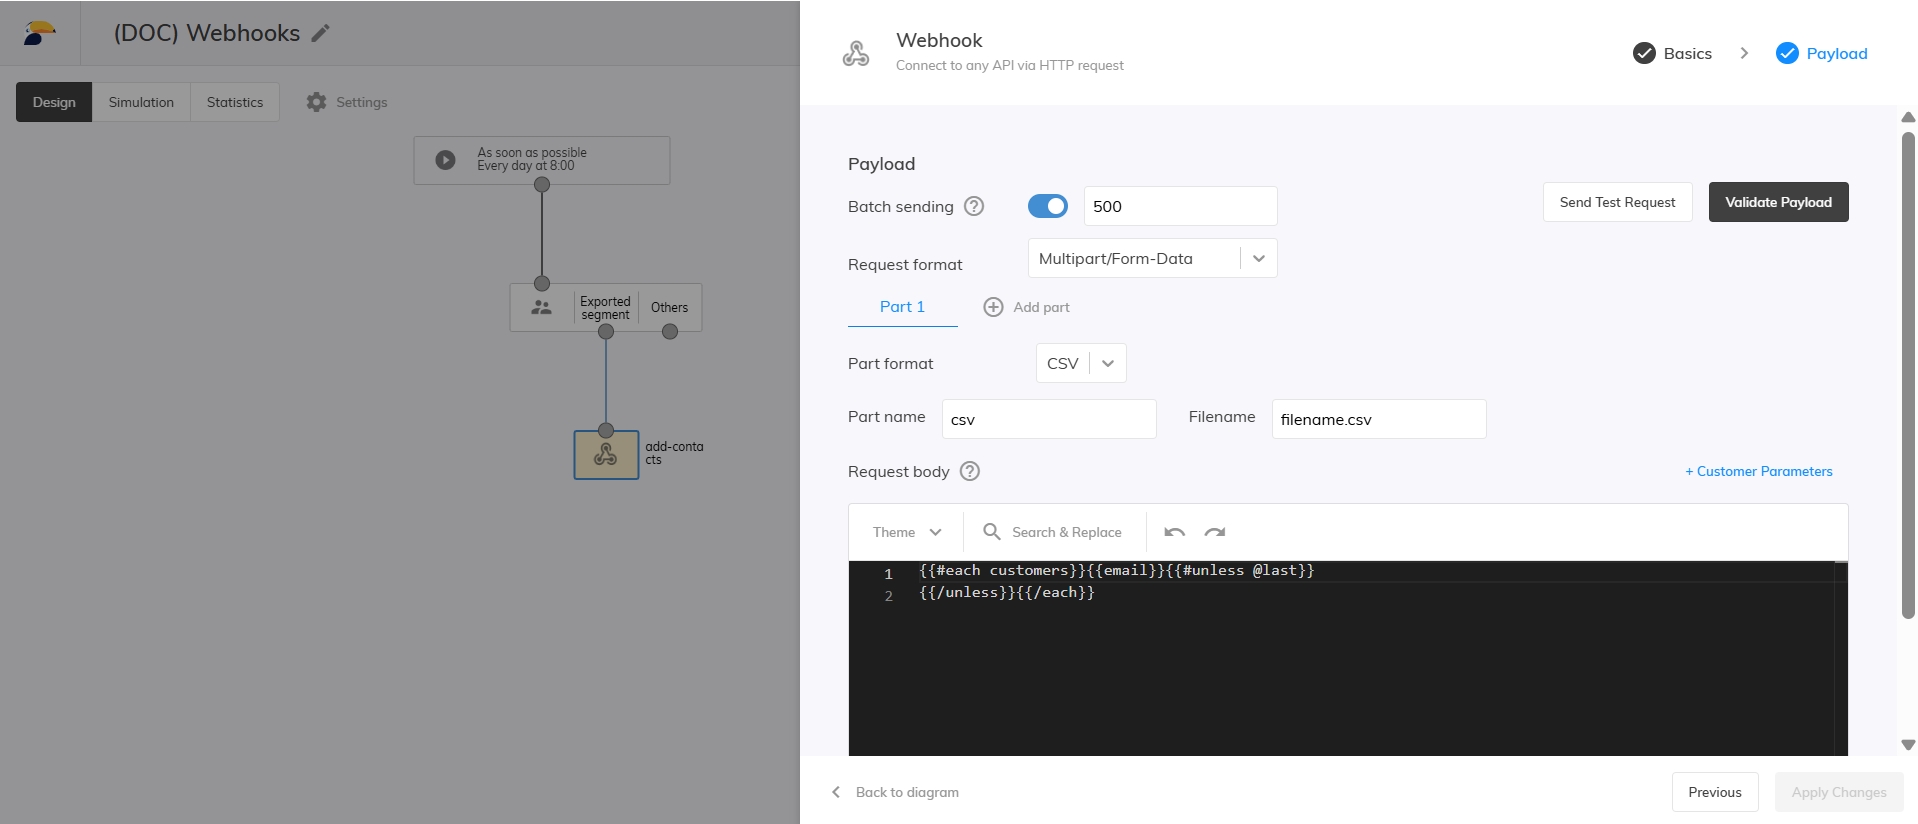 Request form: Multipart/Form-Data
Part format: CSV
Part name: csv (is automatically pre-filled)
Filename: filename.csv (is automatically pre-filled)
Request body:{{#each customers}}{{email}}{{#unless @last}}{{/unless}}{{/each}}
This post is also available in: