
This post is also available in:


Push notifications allow you to send targeted notifications from your eshop, and thanks to that your customers can receive them even when they are not currently present on your website. The display of push notifications is actually handled by the web browser itself. When a user visits your e-shop for the first time, they will receive the following message::
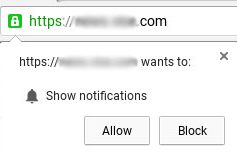
Once the user enabled notifications, you can create custom notifications through Samba’s Push Campaigns, which can look like this:

How to migrate the web push subscribers collected so far?
If you’ve used Push Notifications before, Samba will automatically resubscribe previously collected subscribers. This means that after a visit to your website, this information is passed from the user’s browser to Samba in the background so that Samba can silently add the user back to your subscribers without the user having to go through the entire sign-up process again.
Supported devices
Web browsers
- Push notifications are currently supported for Chrome, Firefox, Edge and Opera.
- Internet Explorer does not have this feature.
Operating systems
- By default, the push notifications work well for Windows OS and Android OS – some functionality may not work on other devices.
- Unfortunately, Push notifications are not available on Apple mobile phones at this time – this is a limitation of that operating system, not Samba.
Ways to integrate push notifications
In Samba you can choose between 2 ways of integration:
- Self-hosted Integration
- Pros:
- Your domain will be visible in notifications.
- Your previously collected subscribers can be automatically resubscribed.
- Your users can subscribe with a single click, a custom pop-up is optional.
- Cons:
- You must have access to the root directory to place the script.
- Your domain must have an HTTPS certificate.
- Pros:
- Hosted by Samba.ai
- Pros:
- You don’t need to have access to the root directory.
- Your domain doesn’t need to have an HTTPS certificate.
- Cons:
- Samba.ai domain will be visible in notifications.
- Subscriptions are associated with the samba.ai domain, automatic re-subscription will not work.
- Before displaying the native browser window, it is necessary to trigger user interaction with a custom pop-up window for subscription. Then users must confirm the subscription in a new window.
- Pros:
The integration method can be changed in the Extensions section under the Settings button for Push Notifications
and then click Change type of integration.
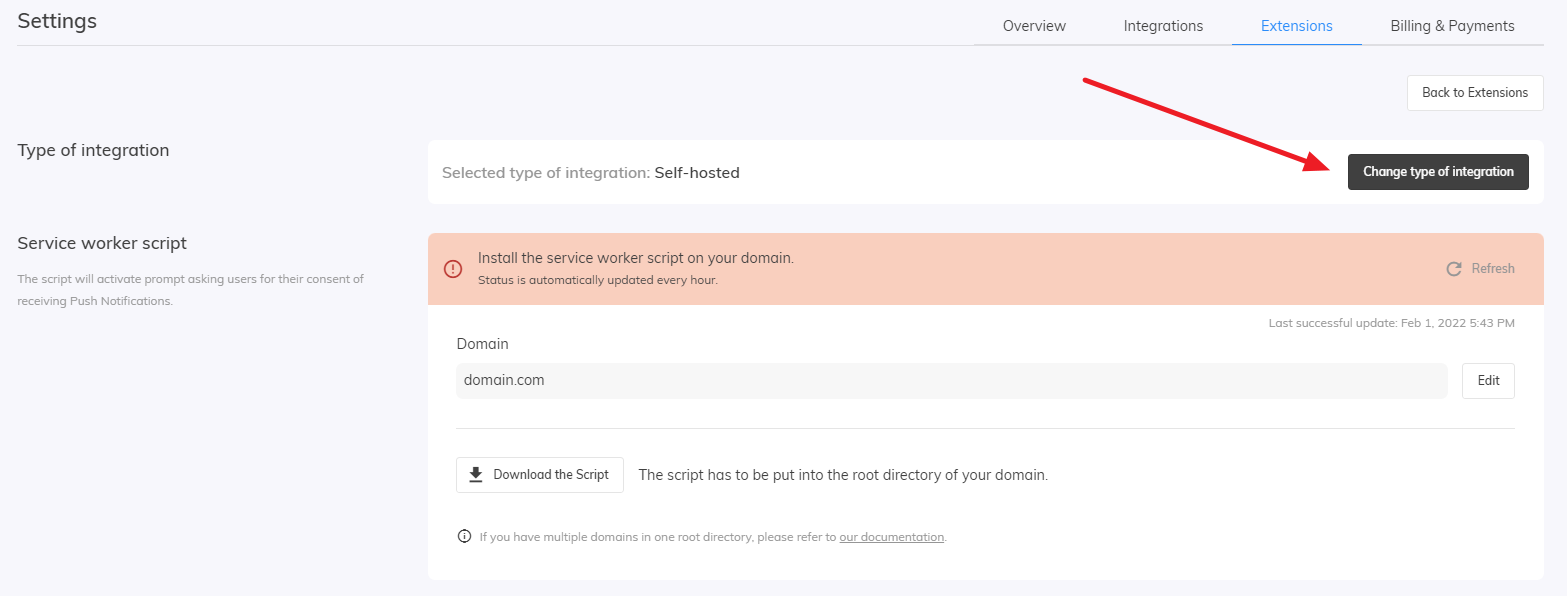
Self-hosted Integration
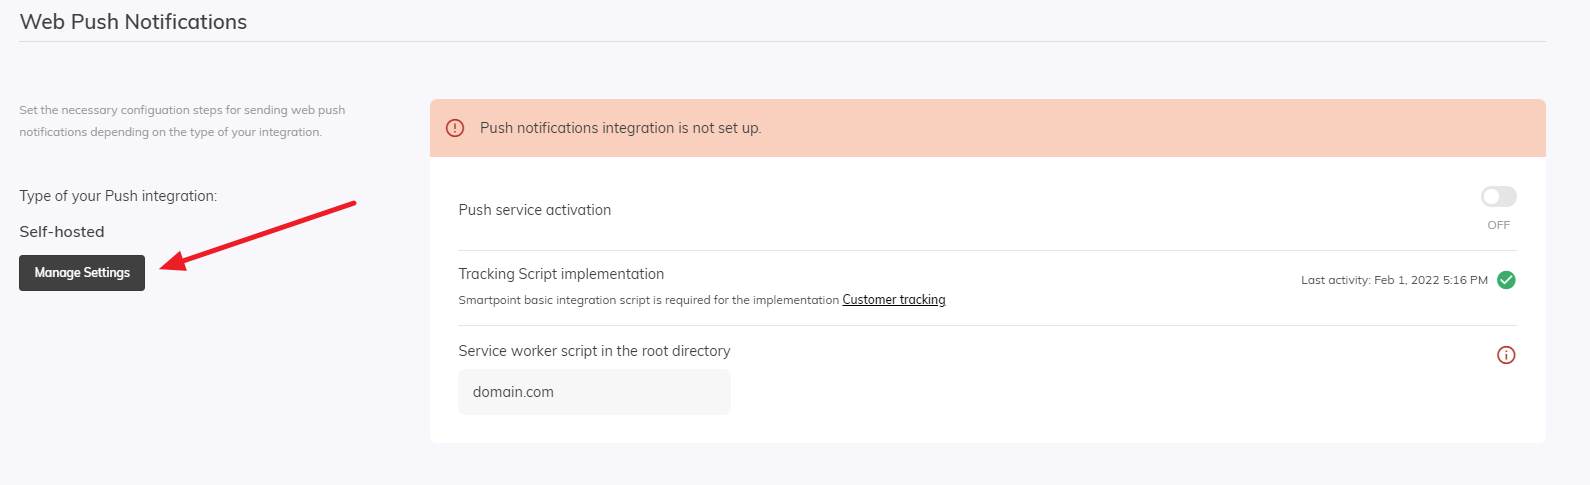
To start using Push Notifications, you need to complete the following steps:
- Have a basic tracking script successfully implemented. The interface itself indicates this with a green check mark.
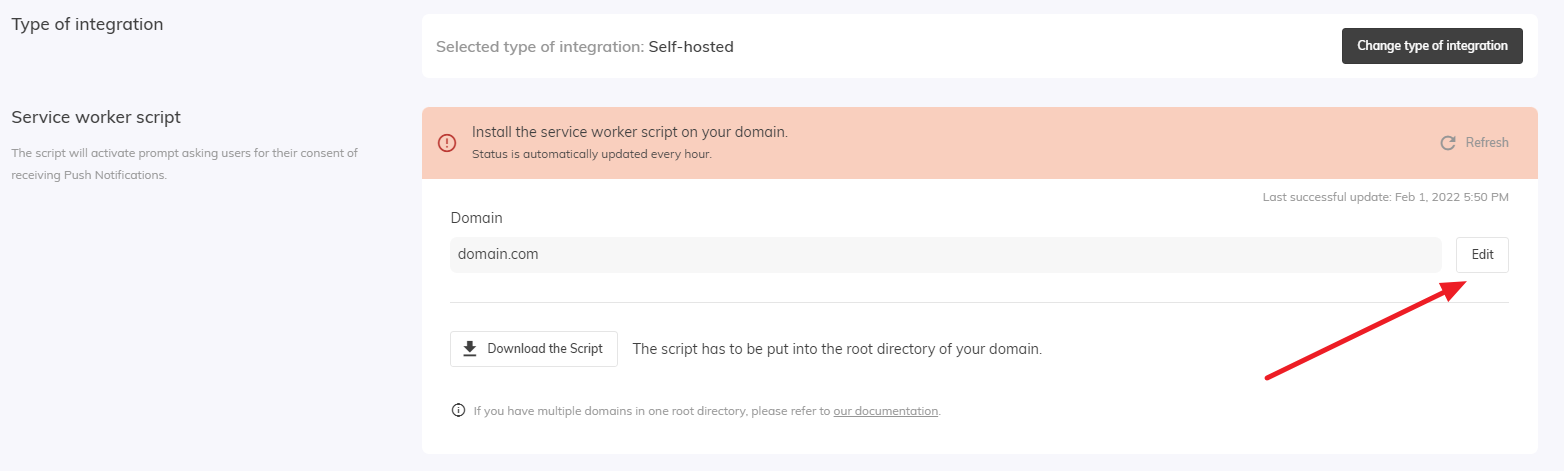
- Put a small script, called service worker script, in unchanged form (same content, same name) into the root directory of the hosting domain where your e-shop is located.
- For example, if your store runs at https://my-eshop.com, the service worker script must be available at https://my-eshop.com/samba-sw.js.
- The script can be downloaded directly in the application.
- You can edit the domain on which your e-shop is located. Be especially careful whether or not to include the “www” for your case. The http/https protocol must not be included here.
- The MIME file type must be “application/javascript”.
- We suggest you place the file on a website with the shortest possible caching time, or disable caching entirely. This is the only way to ensure that your customers have access to all the new features available in push notification communication. Instructions on how to avoid caching can be found here or here.
- If you have multiple domains under one root folder included in your filehosting service, follow this guide.
- Enable Push service
- This activates the collection of your push notification subscribers and enables you to send push campaigns.
- The push notifications subscription prompt window is only working on the domain on which the tracking script and service worker script are successfully implemented.

Hosted by Samba.ai Integration
To start using Push Notifications, you need to complete the following steps:
- Have a basic tracking script successfully implemented. The interface itself indicates this with a green check mark.
- Enable Push service
- This activates the collection of your push notification subscribers and enables you to send push campaigns.

The subdomain that appears together with the domain “push.samba.ai” in notifications is automatically created from your eshop’s domain. It can be changed by changing the Domain in Integration Type: Self-hosted mode.

Other setup features
Icon
Each push message can display your icon, which must meet the following requirements:
- Size: min. 192x192px or larger for high resolution displays
- Aspect ratio: 1:1
- Image format: .jpg, .png
The icon also appears in the popup window that appears for the Hosted by Samba.ai integration type.
Custom Opt-in Popup
In addition to the regular Push notification popup, you can also create your own, personalized popup to help growing your database. You can edit any text in the custom popup – not only the main text, but also buttons (such as Allow/Deny), which will bring more customers to your database.
You can find the Custom Opt-in Popup in the Account settings > Extensions (in your Samba account):
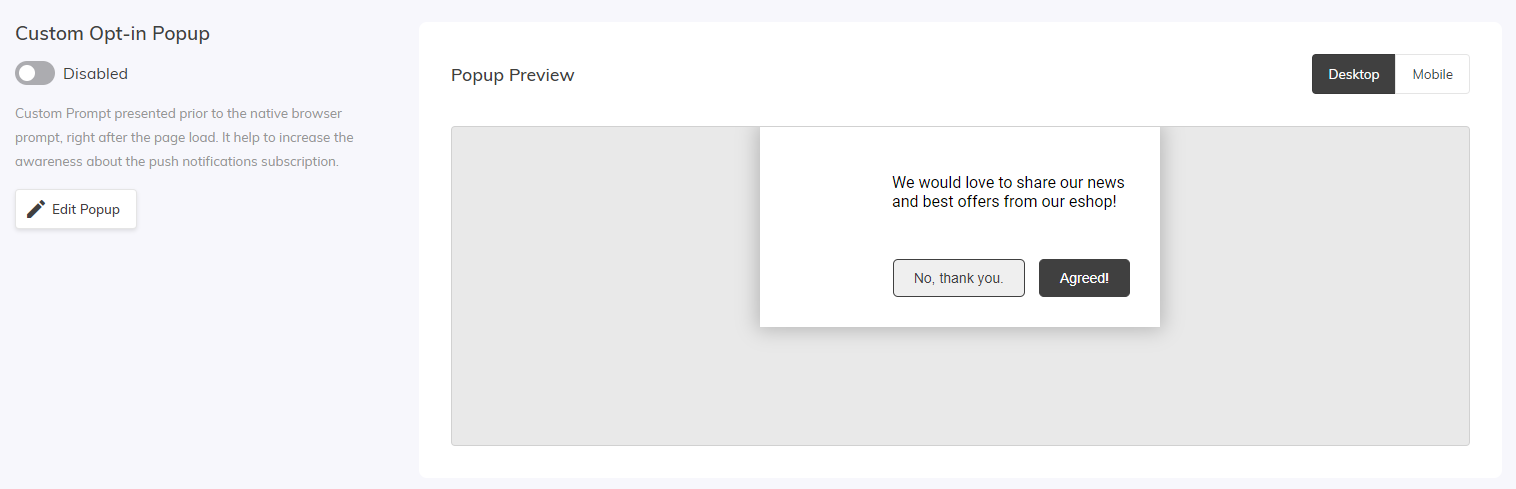
To edit the popup, simply click “Edit Popup”. You will be greeted with a window, where you can edit every part of the contents of the popup.
You can enable/disable the Custom Opt-in Popup using the switch on the left side:
After activation, the window will always appear when a customer visit the eshop. However, it should be taken into account that once the customer confirms their interest in Push Notifications, they will then be presented with the normal Push Notifications sign-up window – this is the correct behaviour, which is dependent on the web browser itself.
More domains with single root folder
If you want to use Self-hosted Integration and you have multiple domains under one root folder included in your filehosting service (e.g. CZ and SK domains), you can use only one samba-sw.js script. In this case you’ll need to edit the contents of the script to the following:
switch (self.location.hostname) {
   case "domain1.com":
      importScripts("https://yottlyscript.com/push/service-worker.js?tp=*TRACKPOINT FOR DOMAIN1*");
      break;
   case "domain2.com":
      importScripts("https://yottlyscript.com/push/service-worker.js?tp=*TRACKPOINT FOR DOMAIN2*");
      break;
   .
   .
   .
}
The “Trackpoint” value can be found in your Samba account’s URL (pay attention to the “bold” part of the text):
https://enterprise.samba.ai/shop/123456789/dashboard
Pay attention to the domain you use in the script – www.domain.com is not the same as domain.com. Therefore, we recommend using the console to verify what is returned as the value of self.location.hostname and set this in the script condition.
Be sure to use your actual tracking domain in the importScripts(...).
Push prompt delay
The push prompt delay is set by default to 20 seconds. This delay is currently not configurable by the user, but if you would like to change it for a different value, please contact our support team for assistance. You can find more information about this in our article – pushSubscriptionPrompt.
The delay applies to the first prompt window. Regardless of the prompt type, the 20-second delay is always enforced before the prompt appears, so regarding all of the scenarios:
- Custom prompt is switched ON→ custom prompt is delayed, after confirming, the native browser window is displayed without any delay
- Custom prompt is switched OFF→ custom prompt is not showed at all, the native browser windows is displayed with the delay
The countdown begins when a user visits a page and is reset every time the user navigates to a new page. This means that a user must remain on the same page for at least 20 seconds for the push prompt to be displayed.
This post is also available in: