
This post is also available in:


In the following guide, we go over the basics of setting up the customer segments for the Precise Segmentation of a campaign.
Audience & Filters
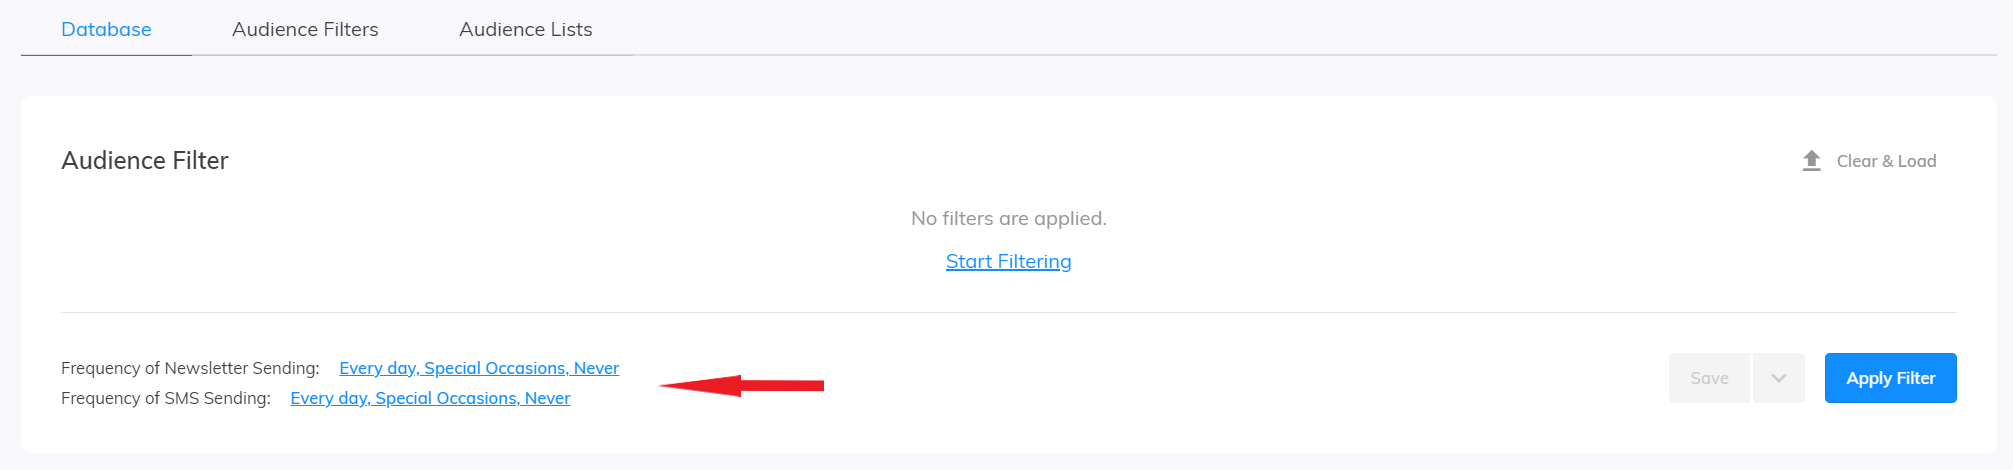
Go ahead and open Audience & Filters in the Customers & Products section in Samba.
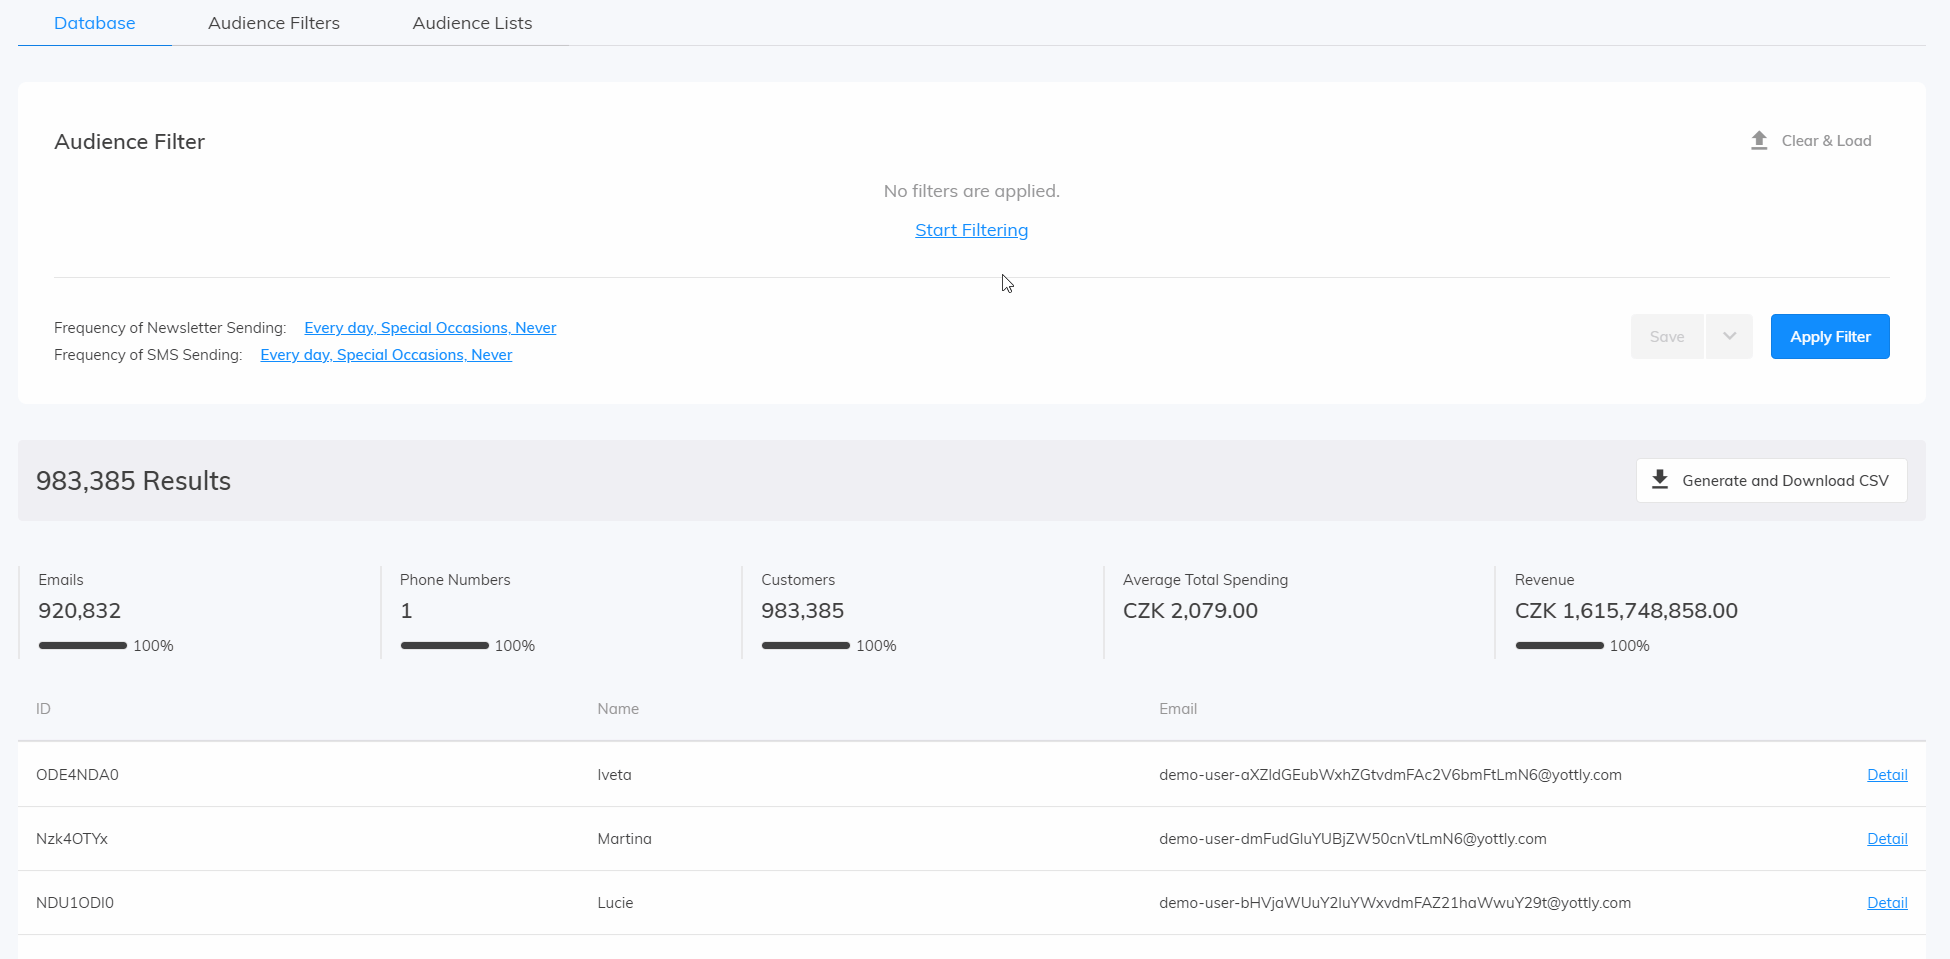
The first thing that you will see is the place for your filters and your audience database with some stats, such as:
- The number of unique email addresses in your database.
- The number of unique phone numbers in your database.
- The number of customers in your database. The number of emails and customers can differ because you can have customers without email address or with duplicated email address in your database.
- Average total spending
- The total revenue
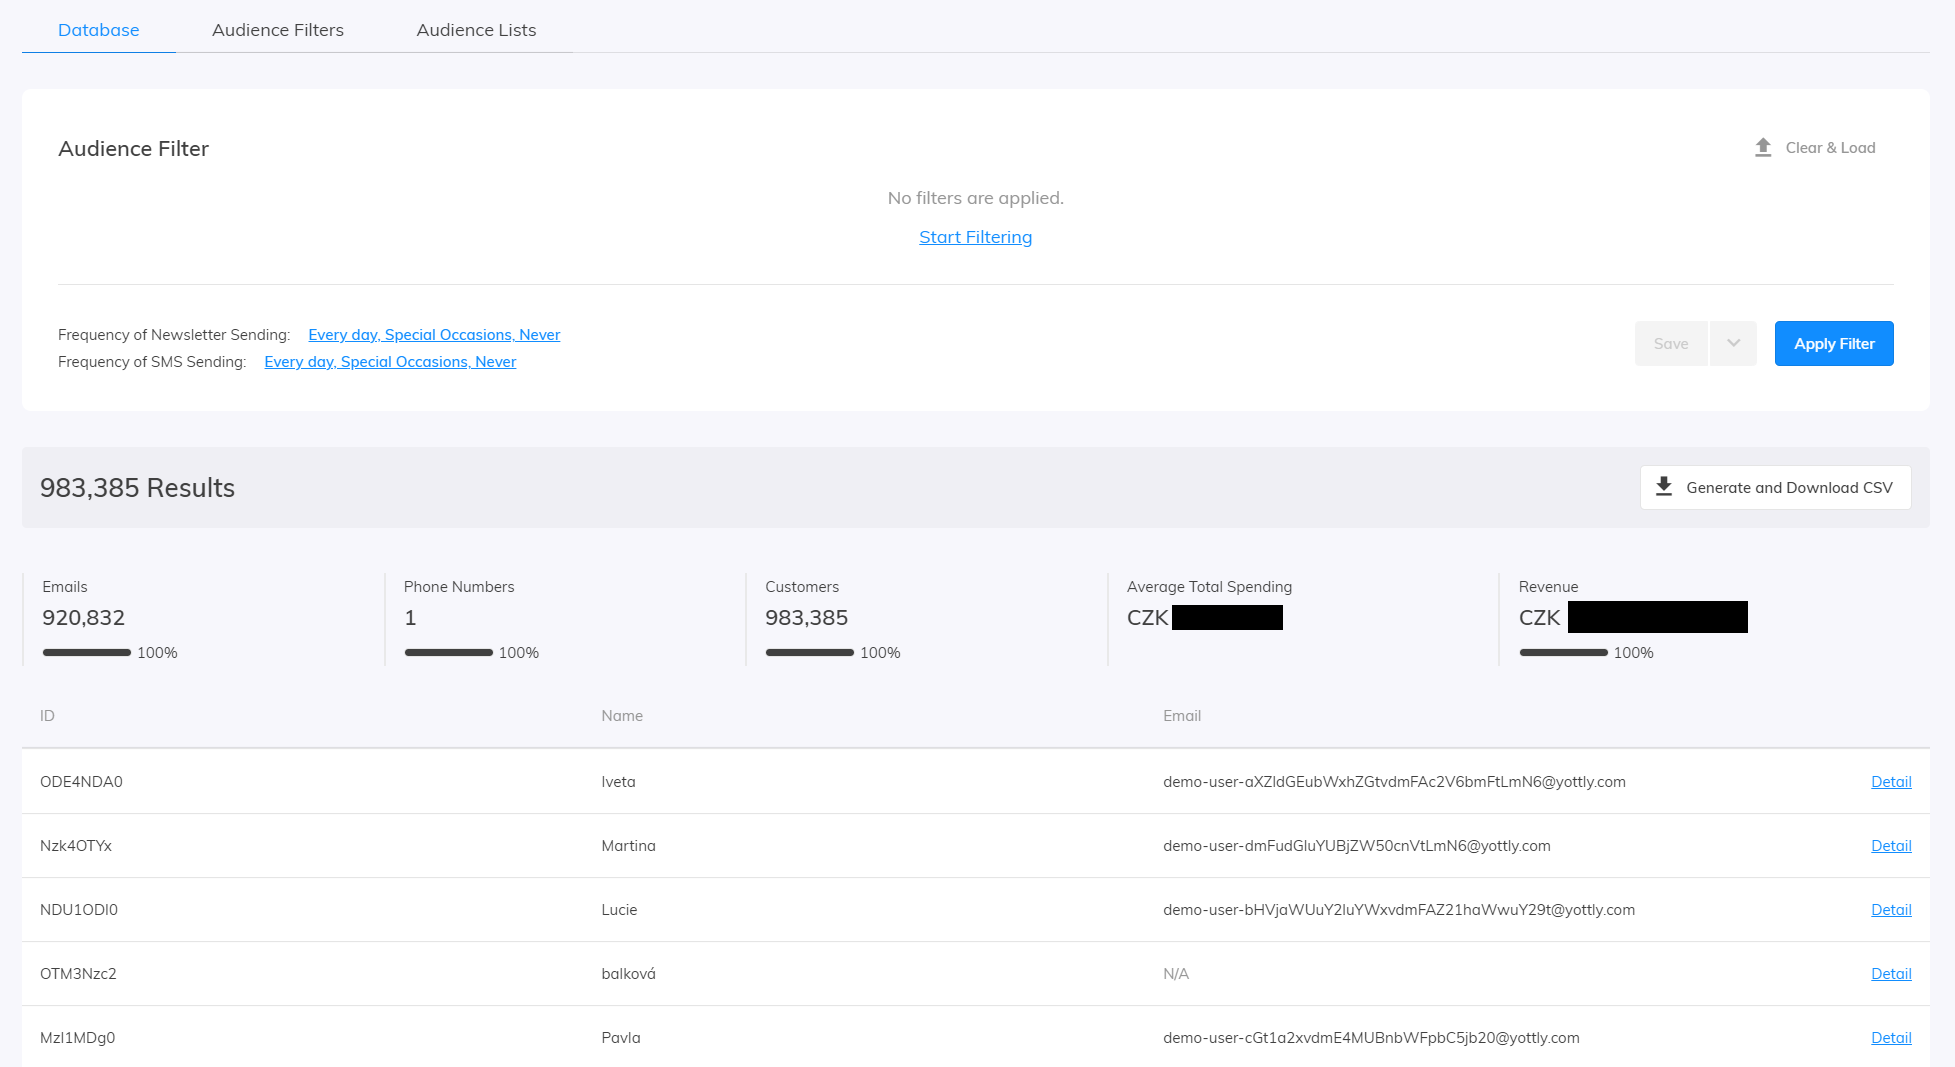
Frequency of Sending
Customers are divided into three groups based on their granted permissions for the subscription to the promotional emails.
- Every day: Customers in this group requested to receive promotional emails frequently.
- Occasionally: Customers in this group requested to receive promotional emails from time to time, e.g. when there are special monthly deals.
- Never: Customers in this group don’t want to receive promotional emails at all.
Customer Selection
Now let’s select our audience. You can filter your database by using over 60 different audience filters to select as specific group of customers as you want. Here you can find all the filters.
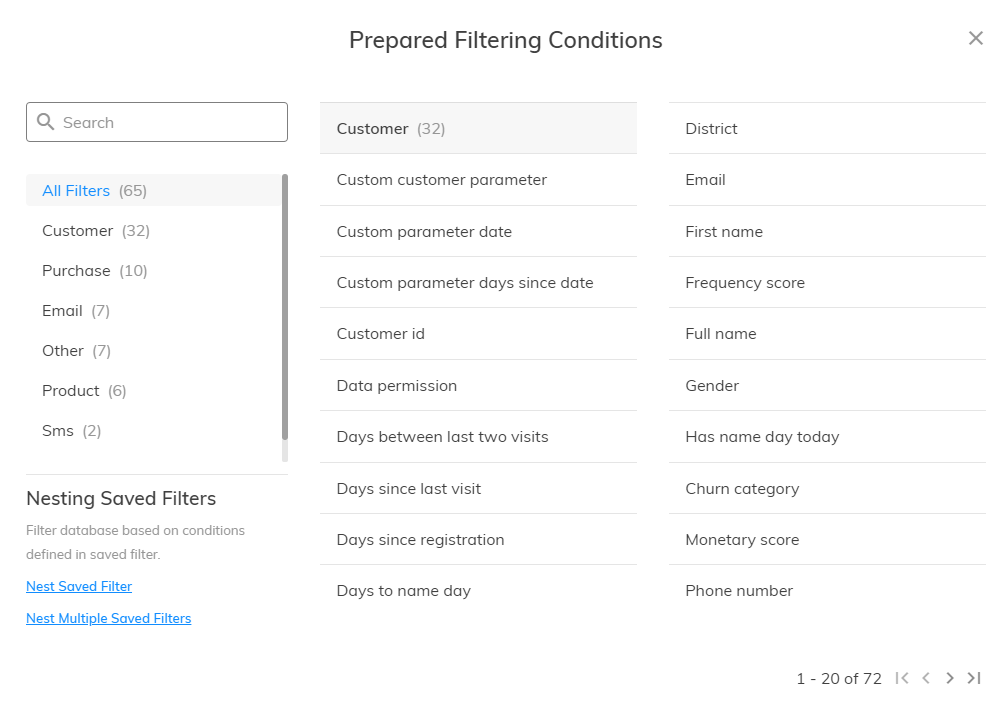
Usage of customer filters
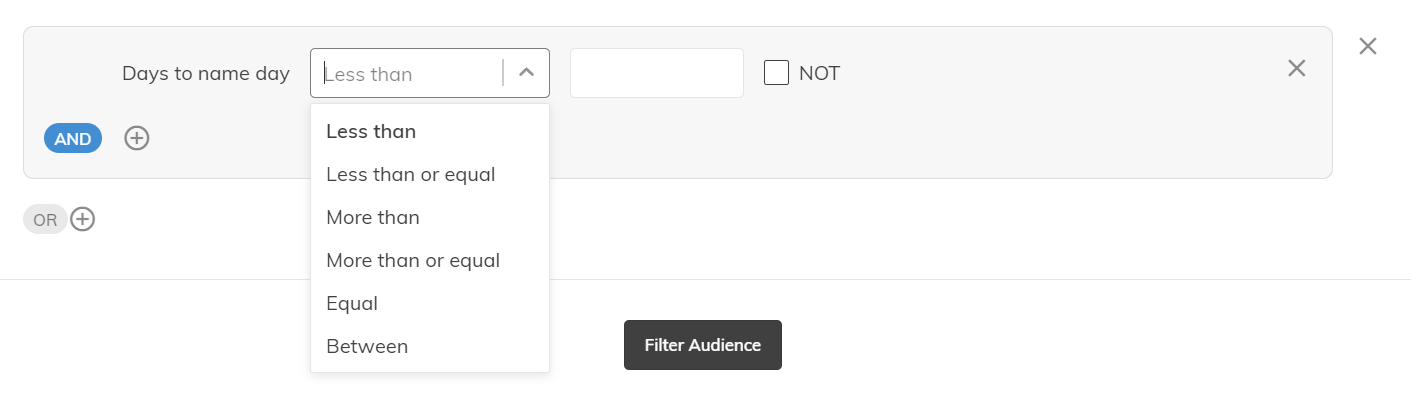
Start with choosing one of the filters. Based on your selected filter you can now select a value. Our filters have three different types of value selection.
- Filter with just a value. Here you can select either an exact value or by selecting “matches any of” you can pick multiple values from a list of values for your filter.

- Exact or Substring of value filter. With this filter, you can select that the value which you want to filter has to be exact or you can select a substring of a value that you want to filter.

- Filter with a numerical value. For this type of filter, you can select whether you want to display results that are Less than (or equal), More than (or equal), Equal or Between your selected value.
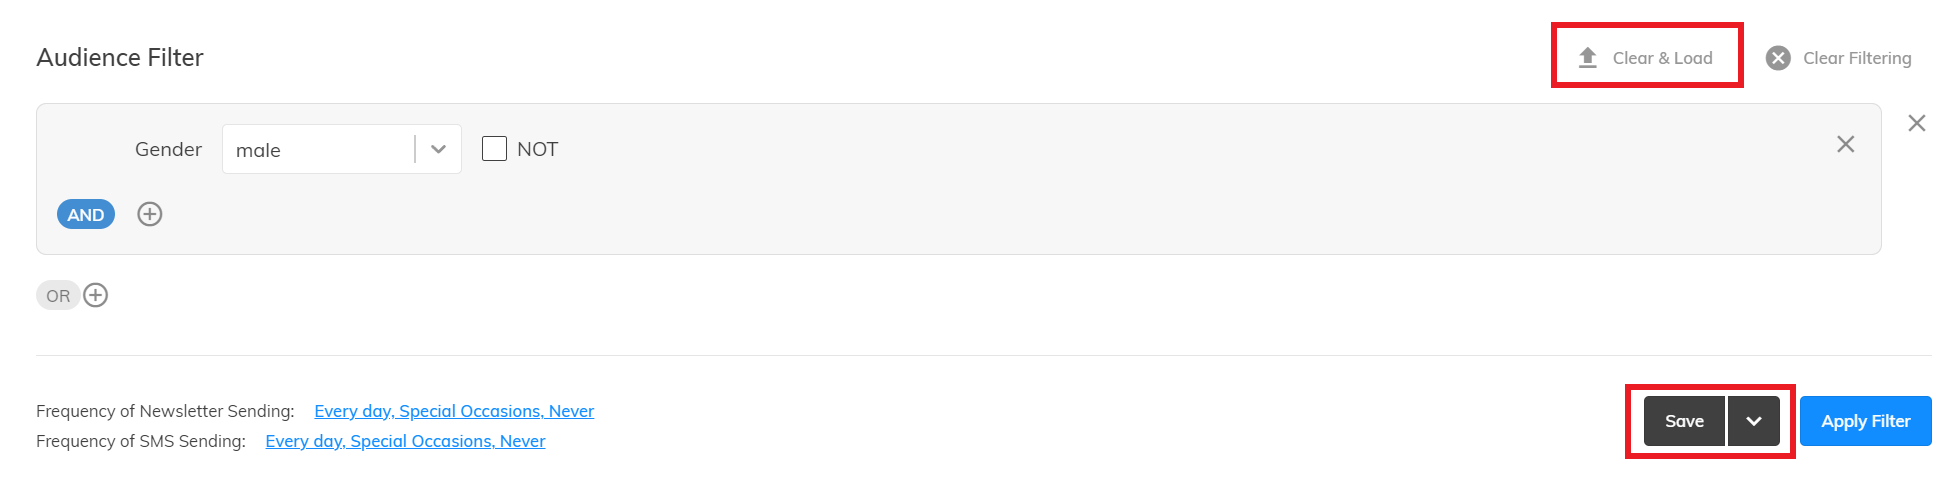
Explanation of terms
- Condition: a filter criterion that a customer meets or doesn’t meet
- Segment: a group of customers that can contain multiple conditions
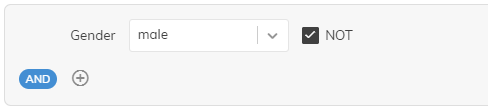
- “Not”: Setting a negative value of the given condition (for example, checking the “Not” option for the Gender > Male condition means you will target women)
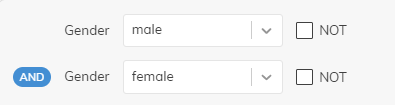
- “And”: A logical link between two conditions, where the customer has to meet both criteria. The more conditions you have in one filter, the fewer customers will meet the conditions.
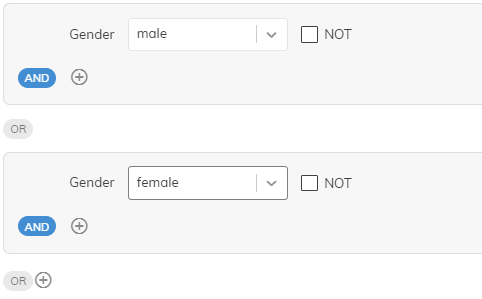
- “Or”: A logical link between two filters, where the customer must fall into at least one of them. The more filters you have with different conditions, the more likely a customer will meet the conditions in at least one of them.
Apply your filter
Once you created your filter, proceed to the next step and press the Apply Filter button to see how much of your customer database you will target with the particular setting.
Saving, Renaming and Loading Filters
Each filter can be saved and later loaded into a campaign, making it easy to reuse filters whenever you want.
To save a filter, click the “Save” button when you’ve finished setting it up. A pop-up will appear where you can set a name and a description for your filter. Don’t worry – you can change both the name and the description of your filters later. To do so, just go to filters, use the drop-down menu, and select “Rename” or “Change description” for the desired filter.
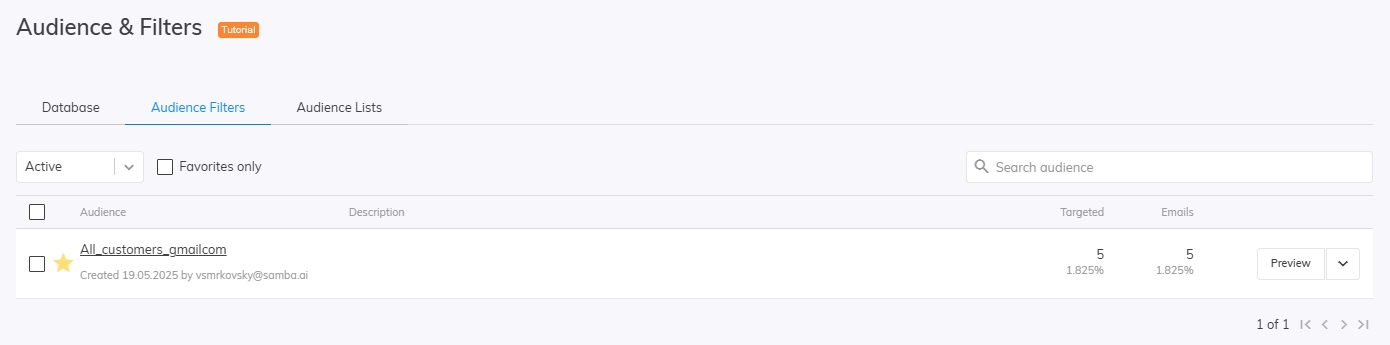
Favorite filters
In the “audience filters” tab, you can also mark a filter as a “favorite filter” by clicking on the star symbol next to the filters name. That will make it easier to search for such a filter if you are using it often.
Nesting Saved Filters
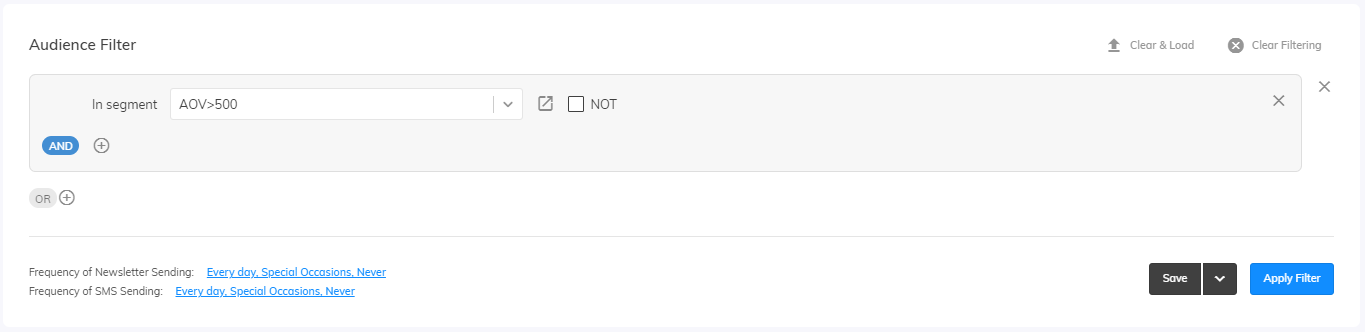
Thanks to the nesting of filters you can filter your database based on conditions defined in your saved filter/s.
You can take advantage of nesting by using the “In Segment” filter, which allows you to select a filter you have already created and saved and use it in the current audience filtering.
Using filters in the campaigns
Let’s take the One-off campaign as an example.
Create a new newsletter for your campaign, at Targeting select Precise Segmentation, and also select Drag & Drop editor as your Email Template System.
Firstly set up your email template, then continue to the targeting approach. Leave Precise Segmentation selected and edit Targeting to your desired parameters.
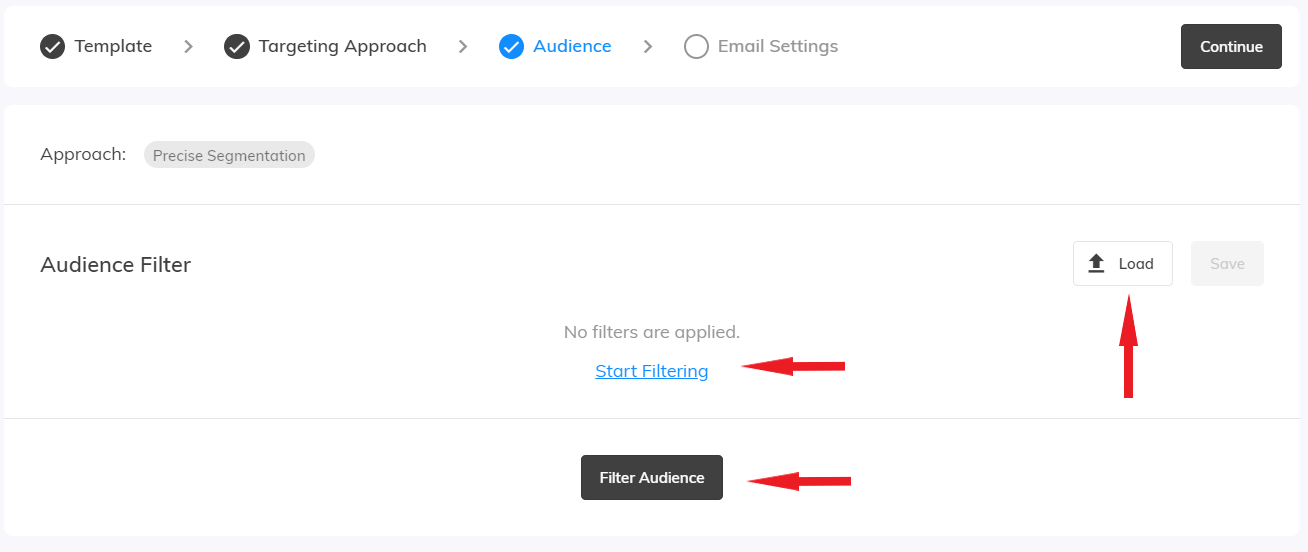
Now for the Audience. You have two options. You can either start creating a new filter from scratch or load an already created filter.
The filter “Newsletter Frequency” does not need to be used here. The one-off campaign is automatically set to “Every day” and “Special Occasions“, you can modify this setting in the campaign settings.
By clicking on Filter Audience button you can check how many customers you’ll target.
For advanced
Filters allow you to create more complex combinations that tell you more about your customers than simple ones. Below, we’ve put together some filtering examples to inspire you on your journey with Samba.ai.
Retention example
In the following example, we want to target customers who have been interested in the site’s products for the last while, yet have not purchased them. At the same time, we target anyone with a high predicted CLV who is likely to leave (possibly churned). We chose one product for this, of any brand and category. At the same time, we only consider products currently in stock.
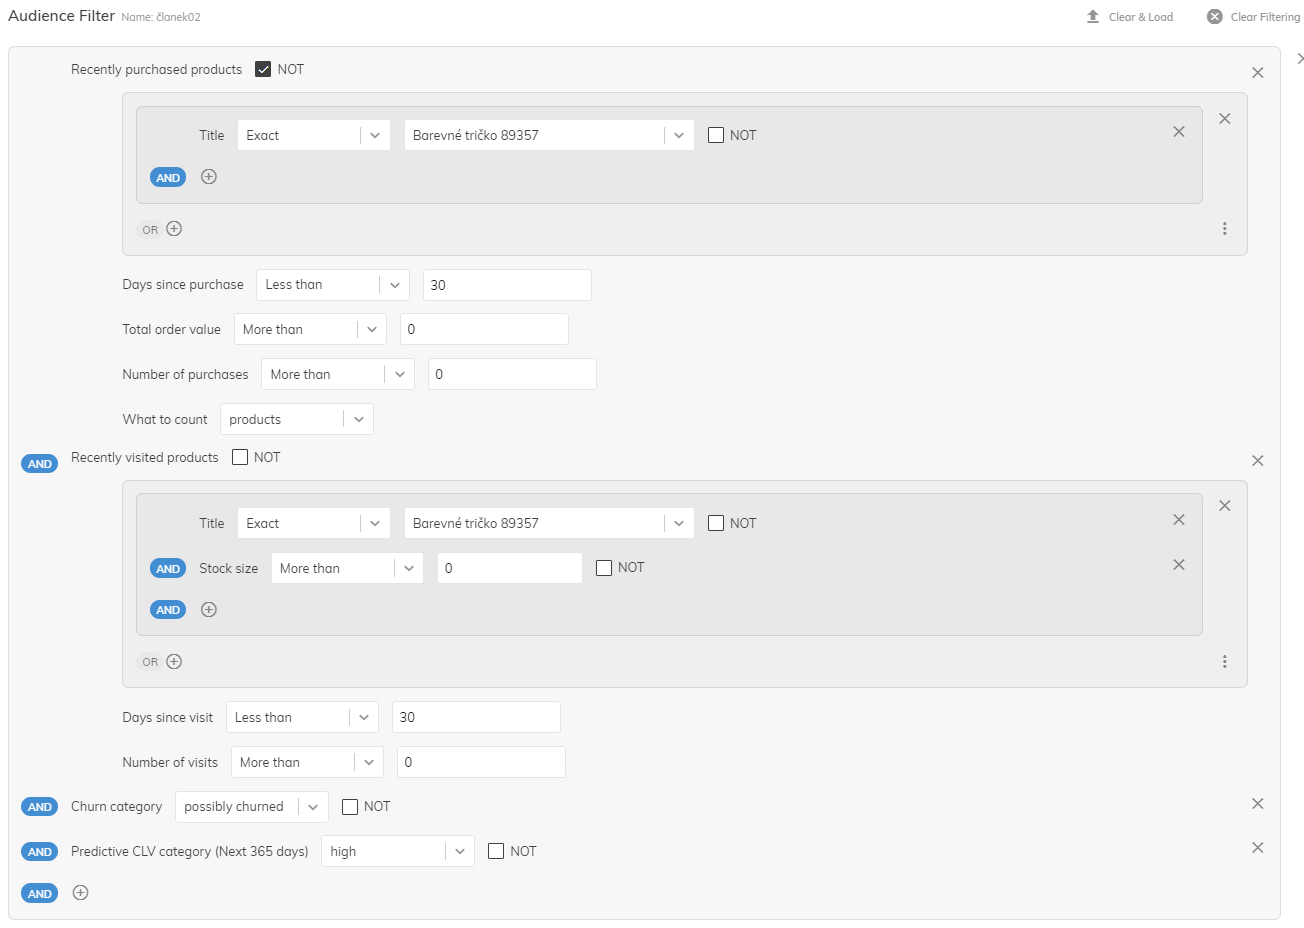
Explanation of the filter
- Recently Purchased Products – In the immersed product filter, select a specific product. Check the NOT box to directly say it has not been recently purchased. We will limit this period to the last 30 days.
- Recently Visited Products – Selecting a specific product that should have been recently visited. We have specified that it should have been viewed in the last 30 days.
- Stock size – Define an inventory of more than 0 to ensure that the product is still available.
- Activity (CVL model) – Selected activity by CVL on possibly churned. This is a potentially churned customer.
- Predicted CVL Category – Selected the predicted category that Samba.ai would assign to this customer.
This post is also available in: