
This post is also available in:


In the following tutorial, we’ll show you the basics of setting up product filters, either for searching or for defining product segments within your campaigns.
Products & Filters
In Samba, navigate to Products & Filters in the Customers & Products section.
The first thing you’ll see is a place to insert filters and your product database. For each product, you can straight see values such as:
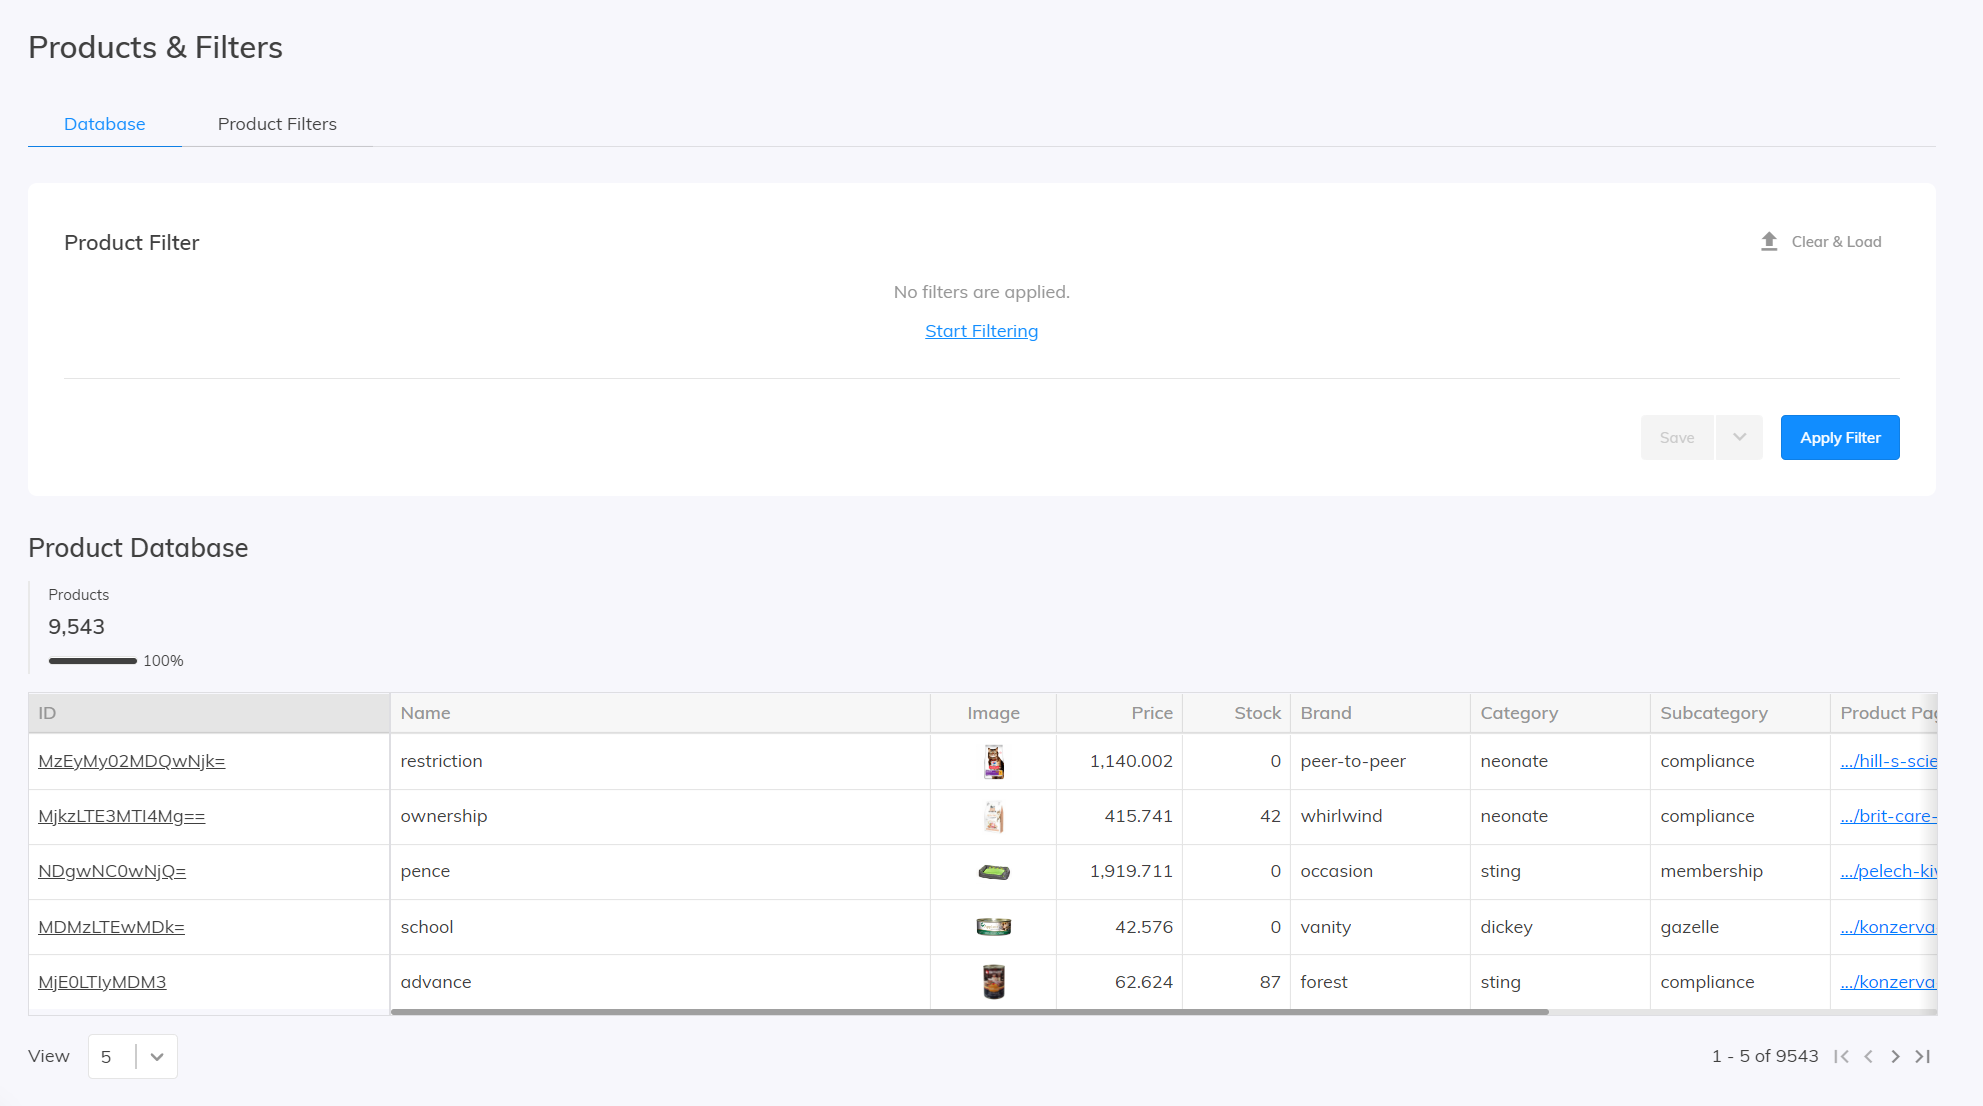
Selection of products
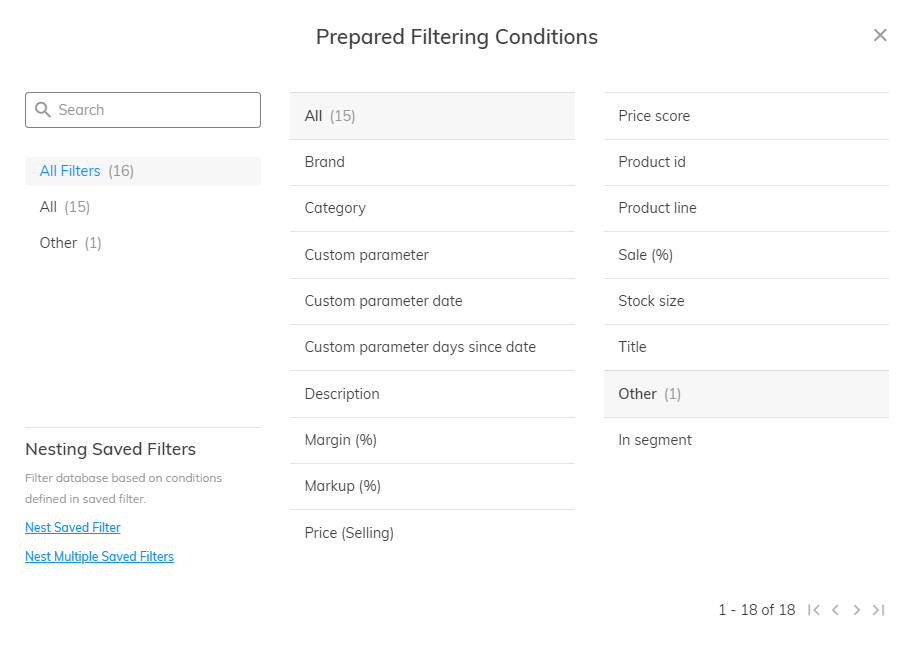
Now select your products. You can filter your database using more than 15 different product filters to select a specific product group. A list of all filters can be found here and a detailed description of the product filters is included in this article.
Using product filters
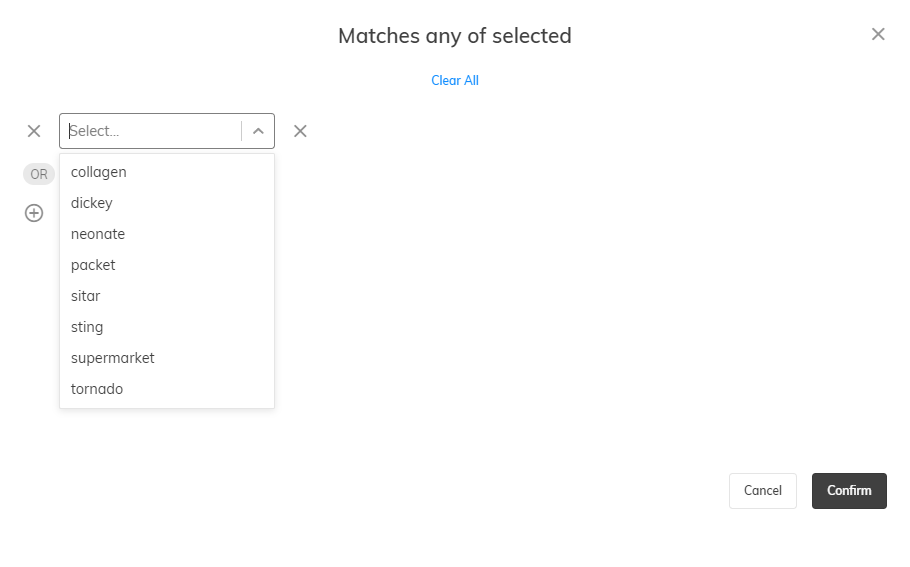
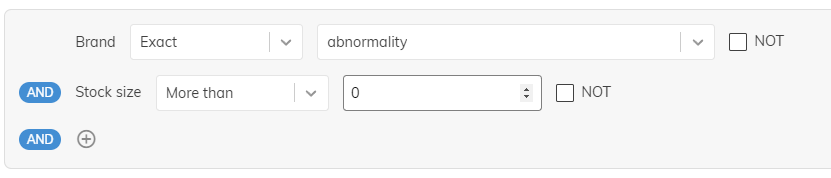
Start by selecting one of the filters. Based on the selected filter, you can select the value you want to filter by.
- Filter by a numeric value. For this type of filter, you can choose to display results that are Less than (and equal to), More than (and equal to), Equal, or Between the value you select.

- Exact match and substring of values. Select whether the value you want to filter must be exact or can be a substring of the value you want to filter.

- Category selection. When you want to select the desired product category, a larger window opens where you can select categories. You can select multiple categories at once, or use the arrow (→) to select a subcategory to the category you have already selected.
Explanation of terms
- Condition: a filter criterion that the product meets or does not meet.
- Segment: a group of products that can contain more than one condition.
- “NOT“: setting a negative value for the condition (for example, checking “NOT” for the selected Category means that you want products that are not in this category).
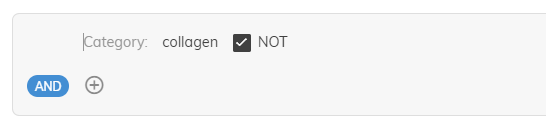
- “And“: the product must meet both criteria. The more conditions you have in one filter, the fewer products will meet the conditions.
- “Or“: a logical link between two filters, where the product must fall into at least one of them. The more filters with different conditions you have, the more likely it is that the product will meet the conditions in at least one of them.

Use your filter
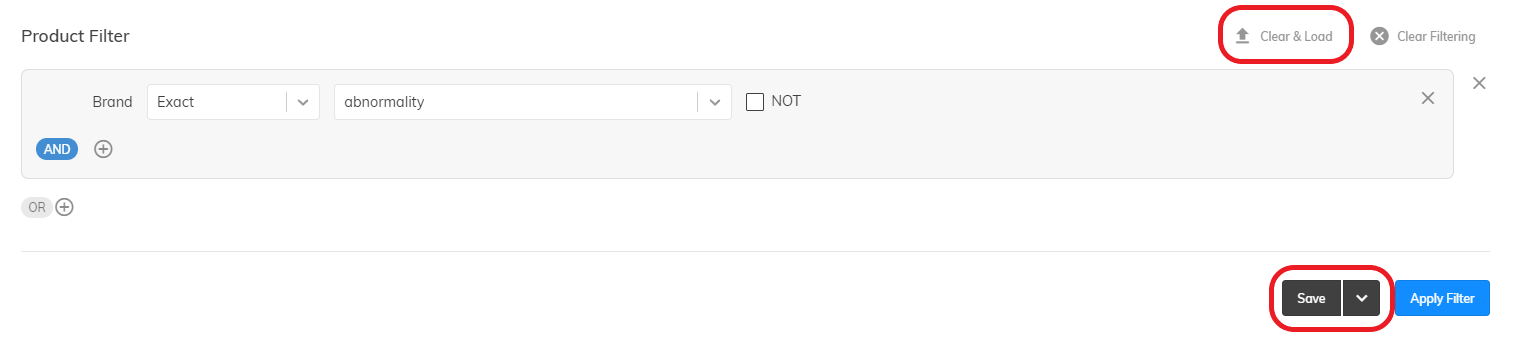
Once you’ve created your filter, go to the next step and press the Apply Filter button to see how much of the product database the setting will target.

Saving, renaming and loading filters
Each filter can be saved and later loaded into a campaign, making it easy to reuse filters whenever you want.
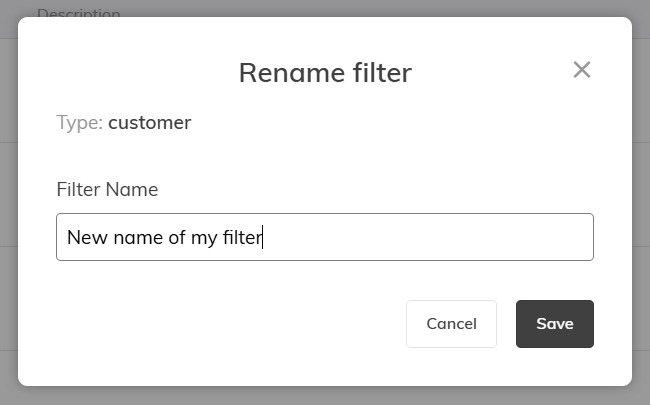
To save a filter, click the “Save” button when you’ve finished setting it up. A pop-up will appear where you can set a name and a description for your filter. Don’t worry – you can change both the name and the description of your filters later. To do so, just go to filters, use the drop-down menu, and select “Rename” or “Change description” for the desired filter.
To load a filter, simply click the “Clear and Load” button and select which filter you want to add to the campaign from the menu.
Nesting saved filters
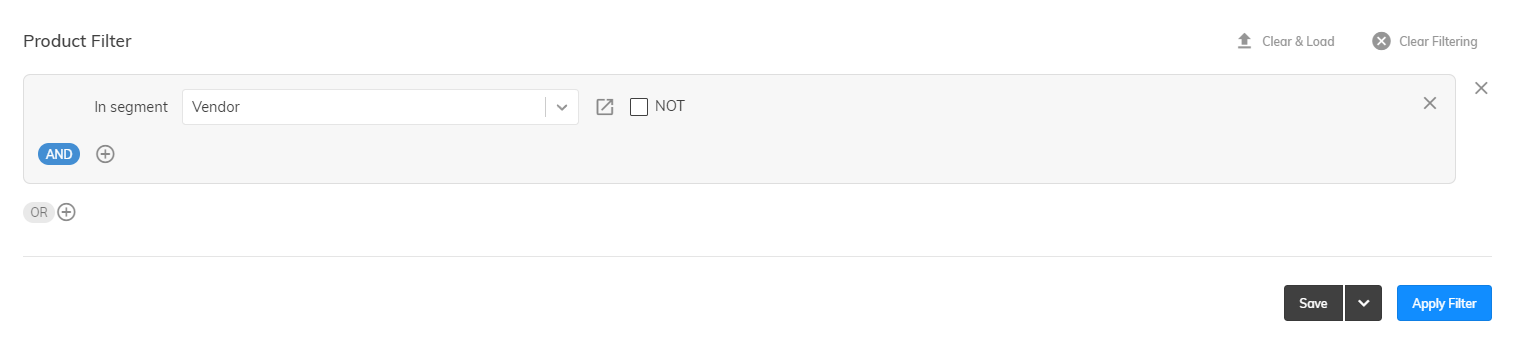
By nesting filters, you can filter the database based on the conditions defined in the saved filter(s).
You can take advantage of nesting by using the “In Segment” filter, which allows you to select a filter you have already created and saved and use it in the current product filtering.
Using filters in campaigns
We have described in detail how to work with filters in different campaigns in separate articles, where you can find information on how to create a new newsletter for a campaign, how to set up an email template and also how to use filters in a segmented or personalized template.
This post is also available in: