This post is also available in:


More orders, completely automatically, every day
Complete automation of email marketing of your eshop. Autopilot is one of Samba’s core features and can create email campaigns and send them itself. From the results, it evaluates which products have generated interest from customers and which have not. This strengthens the effectiveness of each subsequent campaign.
How? Autopilot analyses visitor behaviour on your eshop day and night and looks for buying trends. That is, it finds out which products your customers are most interested in. When it detects such a business opportunity, it creates email campaigns on its own, displaying suitable products and sending them to the right customers. No action is required on your part. At the same time, you can adjust the segmentation according to your own preferences using filtering. Let’s go through the process of creating a campaign from the beginning to sending.
Create a campaign using Autopilot
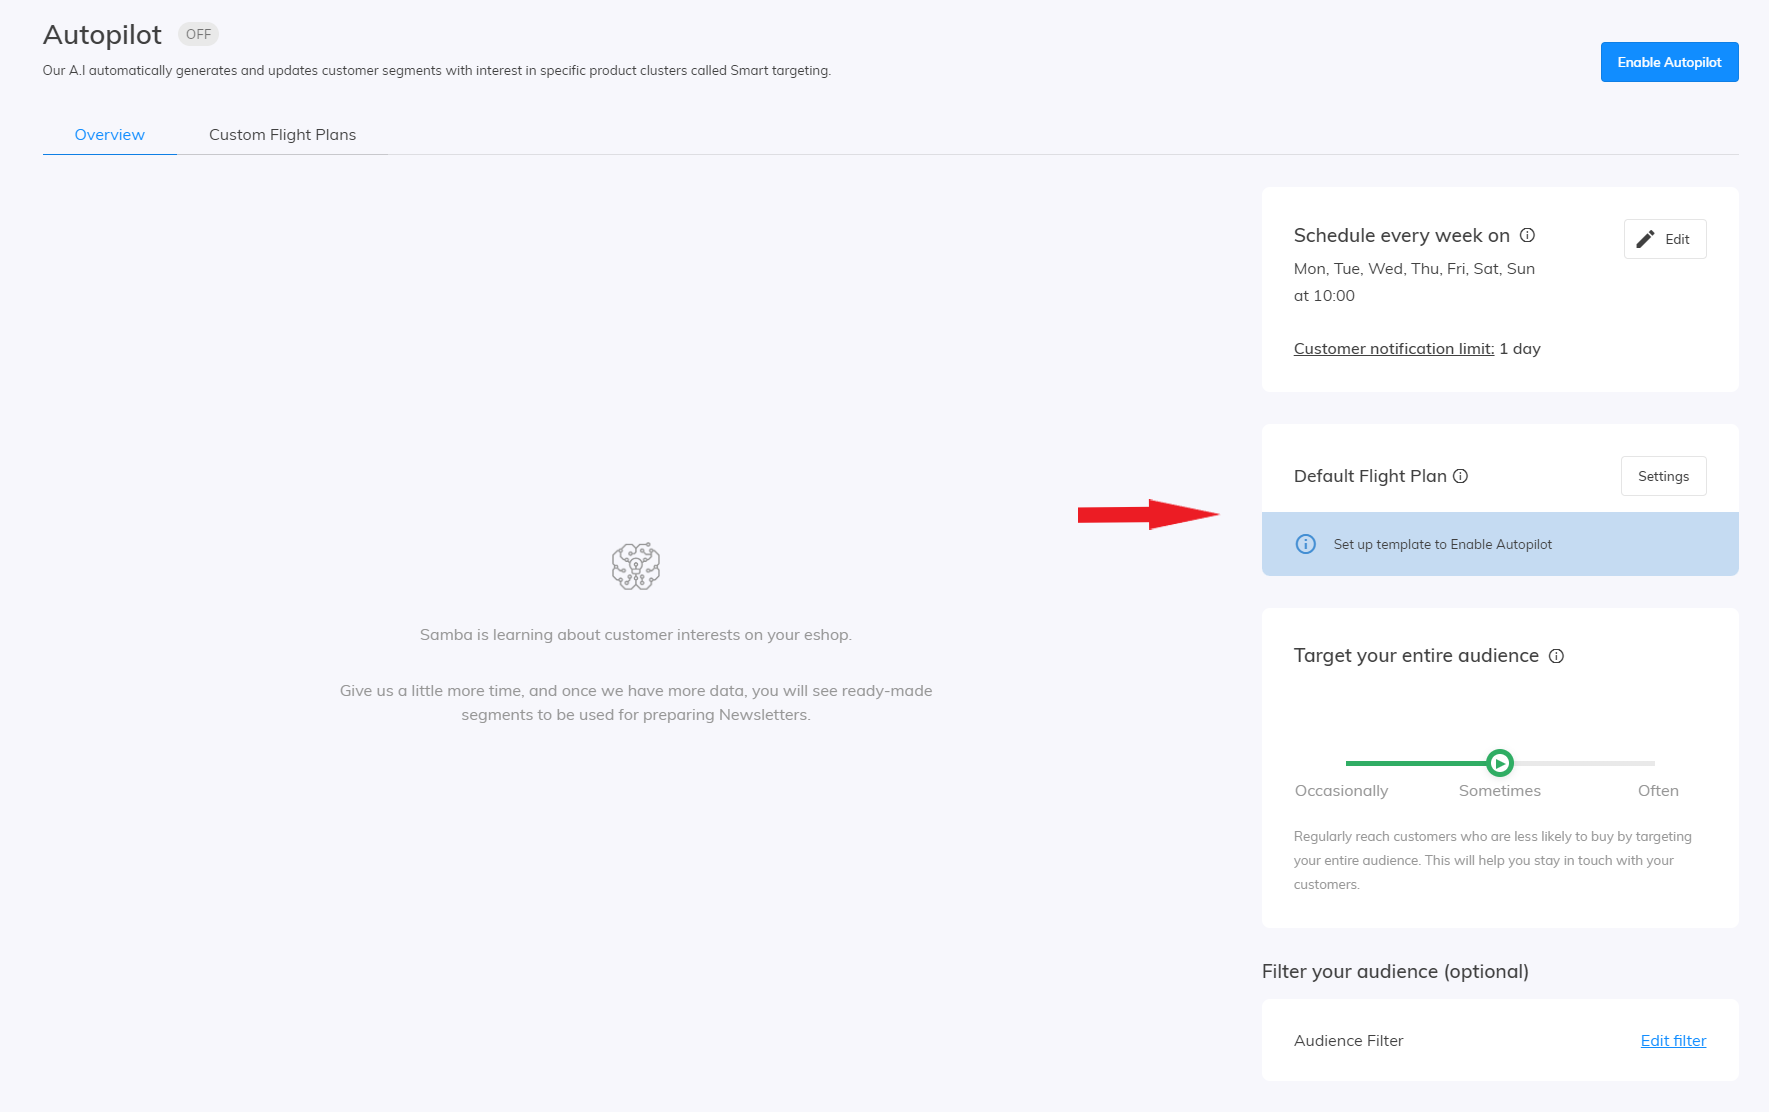
Default Flight Plan
Before you are able to use Autopilot you need to set up a template for Default Flight Plan.
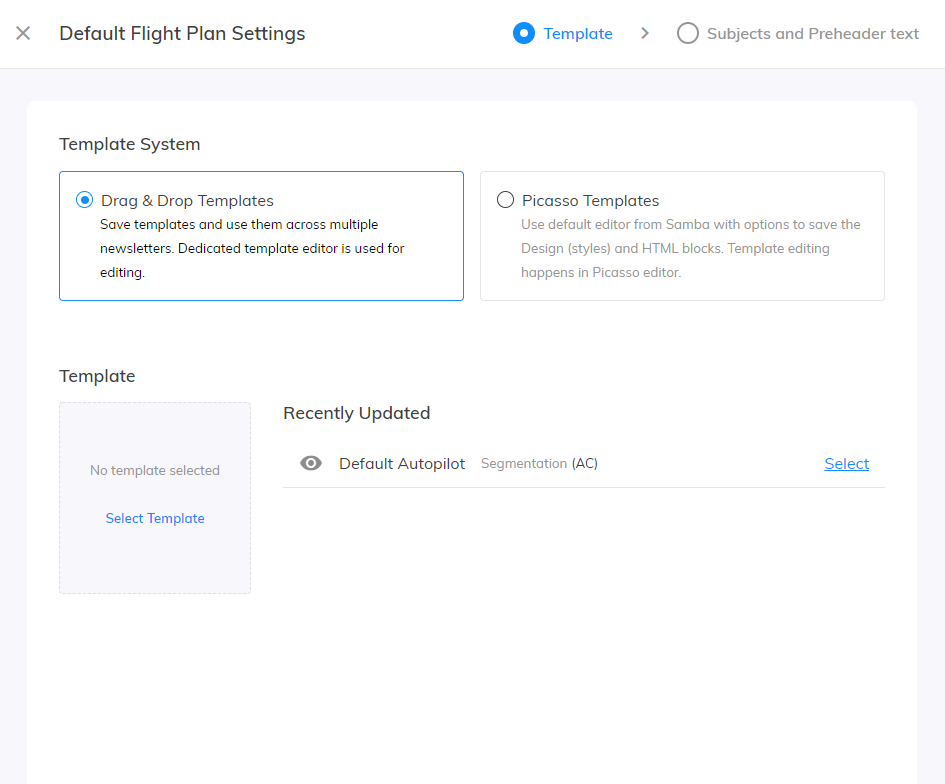
Setting up a template
First, choose whether you want to use Drag & Drop or Picasso template for your Autopilot.
Drag & Drop template
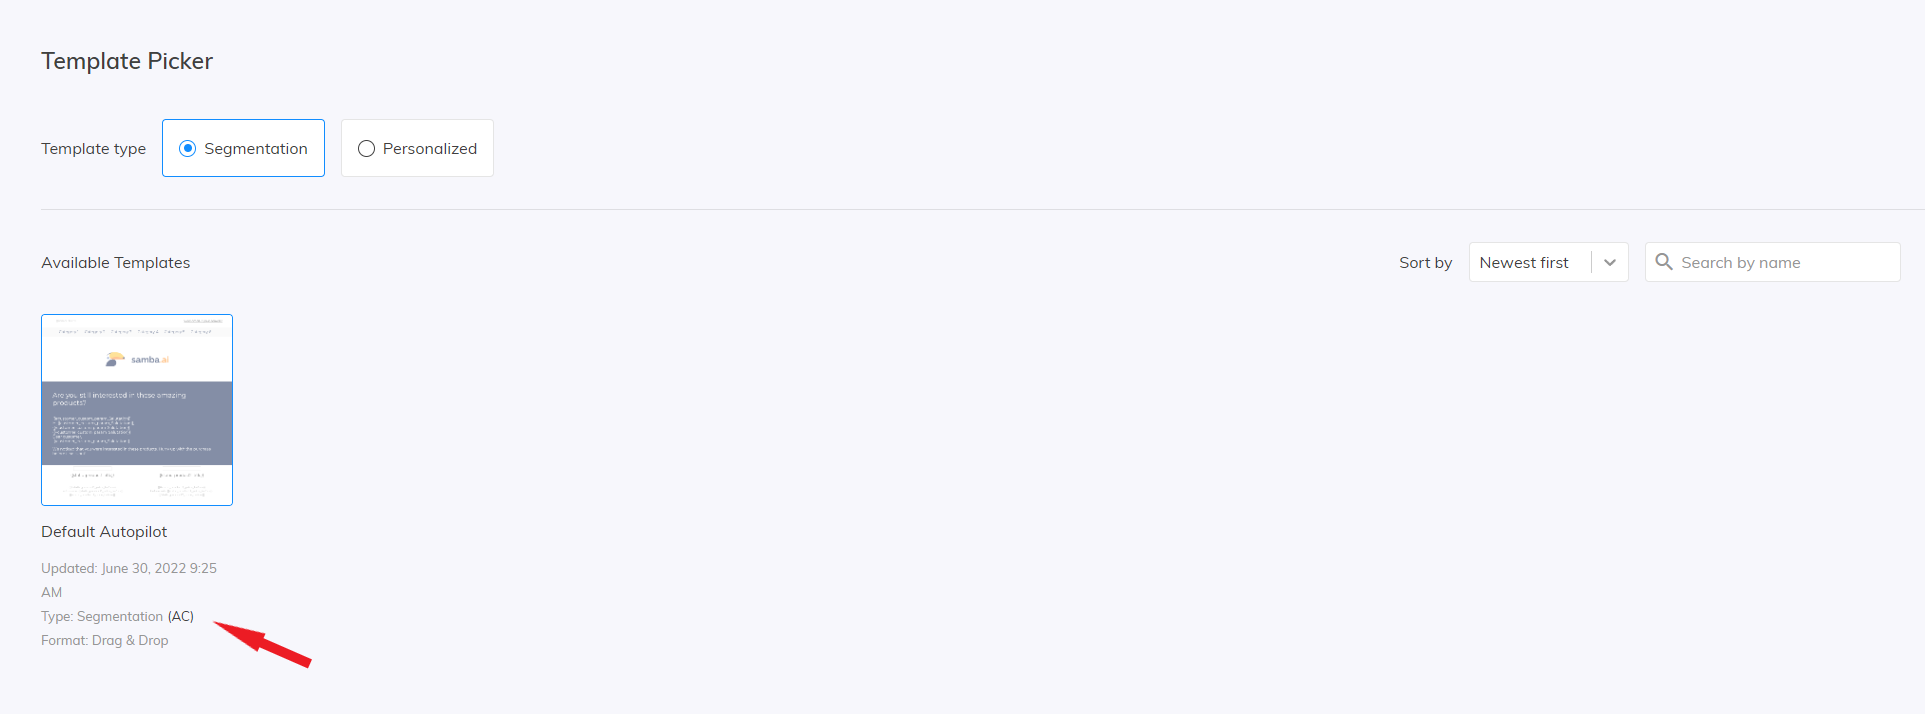
You can select Segmentation or Personalised template that are Autopilot Compatible (AC). Those are templates that contain static products.
In Autopilot template selection Samba will show you only those templates that are AC.
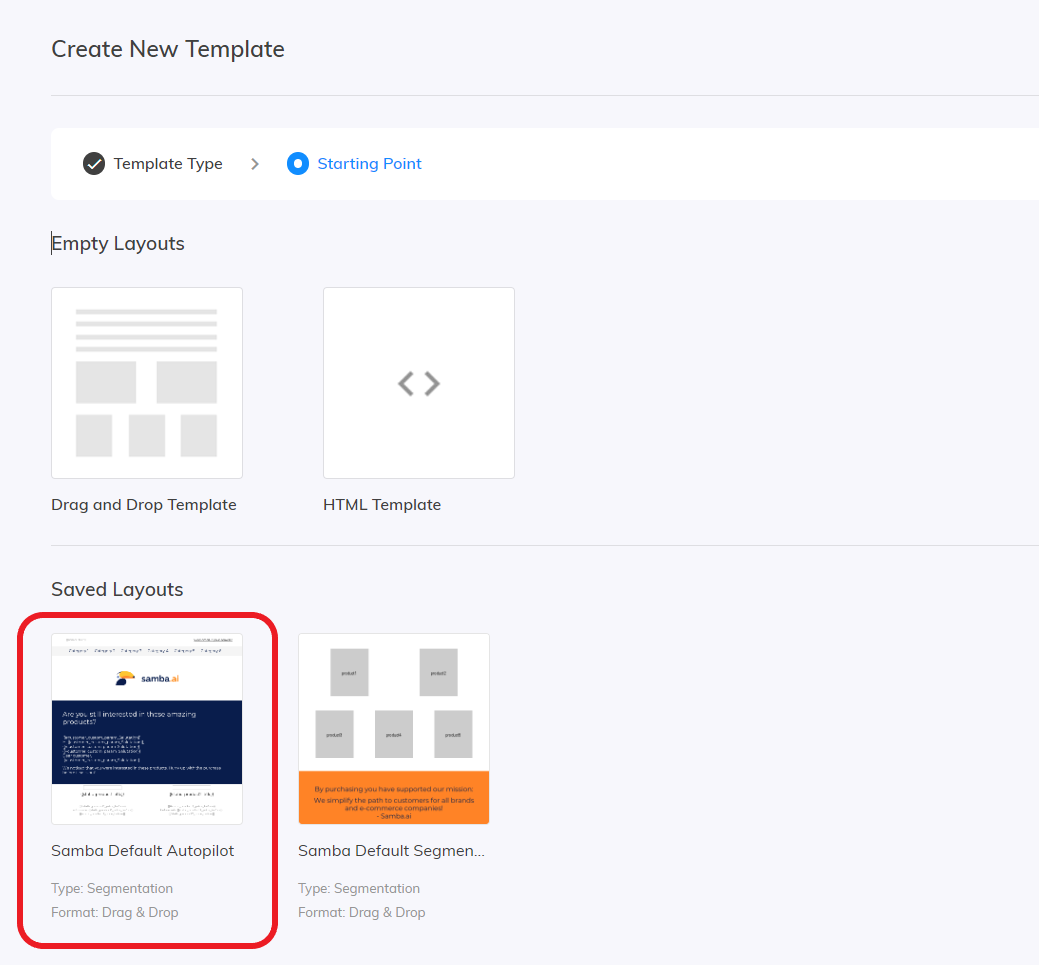
If you don’t have any, you can create a new one and use the “Samba Default Autopilot” template from or Save Layouts and customize it to fit your needs.
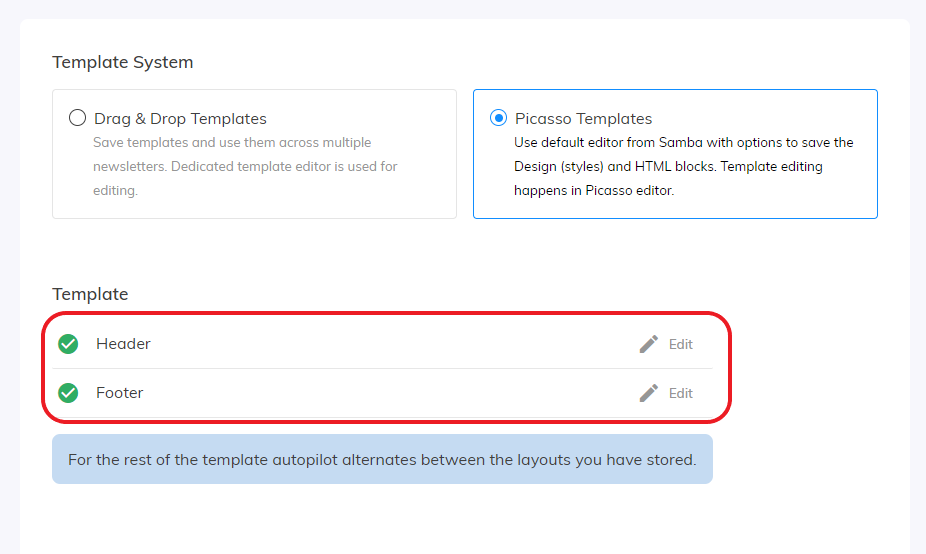
Picasso template
If you wish to choose the Picasso template, you will have to set up a Header and Footer for your template. Samba will show you which part still needs to be created and which you have already done. You can enter the editor through the template set-up by clicking on the “Edit” button.
Layout
Autopilot alternates between the layouts you have stored. In case you only want to use one particular one, it is recommended to have only one layout saved. How do I save a layout?
UTM parameters
UTM parameters are automatically generated in this form:
- utm_campaign: random string
- utm_source: samba
- utm_medium: email
Subjects and Preheader text
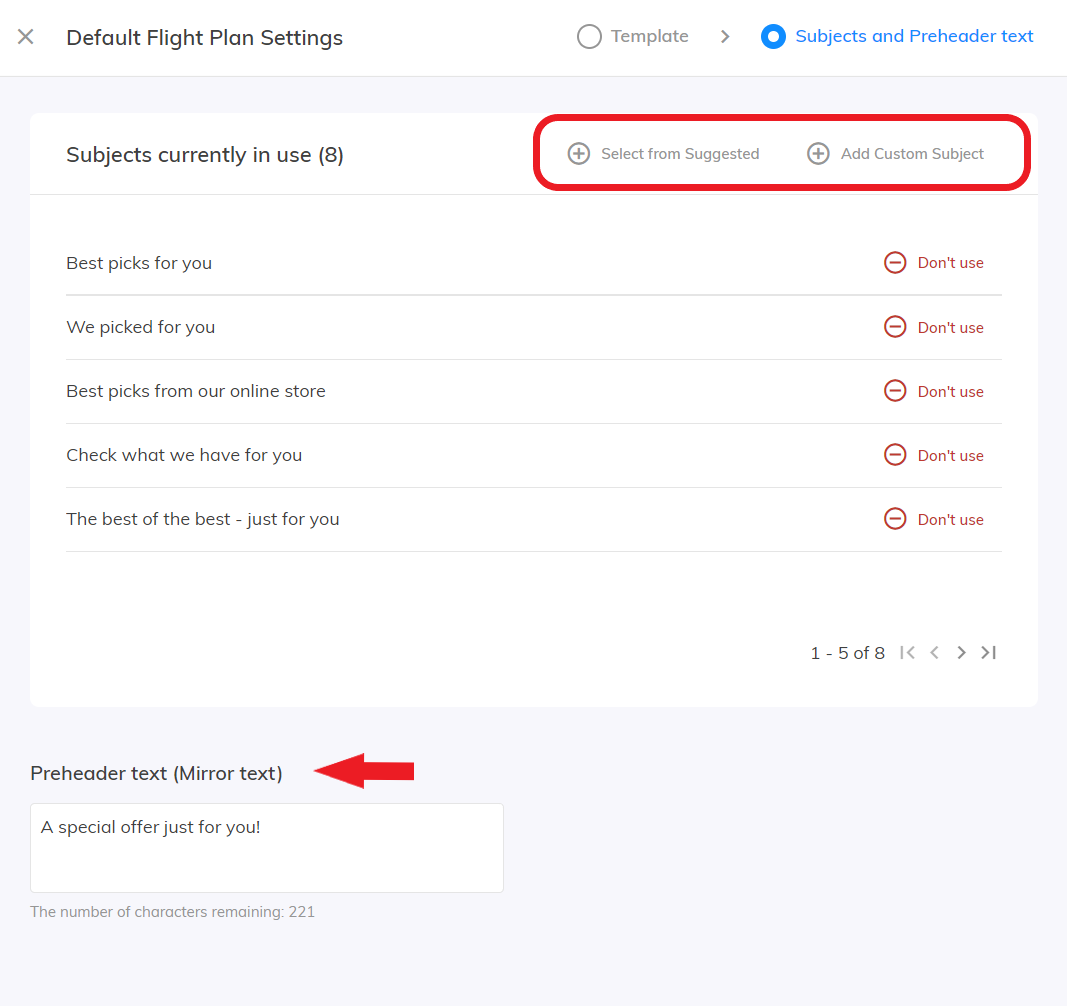
After you set up or choose your template go to the next step to set up your Subjects and Preheader text.
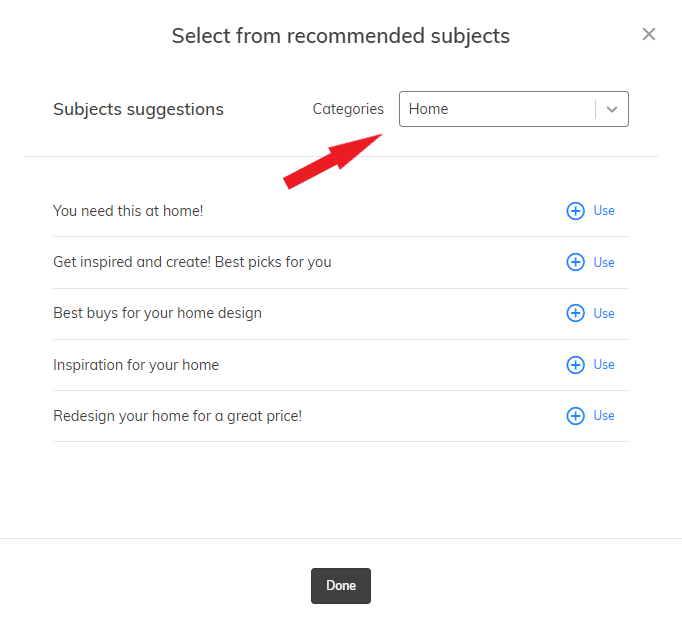
Use pre-made sets of items or create your own. Autopilot uses this set to automatically create campaigns. We recommend items that do not contain the brand, product or event name.
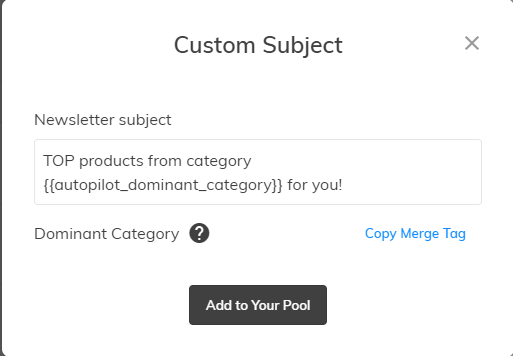
A dominant category variable {{autopilot_dominant_category}} can be inserted into any subject line. This variable is automatically replaced in the email subject line with the name of the specific dominant product category according to the identified customer segment at the time the one-time email campaign is generated.
- So you can easily create a subject line like “The best of the {{autopilot_dominant_category}} category just for you”, which will result in a subject line like “The best of the Cats category just for you”.
Since specific email subjects can be defined for Custom Flight Plans, it makes sense to use this variable, especially for the set of subjects in the Default Flight Plan.
Overview
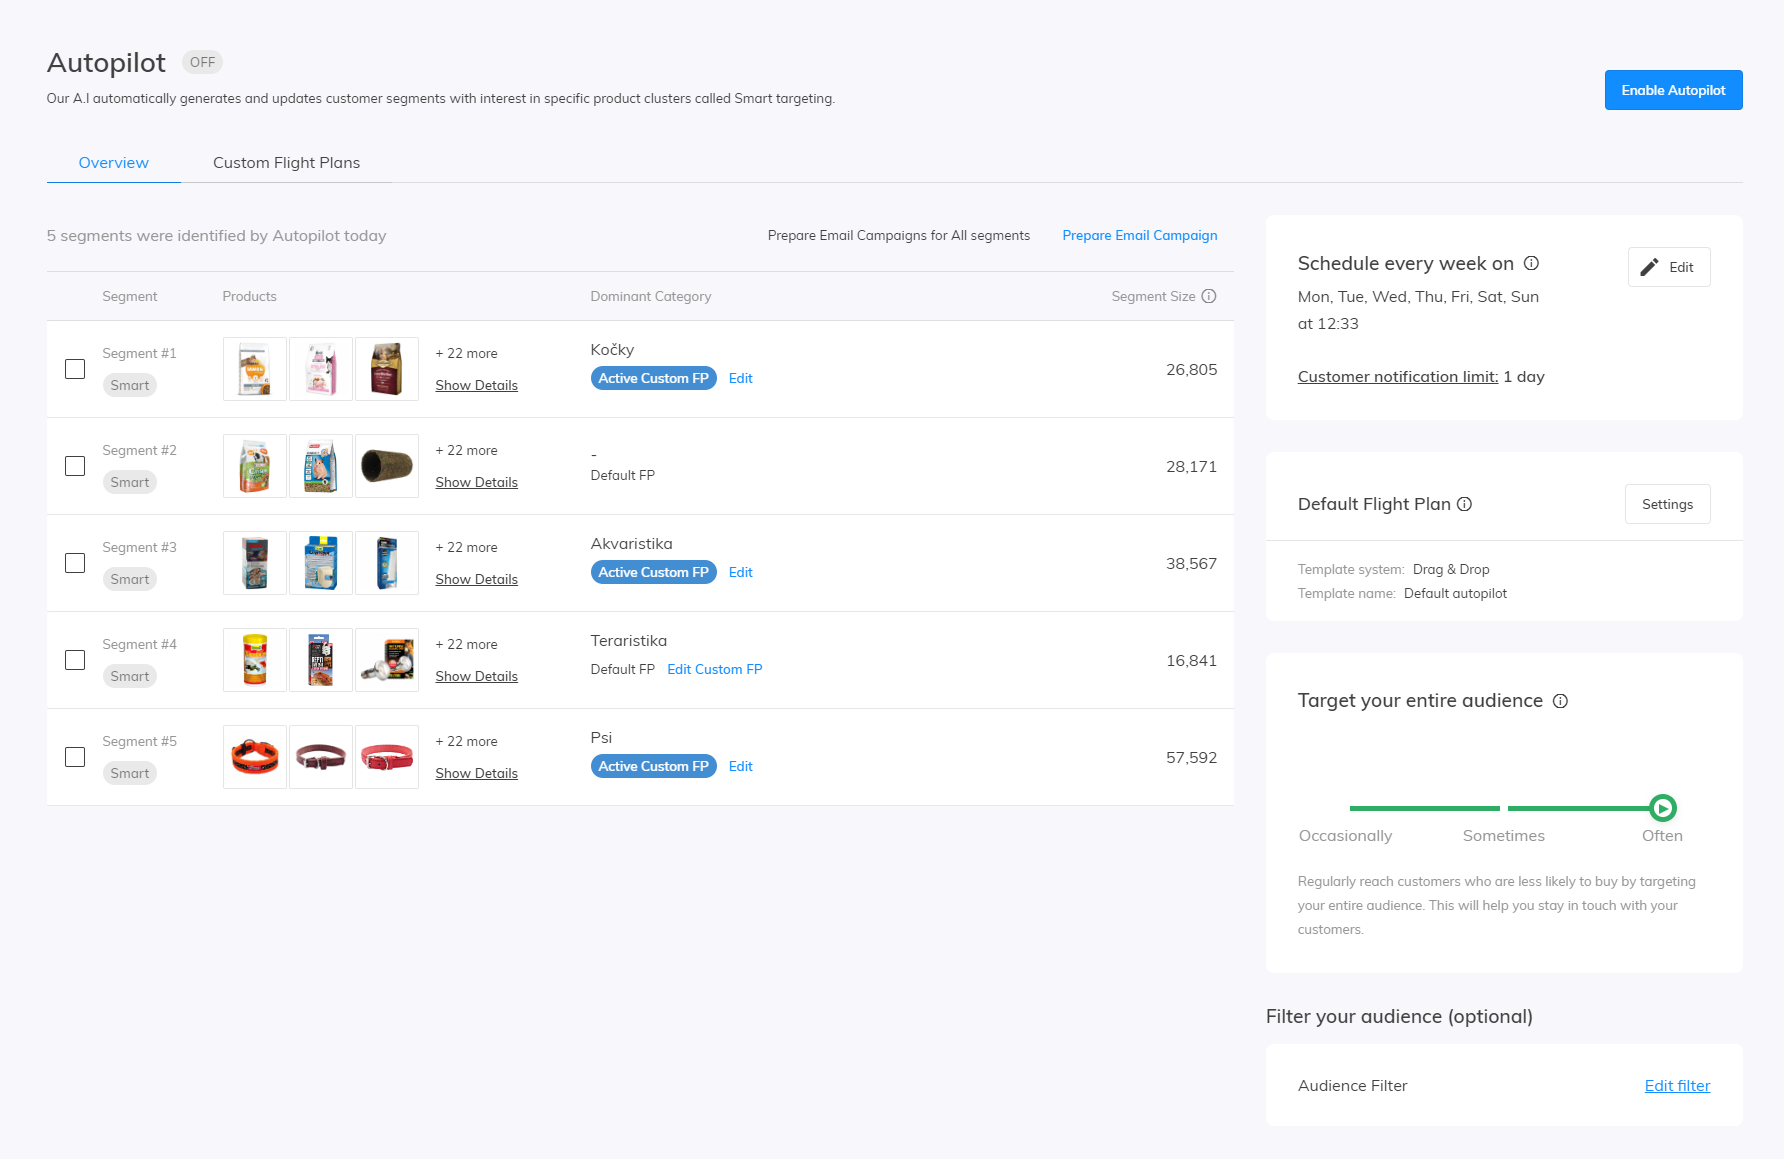
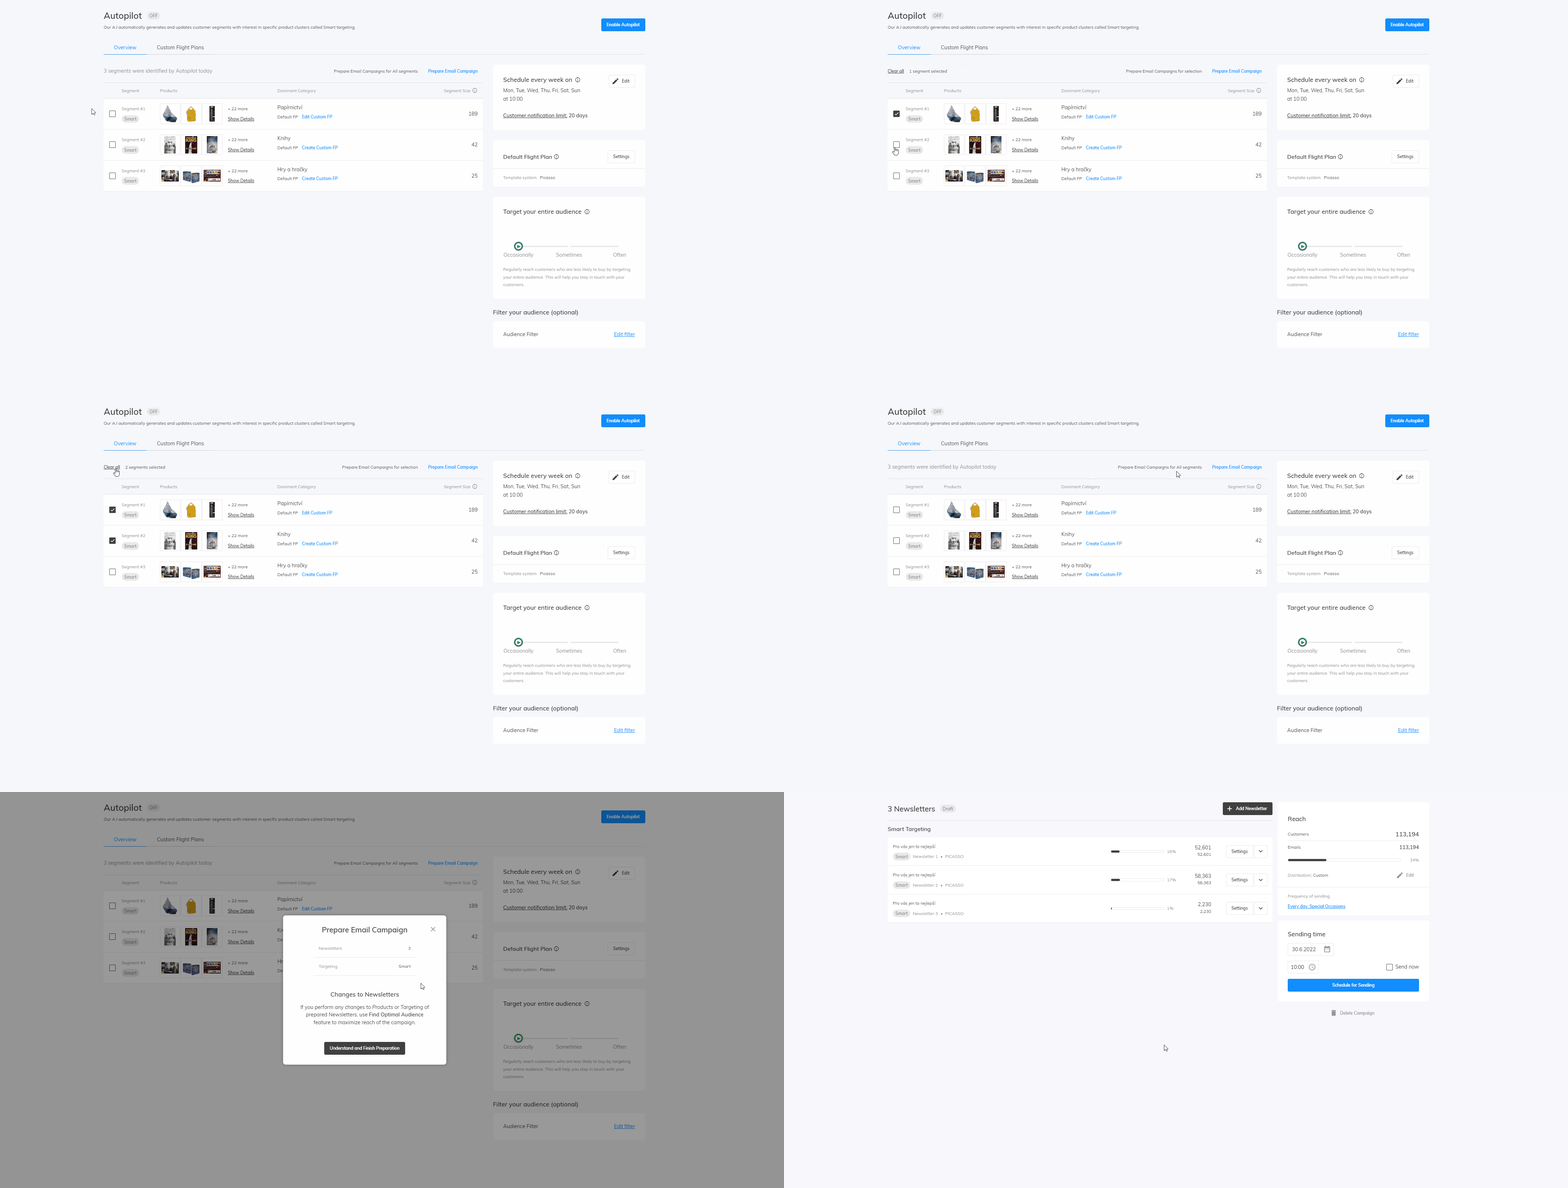
When you created your Default Flight Plan you can now Enable Autopilot. Autopilot will create and display segments of customers based on their behaviour.
Once Samba has enough information and Autopilot has prepared the campaigns for you, we can get started on the setup.
Clicking the Prepare Email Campaign button
you can use the identified segments and recommended products to directly create a one-off email campaign. Here you can then edit the campaign in exactly the same way you are used to from the Custom Campaigns settings (read instructions). You can use all segments or just the ones you select.
The same parameters are used to set up the campaigns as if the campaigns were automatically generated when Autopilot is running – so the specific options according to the Flight Plans see below are applied. In this way, you can do a dry run of Autopilot first.
Autopilot configuration options
The Autopilot automatically recommends selected products for identified customer segments. Within the Autopilot settings, you can further configure its behaviour:
- when to be sent
- day and time of sending
- what is to be sent
- design of the email template
- set of subject lines and email preheaders
- who to send to
- configuration of the “Target your entire audience” option
- customer filters to limit the targeted audience
Custom Flight Plans
Flight plans allow you to personalize more Autopilot performance so that the form of automatic communication is tailored to the segment.
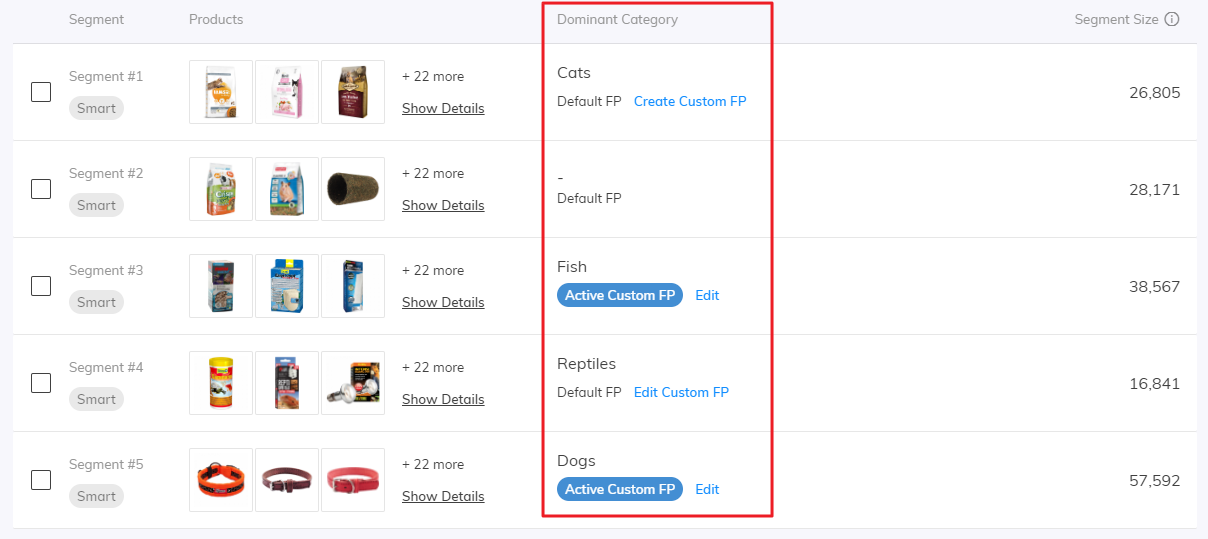
Each identified segment is typically characterized by a focus on a specific product category in your offer that the given customers were interested in. This Autopilot segment designation is called the dominant category and is displayed directly in the Autopilot Overview.
For these dominant categories, a Custom Flight Plan (FP) can be set up, which can contain specific settings. This will then be applied to the campaigns generated for the relevant segment so that, for example, for the “Cats” segment, email subject lines associated with cat products are used, e.g. “The best for your cats from our offer”.
Custom Flight Plans
Theoretically, any product category in your product catalogue can become the dominant category for a segment. We, therefore, recommend that you set up a custom flight plan for all your important product categories. A maximum of 1 custom flight plan can be created for each product category. Currently, only level 1 categories are supported.
In the overview of the prepared segments for the day, you can create a Custom Flight Plan using the Create Custom FP button, if it does not already exist for this dominant category.
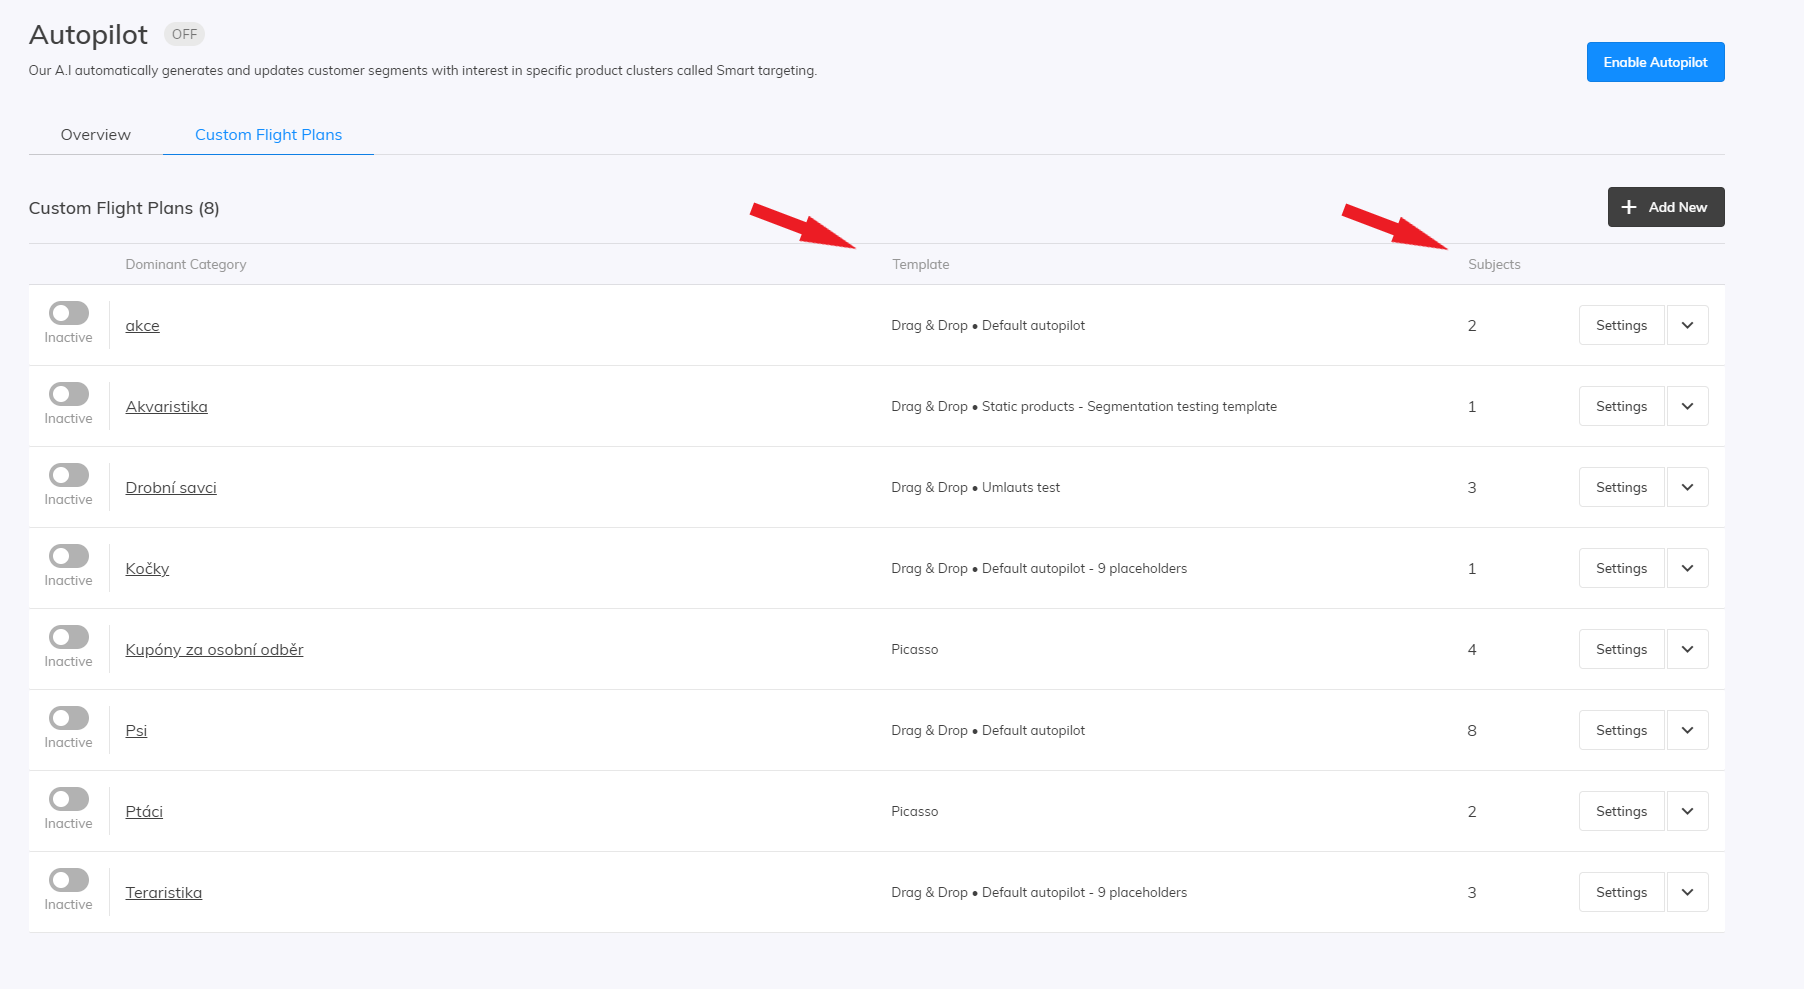
Alternatively, use the Add New option in the Flight Plans tab.
Custom Flight Plan Settings
For each individual, dominant category you can set up the same setting as for the Default FP.
In the plan settings detail, you can change the dominant category to which it is associated.
After you create your desired template, subjects & preheader for your selected dominant category you can see the current template and number of subjects for each category in the tab.
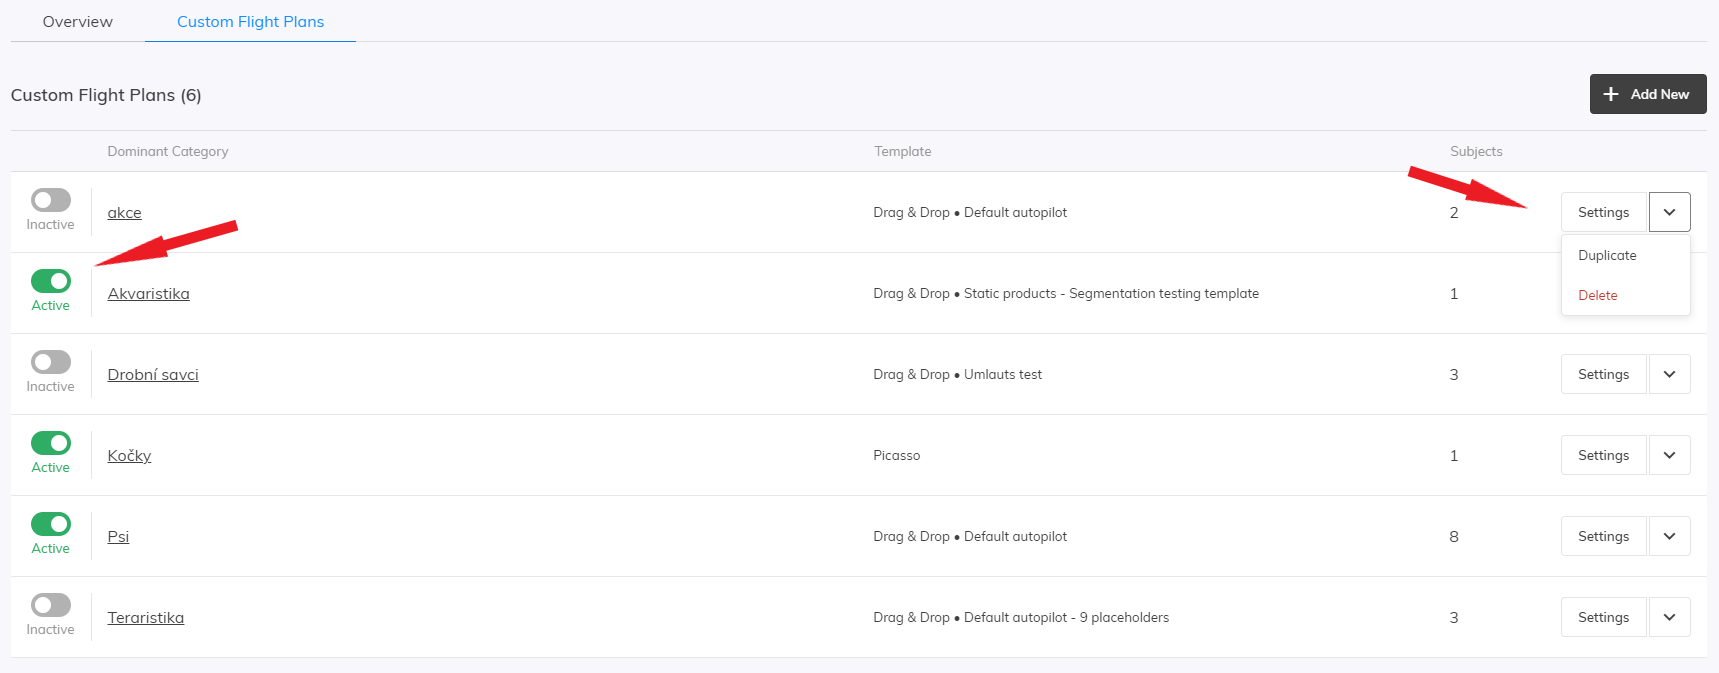
You can Deactivate and Reactivate your custom flight plan at any time. During the period of deactivation, the Default Flight Plan will be applied to the relevant dominant category.
You can also easily create new plans using the Duplicate option – then you just need to change the settings of the dominant category and the rest of the flight plan settings will be applied directly.
If you no longer want to use the selected plan, use the Delete option.
Missing Product Category
In case the relevant product category for your previously defined custom flight plan no longer exists in the product feed, the dominant category is marked as Missing. This means that the corresponding flight plan cannot be applied to any segment. This typically happens if a category in your offering has been renamed or deleted completely. We recommend that you modify such a flight plan to be linked to a newly created product category, for example.
Day and time of sending
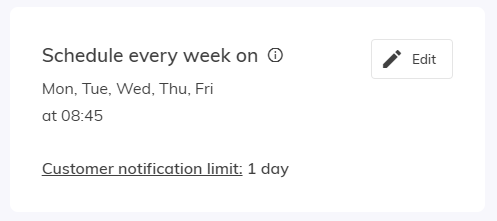
You can select not only the time of the sending but also the days of the week on which Autopilot should operate. Autopilot will then generate campaigns every active day at midnight based on the results of your customers’ purchase behaviour analysis.
You can edit or even turn off the generated campaign each day until the time of scheduling the mailing in the One-off Email Campaigns section.
Target Your Entire Audience
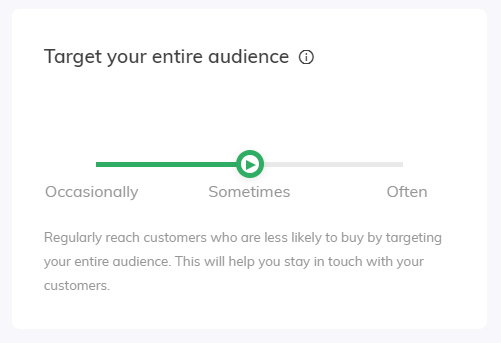
Autopilot helps you to keep in touch with all your customers. With this option, you can choose how often Autopilot should target even the less active customers.
Audience Filter (optional)
Use customer filters, for example, to exclude a certain segment of your customers from being targeted by Autopilot campaigns. All the customer filters that you might normally use in other campaigns are available to you. These filters are automatically set up in the campaign at the time of campaign generation.
Enable Autopilot
Push the button Enable Autopilot.
Then, starting tomorrow, Autopilot will start working for you.

