This post is also available in:


Integration
Failed to connect to the data source. What should I do?
If your data integration shows Failed to connect to the data source, it means that the data in your data feeds is not available to Samba.
If you are using one of our add-ons (Shoprenter, Upgates, Shopify…) that generate feeds for you, this notification may indicate that your data is still not generated. Depending on the size of your project, it may take longer to generate the data. So we recommend you wait a while and try to reload later.
In case you have a custom solution this notification may mean that you are not allowed to access your data. Links must be publicly accessible, or contain access data in the format https://username:password@vaseshop.cz/adresafeedu.xml
- See also this article for more information.
Data integration shows me errors in feeds
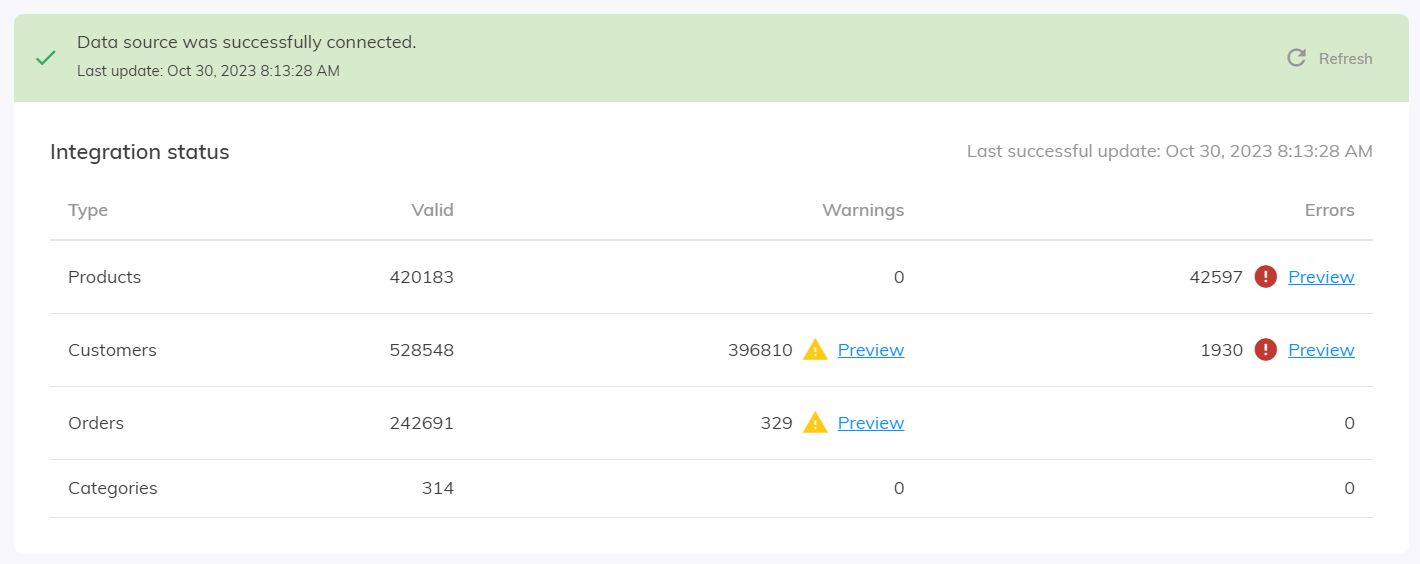
Have you done the data integration setup and after loading data from your feeds, the setup shows you warnings and errors? No need to panic, let’s talk about what these notifications mean for you and how to resolve them.
In case of a warning, Samba tells you that there are missing values for one of the parameters in the feed.
On the other hand, in the errors, you will find information about the parameters in the feed that contain the wrong values.
When you click on the preview, you can see the specific problem with that parameter and also the total number of occurrences in the feed.
When displaying the details afterwards, Samba will also show you not only the specific error value but also the specific line in the feed where the error or empty value is located.
In case of errors, we recommend that you check the feed and try to remove as many errors as possible. However, it will not be possible to remove some errors.
This is the case for example with the order feed and the Bad link in <PRODUCT_ID> error. This error indicates that the product ID in the order does not match any ID in the products. This situation can be caused by historical orders that contain products that no longer exist in your store.
Use of filters
Audience & Filters show me a different number of customers than campaign filtering
In the Audience & Filters section, you have created a filter that you then used in your email campaign. However, the number of targeted customers in the campaign is lower than the filter originally showed you in the Audience & Filters section.
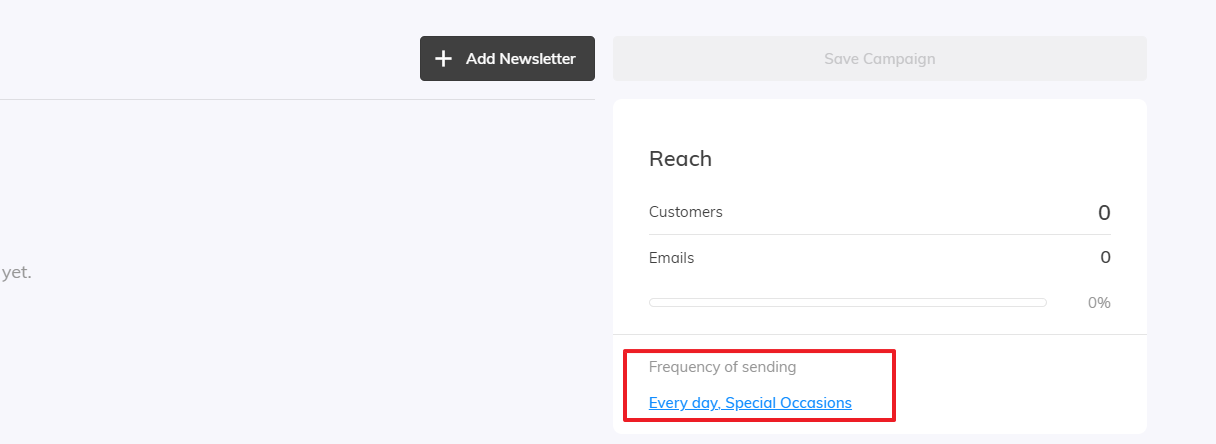
The cause is probably the “Frequency of Newsletter Sending” setting in the Audience & Filters section.
Unless you have set it otherwise, all filter results in a given section will show you all customers that match your filter. This means both logged-in and logged-out customers.
While email campaigns by default only count logged-in customers and do not take unsubscribes into account. For this reason, the number of resulting customers in the campaign will be lower than the original filtering.
The solution is simple. Simply remove unsubscribed customers from the Audience & Filters section under the “Email Frequency” settings.
Incorrect use of filter operators
Whether you are setting up a customer or product filter, you always have the option of combining multiple filters within the filtering using the logical operators “AND” or “OR“.
When combining filters to search for a target audience, you may then combine these operators incorrectly, causing an unwanted result.
Let’s take an example: Let’s say that we want to search for customers who are not from Prague or Brno.
Here the user might think of using the “OR” operator, but that would be wrong in this case. So if we were to type:
- District=Prague(NOT) OR District=Brno(NOT)
We would look for customers who are not from Prague (they may be from Brno) OR not from Brno (they may be from Prague). So within the first filter, we would count people from Brno and within the second part we would count people from Prague and therefore we would get an unwanted result.
The correct usage is therefore:
- District=Prague(NOT) AND District=Brno(NOT)
Thus, the condition is that the searched customers must not be from any city.
Email campaigns
My automated email campaign stopped sending emails
In case you have set up any automatic campaign and it suddenly stops sending you emails, we recommend that you check if you are sending discount coupons to customers in that campaign as a first step.
If you have set up a campaign to insert discount coupons and they are subsequently used up in the coupon stack, the mailing will stop. You can then simply refill the coupon stack.
Autopilot has targeted 0 customers
If you encounter a situation where no email has been sent within a scheduled Autopilot mailing because the targeting shows 0 customers, you need to check if there are any missing products in the scheduled campaign.
If your data in Samba is updated temporally before Autopilot is sent, in an extreme situation, the product(s) that Autopilot schedules in the mailing may no longer be available after the data is updated.
In such a situation, the entire mailing will fail.
If you encounter such a situation, please contact our support to request an adjustment to the update time of your data in Samba.
No follow-up within the Flow campaign
Have you ever set up a flow campaign where a follow-up email was supposed to go out to your customers, but the email didn’t go out? One of the causes could be a misconfigured Campaign Activation node.
In order to send a follow-up within a flow campaign you need to insert a delay node after the first sent email, where customers wait before performing the next step of the flow campaign.
However, the delay node is only processed if the flow campaign is started and active under the conditions set in the campaign activation node.
So let’s take an example of a misconfiguration:
You plan to send a one-time flow campaign on 5.11. with an email to customers and a follow-up after 5 days.
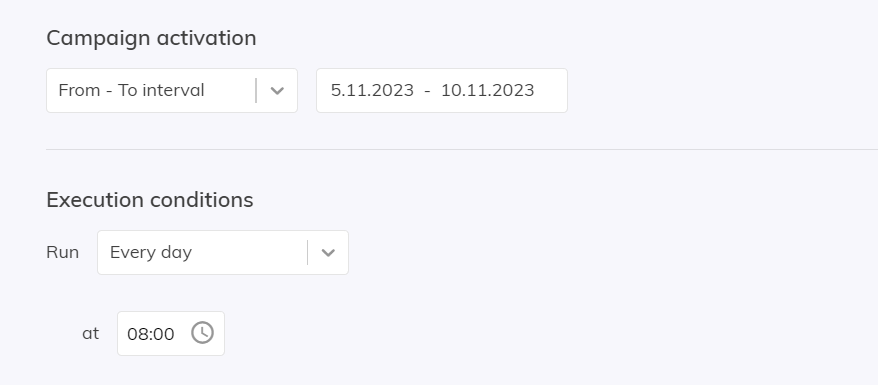
In the Campaign activation node, you set the Activation “On a specific day” = 5.11.
You then create a flow campaign where you also insert a delay node after the first email with settings for 5 days.
However, after the first email is sent and the delay expires, the second email is not sent.
The problem is in the activity settings. Because the delay node is processed only on days when the flow campaign is active, the node is processed only on 5.10 and not afterwards.
The correct setting under Activation is therefore “In range” = 5.10. – 10.10. so that the flow campaign is processed every day in this range and the delay node is processed.
The most appropriate settings, along with the use of the “Date Condition” node, can be found in this article.
Email templates
How do I insert products into the template?
You can insert products into the email template in several different ways. First, it’s a good idea to divide your products into Static (each customer will see the same product in the email) and Personalized (each customer will see a customized product)
- For static products, you have 3 ways to add the product to the template:
- You compose the product from individual content elements. So you insert an image into the template, then text for the price or a label and finally a button with a click-through to the product.
- The second option is product tiles. Within the template editor, you can create a product tile via the Product Tile Manager, which will then be generated directly into your template. In the selection of pre-made rows, you can find them under Static product tiles.
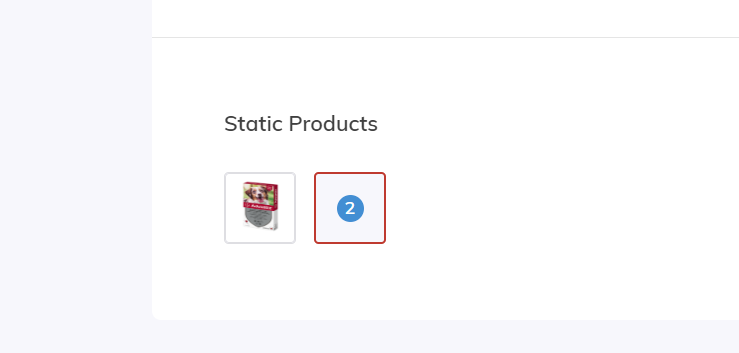
- The third way is to insert static product placeholders into your template. These placeholders can be found in the selection of pre-made rows under Static & autopilot products. You only need to insert the placeholder into the template and then edit its visual appearance (font size, button colour, etc.). The products themselves are added to the placeholders only in the settings of the specific email campaign.
- Personalized products are added to the template in only one way, using placeholders just like static products in point 3. Placeholders for personalized products can be found under Personalized template products.
Is it possible to move a template from one account to another?
If you need to move an email template between accounts, just select Copy for the template. You will then be given the option to create a new name for the template and assign it to any account you have access to.
Triggers
Why can’t I see products in the email preview for an abandoned cart?
Trigger An abandoned cart is different in its setup and operation from a regular mailing. Because it uses customer tracking to react to a customer leaving specific products in the shopping cart, it is not possible to display products during a test email or preview email. Samba simply does not have any product information to add to the preview at that moment.
The exception to this is when you open a preview email, within a 10-minute window in which some customer has an abandoned cart trigger to send. See also this article for more details.
Welcome Campaigns
Is it possible to use a custom pop-up to collect emails?
If the dedicated pop-up editor in Samba.ai does not meet your requirements, you can use a custom window to collect emails. In fact, there are 2 ways you can use it:
- In the first case, you can create your own welcome pop-up internally outside of Samba and then integrate our email collection logic into the pop-up, which will take care of proposing the inserted email into your database and also checking if your database does not already contain the inserted email.
- In the second case, you can use the Script Manager feature to create the pop-up itself, which allows you to insert your own JavaScript directly into the Samba interface.
Database management
I manually logged out a customer, but the change did not take effect
If you have unsubscribed a customer manually via Contact Management, you must update your data to reflect the change. In the Account Settings, in the Integration section, click the Refresh button in Data Integration.
If you do not manually reload your data, the update will occur automatically as part of a one-time refresh that occurs once a day.
How do I track logged-in via pop-up?
In case you collect customer email addresses through Welcome Campaigns, all customers signed up in this way will be entered into your database with the prefix “popup-” in the value of the customer ID.
You can search for them using the filter “ID: Substring = popup”
If a customer logged in via a welcome campaign popup is subsequently fully registered, the prefix in the database will disappear and it will no longer be possible for you to find the customer among those logged in via the welcome campaign – the customer ID from your data feed will automatically be taken over.
Statistics
My emails have a low open rate
If you see a low open rate in your email statistics, there are several ways to increase it.
First of all, it’s always a good idea to work with your customer database and test different types of communication (for example through A/B testing) as well as days and times of sending to see what is effective in your case.
One of the most common causes of low open rates tends to be bulk and generic communication. If you are regularly targeting your entire database with generic emails at one time as part of your mailings, chances are you won’t get the best results.
A much more appropriate and results-proven method of communication is sending personalized newsletters.
Thanks to our wide range of customer filters, you can target detailed and specific customer groups. At the same time, thanks to personalized, product placeholders, outreach and other options of the template editor, you can achieve that the template content is individually adapted to each customer.
By targeting smaller and specific groups of customers, you can also send your communications more frequently and schedule your newsletter campaigns throughout the week instead of once a week.
In Samba, I see an increase in the Bounce Rate
Bounce rate is one of the main indicators of a problem with a poor-quality customer database. Incorrect, fake or non-existent email addresses cause an increased bounce rate on your mailings and thus reduce your reputation as a sender.
The best way to prevent an increased bounce rate is to regularly check and clean your customer database.
At the same time, if you use welcome campaigns to collect customer emails, it is very important to have double opt-in emails activated to avoid bad email addresses in your database.


