
This post is also available in:


The PrestaShop module connects your e-shop with Samba.ai and was designed for ease and simplicity, requiring very little work to get it up and running.
In the following guide, we break down the steps needed to get your shop integrated and configured with Samba.ai.
INTEGRATION
Step 1 – Download the Samba.ai PrestaShop module
Next, you’ll need to download the Prestashop Module by clicking here or the following button:
![]()
Step 2 – Log into PrestaShop
Log into the administration panel
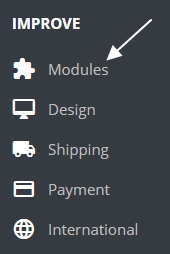
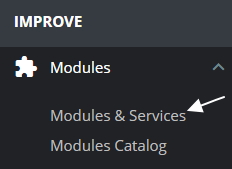
Step 3 – Go to Modules > Modules & Services
In the menu, navigate to your Modules, then to Modules & Services.
Step 4 – Press “Upload a module” button and choose the previously-downloaded sambaai.zip file
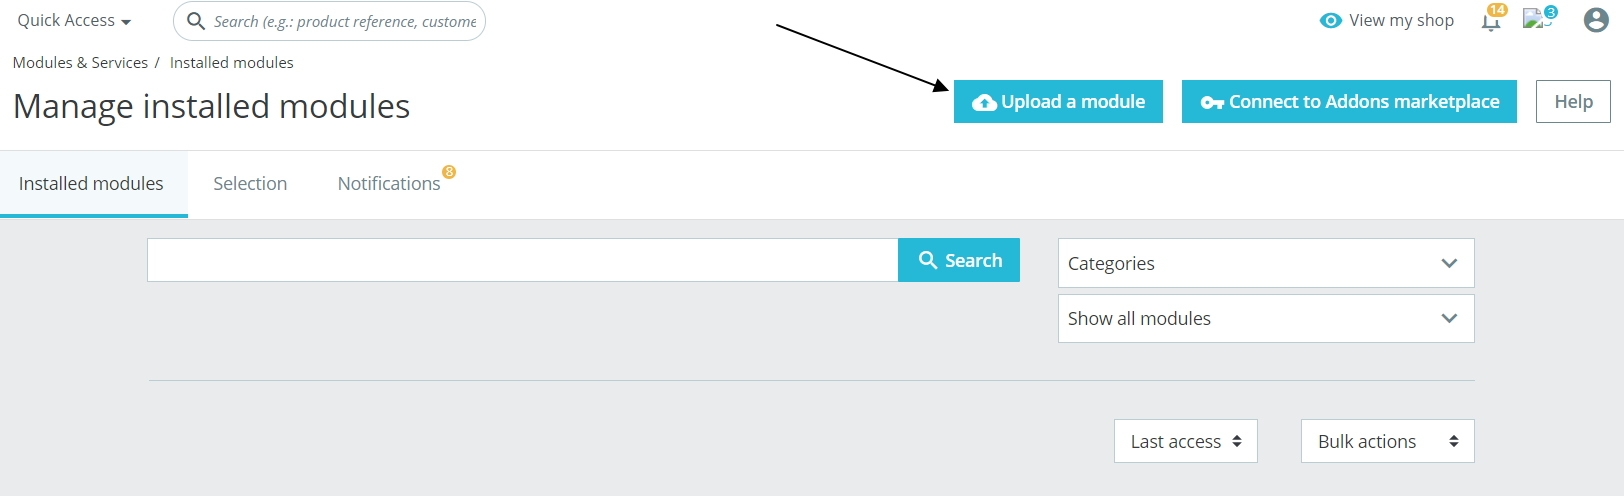
Step 5 – After the module has successfully been uploaded, press the “Configure” button

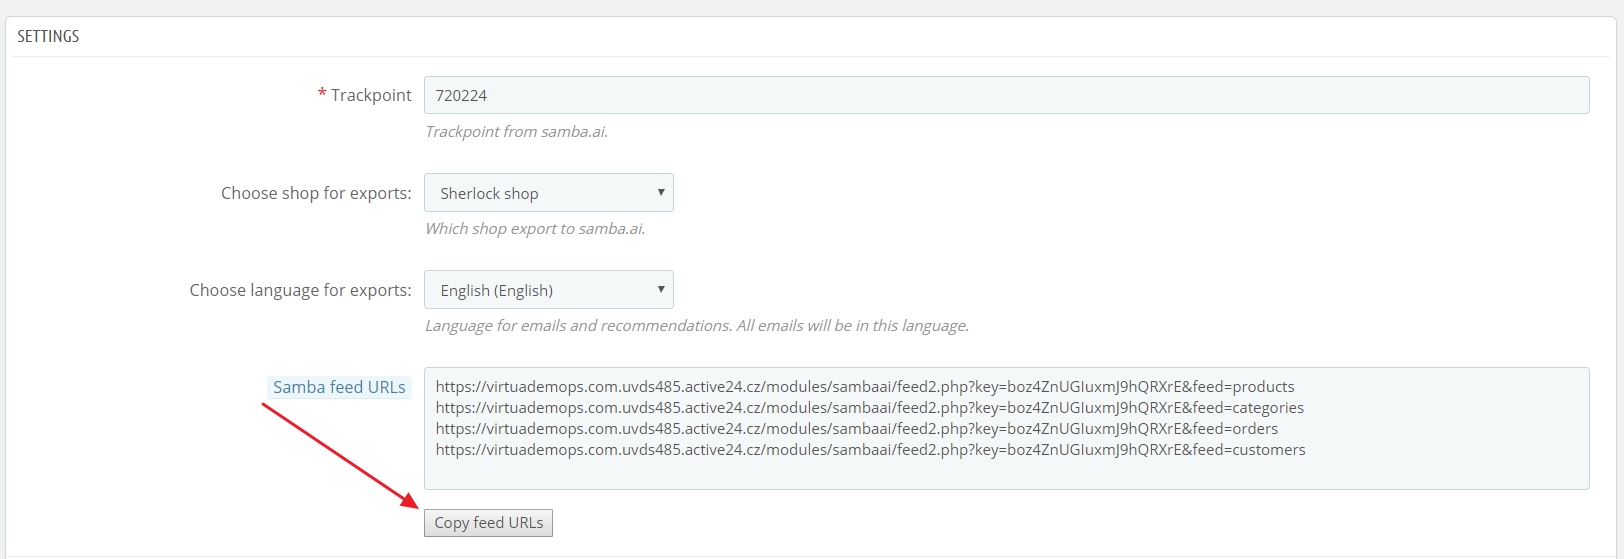
Step 6 – Configure your Trackpoint
Once the zip file has been uploaded and you’ve pressed the “Configure” button, you’ll be presented with the following page:
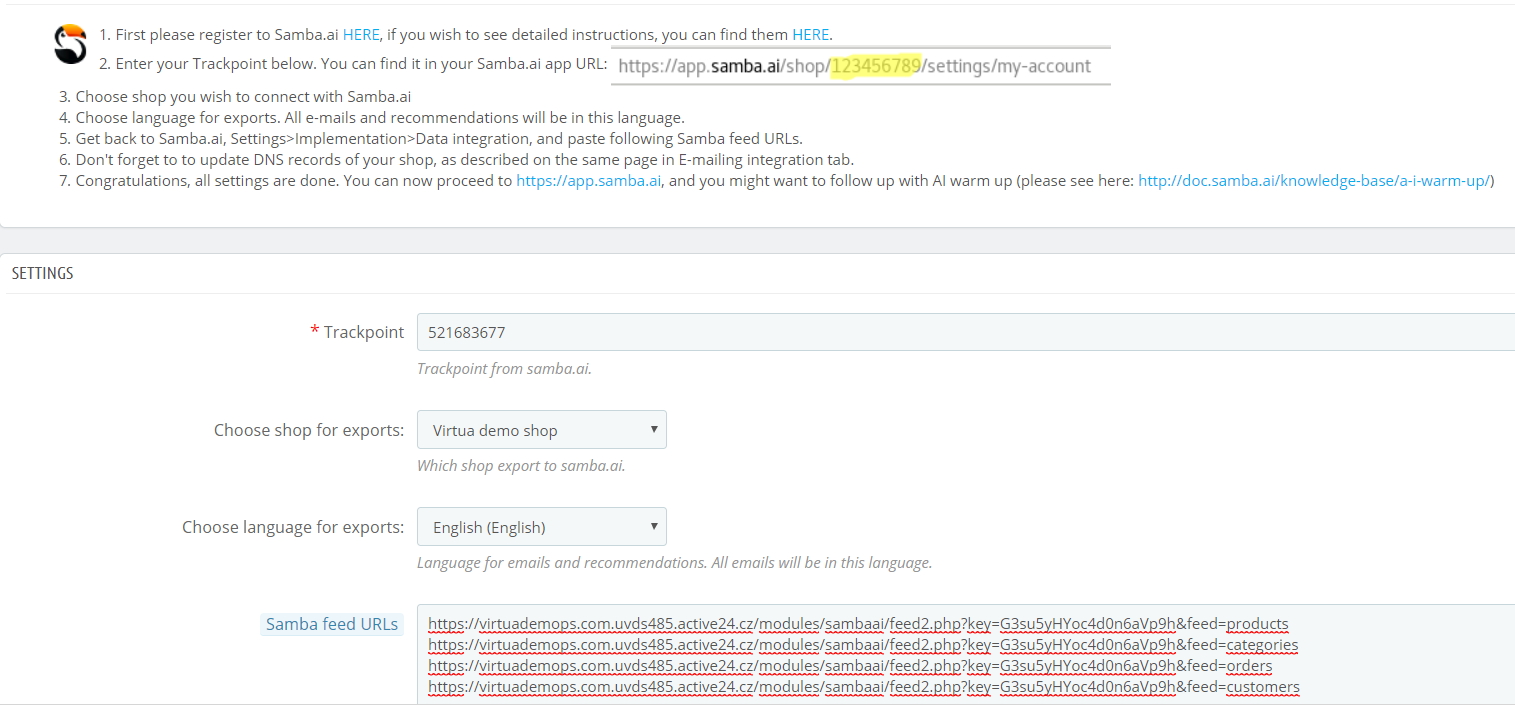
To proceed, you’ll need to input your Trackpoint number. To do so, log into your Samba.ai account and copy the number shown in the URL, as you can see in the image below:
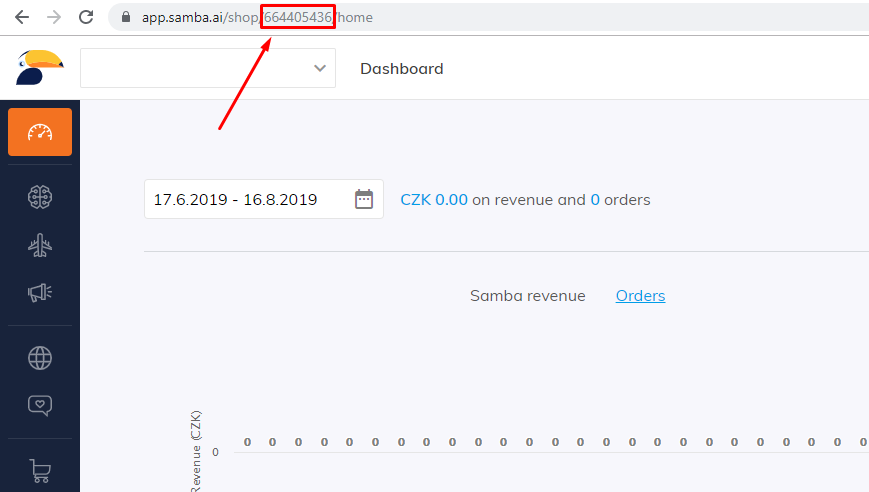
Copy and paste it into the “Trackpoint” field in your PrestaShop admin panel.
Step 7 – Choose your Shop and Language
Next, choose which shop you wish to connect to Samba.ai and the language for export feeds. Please note, all Samba.ai e-mails and recommendations will be in that language.
Be careful, if a product doesn’t have a description in the selected language, it will not be included in the feed, which can lead to an extremely low amount of products and less-than-optimal functionality.
Step 8 – Enter Samba feed URLs
Next, copy the URLs located in the “Samba feed URLs” field by clicking the “Copy feed URLs” button (as shown below).
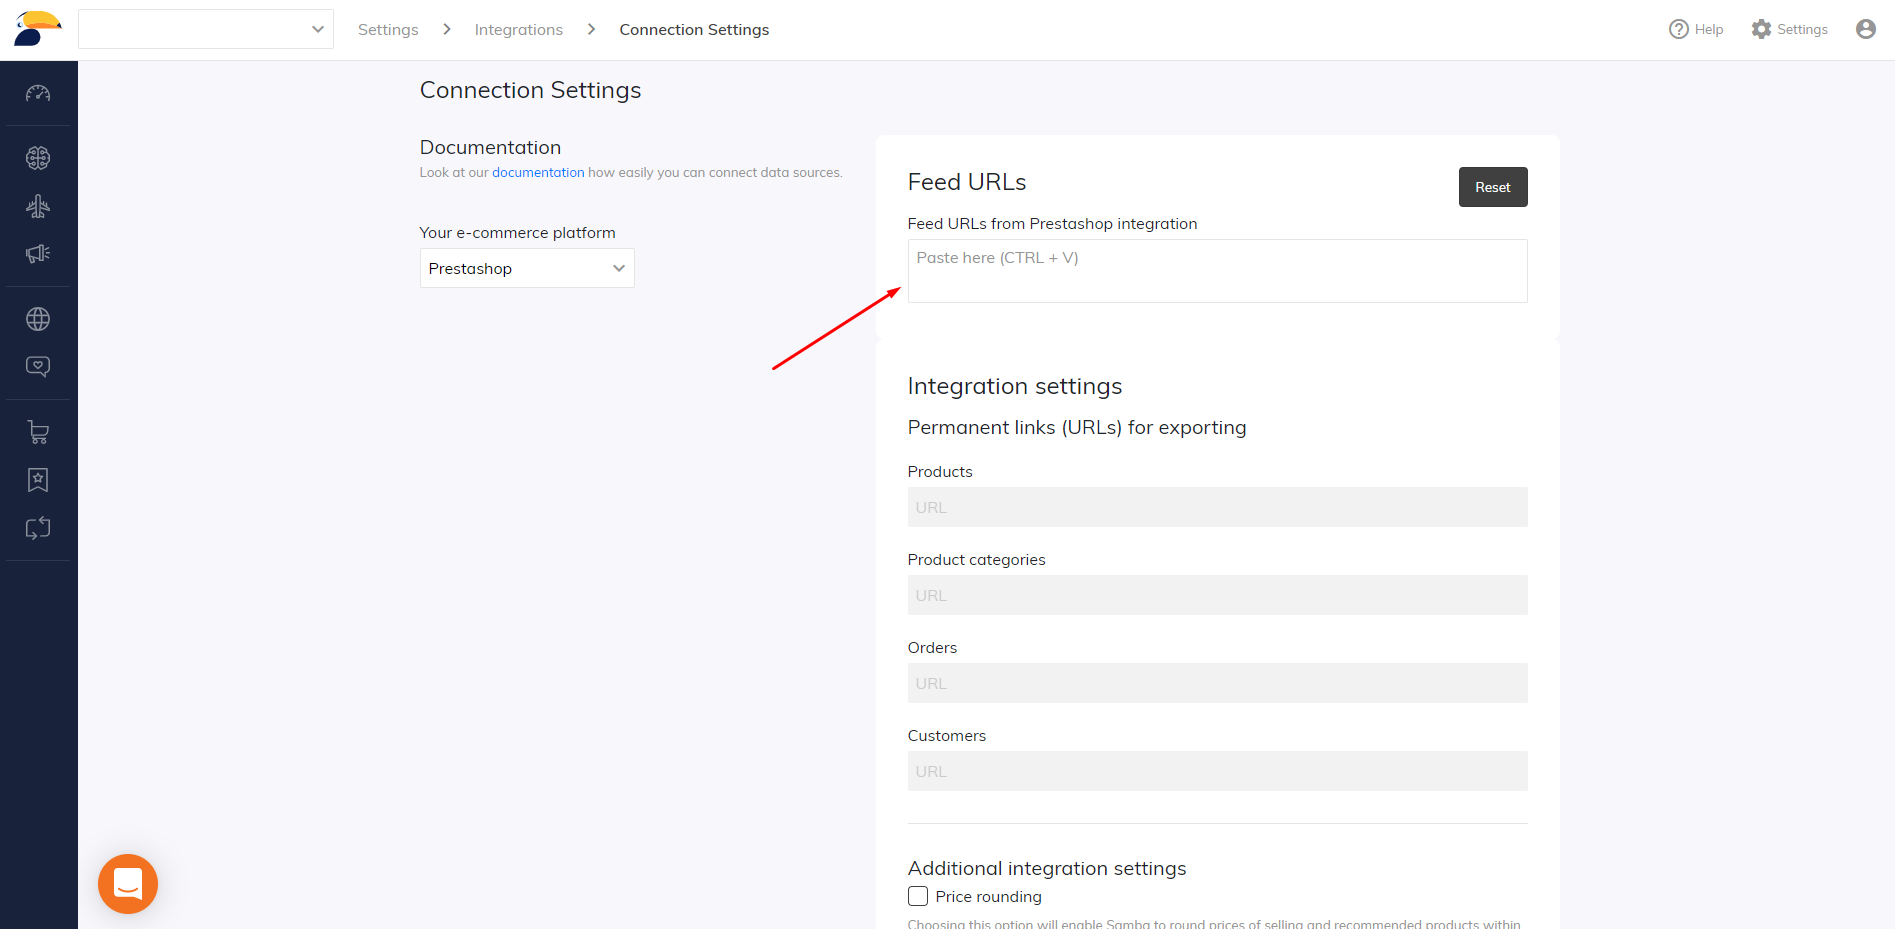
Next, go to your Samba.ai dashboard and click the Settings button (the wheel icon on the upper right-hand corner of the screen – as shown below).
![]()
From that page, click “Integrations”, then “Connection Settings” on the left.
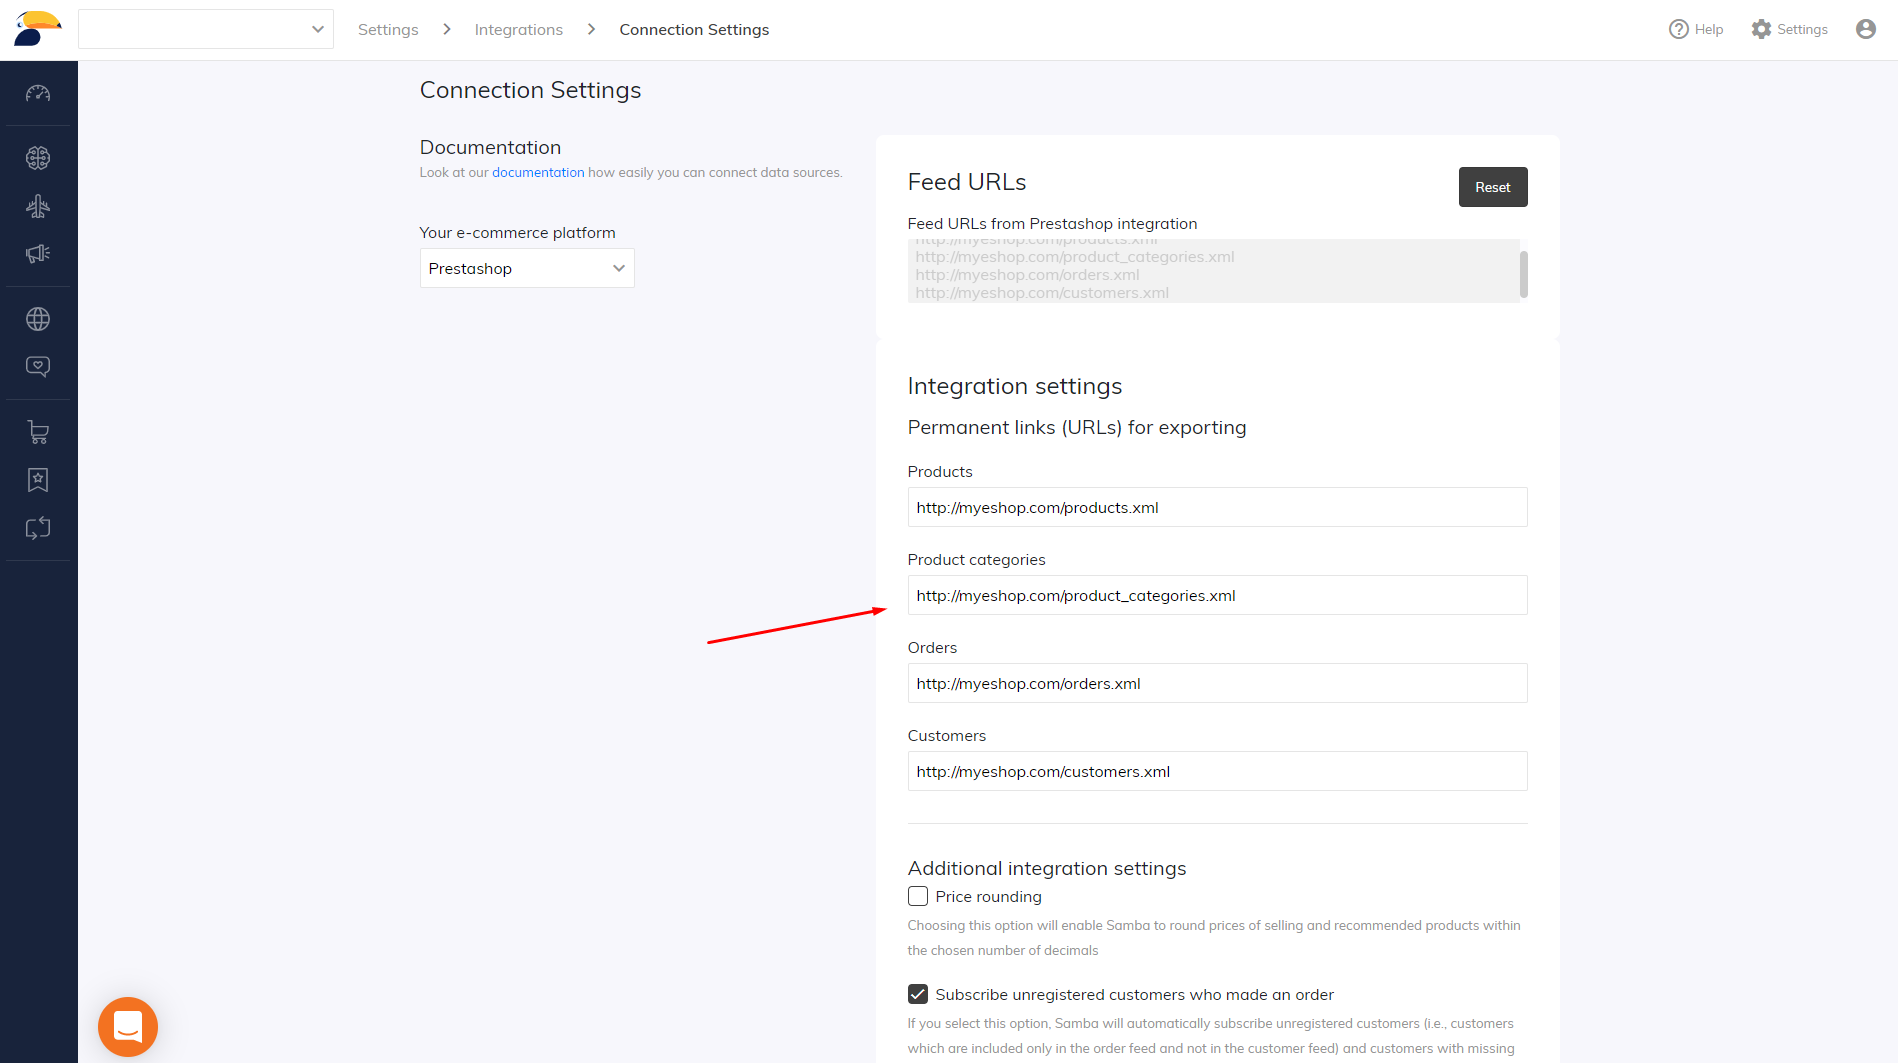
From there, select “Prestashop” from the drop-down menu and paste the URLs into the “Feed URLs from Prestashop integration” field.
After that your Feed URLs will be automatically inserted into their respective fields:
Click “Save configuration”.
Click the “Check” button to validate. You can also check the number of downloaded products – by clicking the box PRODUCTS.
GOOGLE ANALYTICS
To set up your Google Analytics, navigate to the “Data integration” section in your Samba.ai dashboard and click on the “Google Analytics” tab. From there you can enter your Google Analytics ID, if you have one.
See https://doc.samba.ai/knowledge-base/google-analytics-2/?lang=en for more details.
DNS RECORDS
If you would like us to send marketing e-mails on your behalf, you’ll have to set up your DNS records. To do so, from the same “Data integration” section click on the “E-mailing integration” tab and add the displayed DNS records to your shop.
https://doc.samba.ai/knowledge-base/dns-records/?lang=en for more details.
This post is also available in: