This post is also available in:

One of the core features of Samba.ai is its ability to automatically recommend products on your e-shop based on the personal preferences, shopping history, and interests of each particular customer. This feature, Web Personalization, generates product or service recommendations that typically show up on the home page, a product page, or the shopping cart page. In the following guide, we go over the steps to help you get your Web Personalization working and optimized. In general, there are two ways to implement Web Personalization on your e-shop: Both of these means are described below.
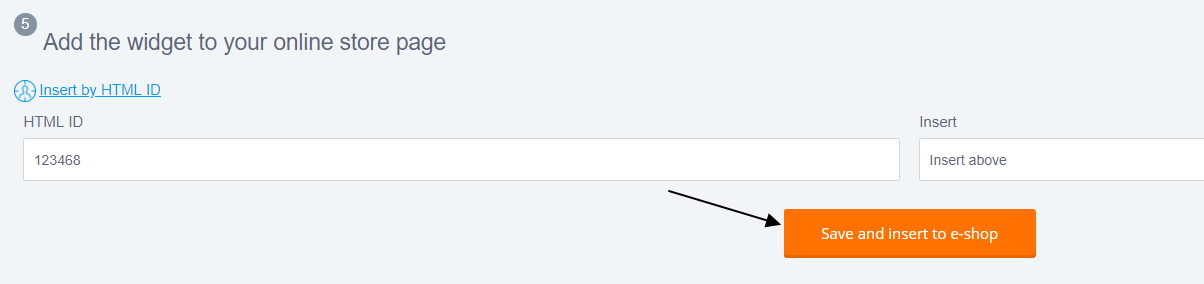
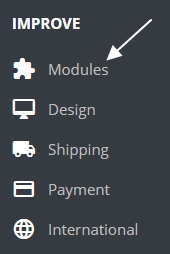
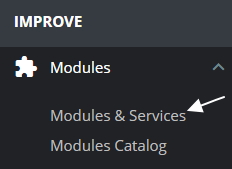
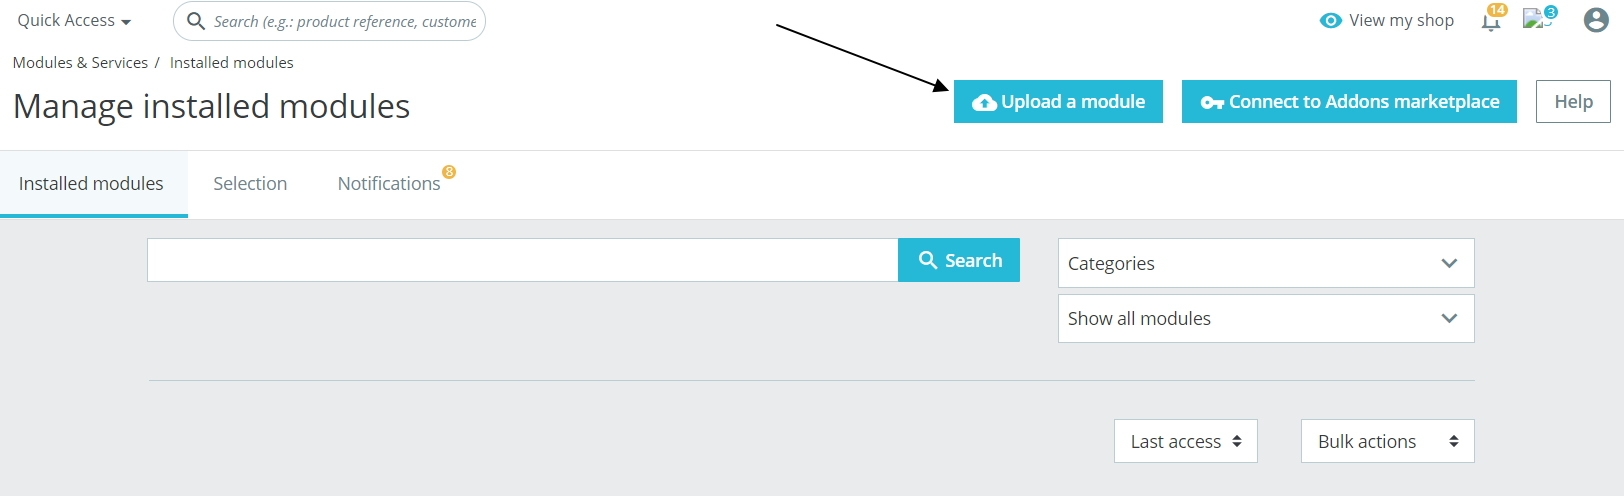
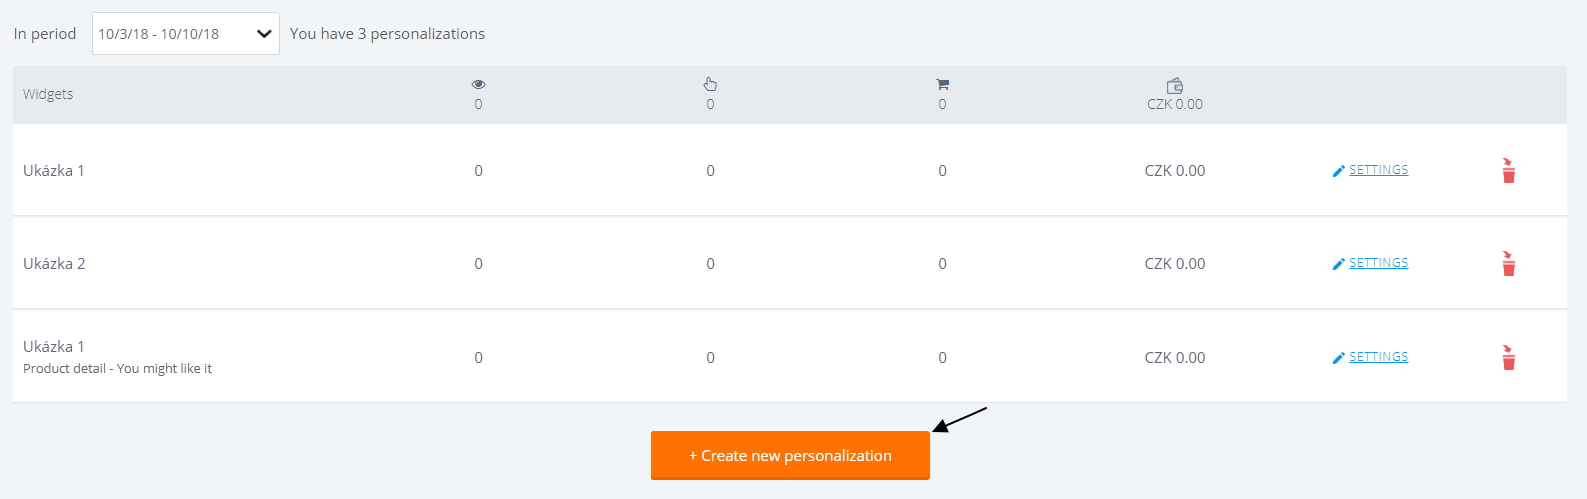
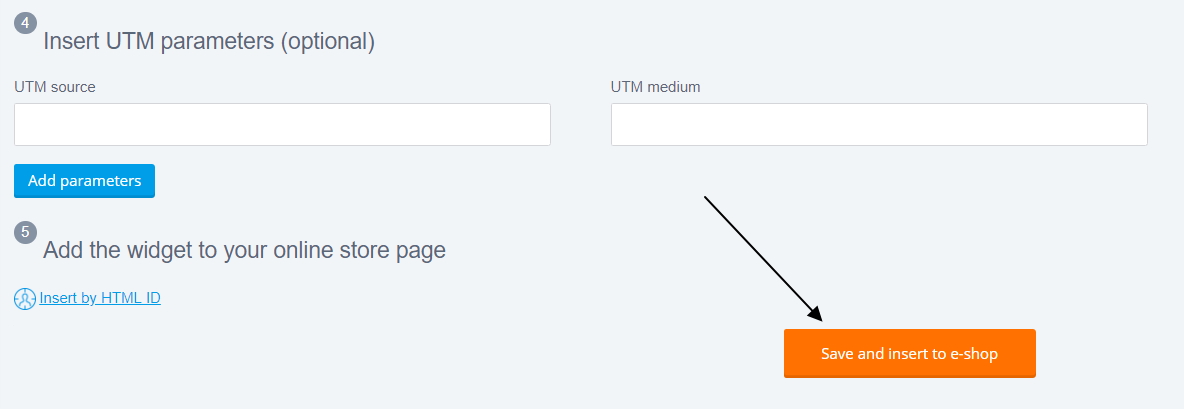
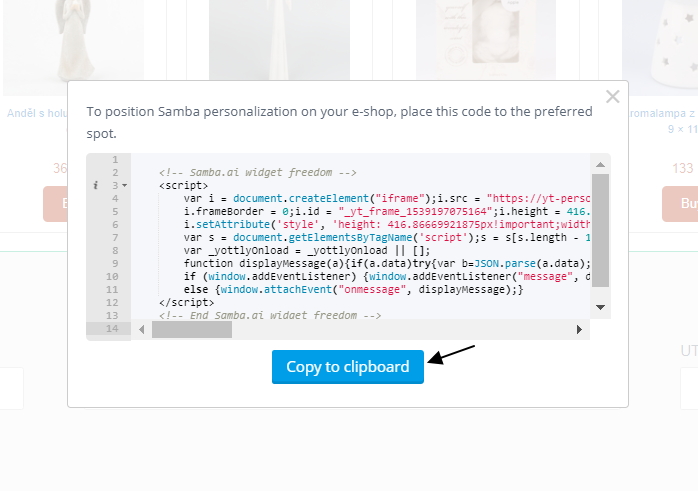
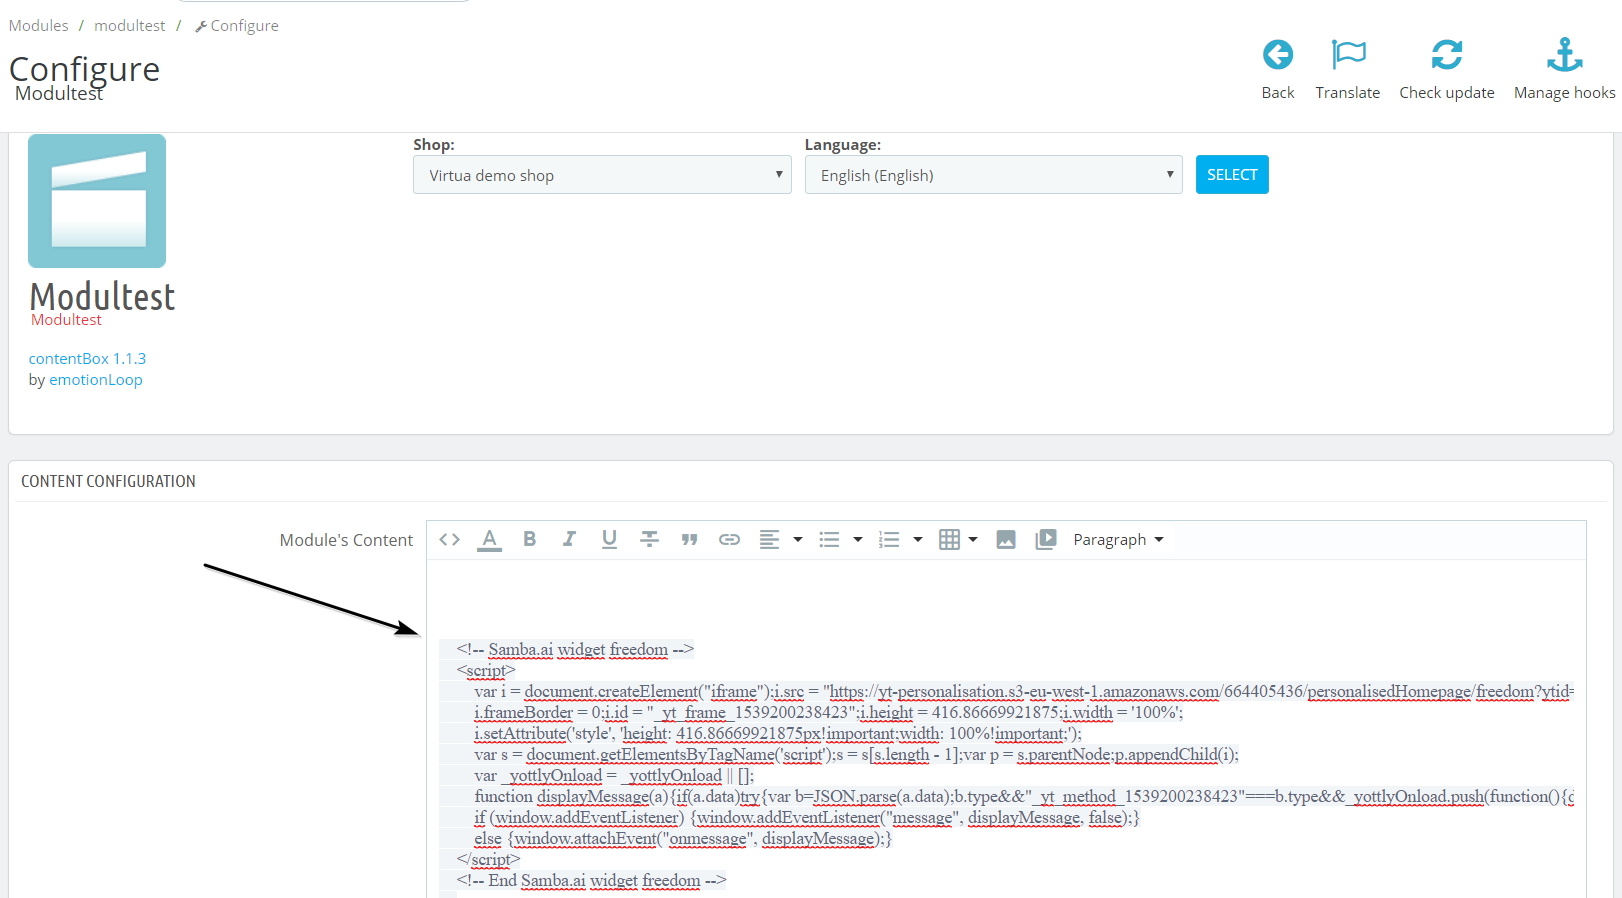
Step 1 – Install contentBox Navigate to contentbox.org and go to the bottom of the page. You’ll see an option to “Download Contentbox” and click on “Generate your Module” (as shown below). Name the module contentBoxRecommender and the module will download. Step 2 – Install the contentBox module on PrestaShop Log into your PrestaShop administration panel and navigate, via the menu, to Modules > Modules & Services Step 3 – Press the “Upload a module” button and select the previously-downloaded ZIP file Step 4 – Configure via Samba.ai Once the installation process successfully completes, press the “Configure” button (as shown below). Log in to your Samba.ai account and press the “Web personalization” button from the menu. If you haven’t created a personalization widget yet, click the “+ Create new personalization” button (as shown below). If you already have an existing widget, click on the “SETTINGS” button of that widget. Please note, while the following steps will represent the process of adding a new personalization widget the steps to modifying an existing one are very similar. From the new page, configure the following aspects of the widget: After you’ve configured the widget, click “Save and insert to e-shop” and then click “Copy to clipboard” to copy the personalization code (as shown below). Step 5 – Initialize the contentBox module Open Prestashop and go once again to Modules > Modules and Services and navigate to the contentBoxRecommender module configuration (as shown below). From within the configuration, paste the previously-copied widget code into the “Module’s Content” field (as shown below). If you are using the default template and want to display the widget on the home page of your shop, attach the module to the displayHome hook. If there are more modules attached to this hook, you can move them up or down via the settings found in Design > Positions page in PrestaShop. Step 1 – Configure via Samba.ai From your Samba.ai administration panel, click on the “Web personalization” tab within the menu. From there, click the “Create new personalization” button. From the new page, configure the following aspects of the widget: After you’ve configured the widget, enter the HTML ID to hook your personalization widget to and generate the widget code by clicking “Save and insert to e-shop” (as shown below). Copy the code by clicking the “Copy to clipboard” button. Step 2 – Configure contentBox From PrestaShop, navigate to Improve > Modules > Modules & Services and click the “Configure” button related to contentBox. In the Developer Configurations section switch the “Use Text Editor” setting to “No” and click the “Save” button (the one in Developer Configuration section) and switch the “Use only the main language settings” to “Yes”. Next, go to the Content Configuration section and paste the previously-copied widget code into the “Module’s content” text field. Click the “Save” button (the one in Content Configuration section). Last, navigate to Improve > Design > Positions and click “Transplant a module” and add contentBox to the relevant hook (displayBeforeBodyClosingTag or DisplayHome). This post is also available in:
CONFIGURING WEB PERSONALIZATION
VIA CONTENTBOX


VIA HTML ID