This post is also available in:


What is BIMI?
BIMI (Brand Indicators for Message Identification) is an advanced electronic mail specification that builds on DMARC. While DMARC enforces email authentication, BIMI adds a visual tag to authenticated emails. It works by allowing authenticated senders to display their logo next to their emails in the recipient’s inbox, which helps users quickly identify legitimate communications and increases brand recognition.
To prevent spam and phishing emails from overwhelming mailboxes, enterprises rely on DNS email authentication protocols such as Sender Policy Framework (SPF), Domain Keys Identified Mail (DKIM) and Domain-based Message Authentication, Reporting & Conformance (DMARC). These protocols verify that the email originates from an authorized source, thus confirming its legitimacy.
How does BIMI work?
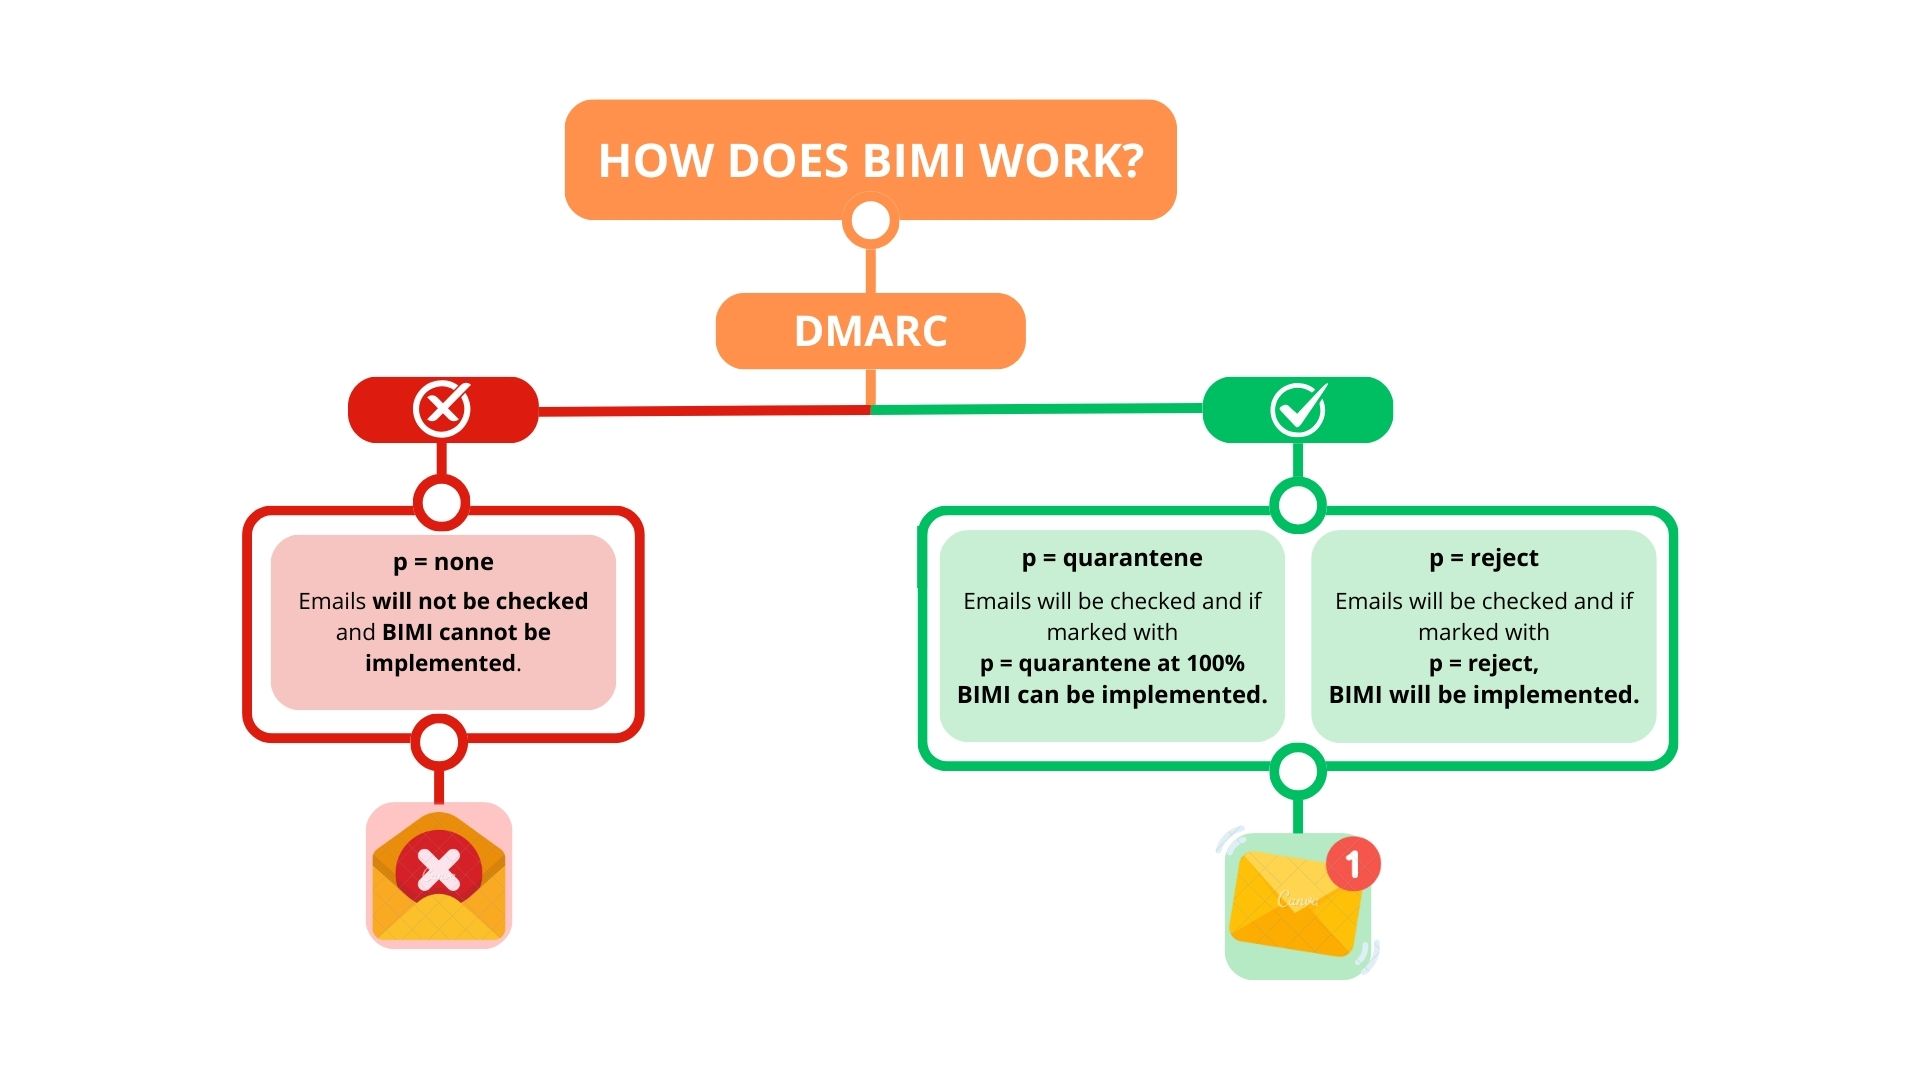
For the BIMI service to work, the sender of the email must pass DMARC authentication. This ensures that the domain sending the email is properly authenticated and that the message has not been tampered with. Only if the DMARC check is successful can BIMI trigger the display of the sender’s brand logo, which signals the authenticity of the message and reinforces the recipient’s trust.
Why set up a BIMI?
We recommend setting up a BIMI for several reasons. First of all, it gives brands the ability to manage and control which logo appears next to their emails. In addition, it lets your customers know that it’s not a fraudulent email. With this verification, your newsletters are also less likely to fall into spam.
.Standing out
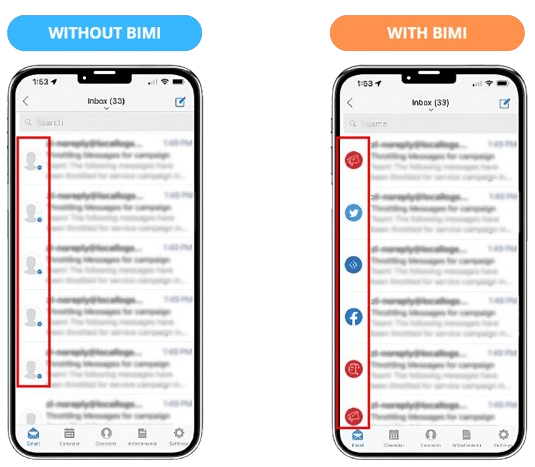
BIMI is introducing a standardised approach to logo display for authenticated emails. Using DNS records and a unified format (SVG Tiny PS), it allows email service providers and agencies to draw logos from a single authenticated source. As you can see from the image, this authentication will make your emails appear in inboxes with your official logo, giving them a trustworthy appearance.
Building trust
Trust with your clients is key, so it’s important to reassure recipients that you are really YOU and that the newsletters you send, for example, are not a trap. BIMI positively impacts email deliverability by increasing trust between senders and recipients, which is why it is considered a valuable email marketing tool.
- Increases brand recognition: With BIMI, your brand logo appears next to the email in the recipient’s inbox, increasing visibility and making it easier for your recipients to quickly identify your brand. This can lead to greater brand awareness in the marketplace.
- Improves engagement in email campaigns: BIMI builds trust and recipients are more inclined to engage with your email campaigns, that leads to higher open and click-through rates. This positively impacts your email marketing.
- Reduces spam filtering: Using BIMI signals better email verification, reducing the likelihood that your emails will be marked as spam or bounced back.
- Improves Sender Reputation: By implementing BIMI, organizations strengthen their credibility with recipients, which helps build a positive sender reputation in email marketing.
Fighting phishing practices
By verifying the authenticity of your emails, you help reduce the flood of phishing scams that could impersonate you. In this way, you protect your clients and your company’s reputation. At the same time, you are indicating a clear stance against fraudulent phishing emails.
.How to set up BIMI step by step
For BIMI to work, your domain must be properly configured with SPF, DKIM and DMARC protocols, and you must add a BIMI-specific DNS record that points to your brand logo. Additionally, brands can enhance their BIMI setup by obtaining a Verified Mark Certificate (VMC) to confirm ownership of their logo.
The following subsections provide everything you need to set up and implement BIMI.
1. DMARC email verification
BIMI works with DMARC (Domain-based Message Authentication, Reporting & Conformance). For proper setup, you need to make sure you have your DMARC policy set to p=quarantine or p=reject for full authentication. This will ensure that your domain is protected against spoofing.
2. Logo on the server
The next step is to place the SVG file with the logo on a secure server (HTTPS).
Make sure the image is available at the URL.
Logo and requirements
Create and upload a small version of your logo in SVG (Scalable Vector Graphics) format to a publicly accessible server. To be usable, the logo must meet the following parameters.
- File type: svg (scalable vector graphics)
- Size: the logo should be compact, usually less than 32 KB.
- SVG format: must conform to the SVG P/S Tiny 1.2 profile, which is a restricted version of the SVG format that excludes some features such as scripts and animations.
- Content: the logo must be a visual representation of your brand (e.g., your company logo) with no text below the logo. It should be centered to fit in with the most common email box design variations, see image.
- Dimensions: ideally 1:1 square.
- Availability: the logo should be uploaded to a publicly accessible HTTPS server, regardless of domain.
3. Verified Mark Certificate (VMC)
A Verified Mark Certificate (VMC) is a digital certificate issued by trusted certification portals. It verifies that your brand logo is a registered trademark and gives email recipients additional assurance that the email is legitimate. Although VMC is not universally required for BIMI, it is a growing industry standard for organizations that want to take full advantage of the benefits of BIMI. For example, Google directly requires the certificate and without it, logo display will not work!
Benefits of using VMC:
- Trust and authenticity
- Wide logo display
- Protection against brand impersonation
How to get a VMC certificate?
To obtain a VMC certificate, your logo must be a registered trademark. You must provide proof of this trademark to the certification body. The certificate can be registered on official websites such as DigiCert . These certification authorities will verify your trademark and issue a certificate in PEM format, which you can reference in your BIMI TXT record.
Price of the certificate
Prices may vary depending on the issuer, the number of domains for which you want to purchase a certificate, and the length of validity. An annual VMC certificate from DigiCert for a single domain will cost you $1,608, with a monthly fee of $134 (figures are valid as of September 2024). In DigiCert’s case, these are subscription payments that automatically renew.
Number of domains │ Annual price │ Monthly price
- 1 $1,608 $134
- 3 $4,824 $402
- 5 $8,040 $670
- 10 $16,080 $1,340
4. Adding a BIMI to a DNS record
You will now create a BIMI TXT DNS record. The format of this record has its own specific format for Name, Type, and Value values.
- Name (Host):
default._bimi(For exampledefault._bimi.sendingdomain.com) - Type:
TXT - Value:
v=BIMI1;l=https://example.com/path/to/logo.svg;a=https://example.com/path/to/VMC.pem
default means the default selector, which can be replaced by a specific one if needed, see belowv=BIMI1: Indicates that this is a BIMI recordl: This is the URL where the SVG logo is located (see step 2.)a: (Optional) This is the URL where the Verified Mark Certificate (VMC) is stored, which is necessary if you are using VMC
BIMI settings are automatically inherited even on subdomains that do not have their own BIMI defined.
BIMI Selector
The concept of the BIMI Selector is slightly different from that of SPF, DKIM or other email authentication standards. However, BIMI selectors can be used in more advanced settings to allow multiple logos to be used for different purposes, subdomains or campaigns.
By default, BIMI does not require a selector in the same way as DKIM, but you can configure it to manage different logos. This selector allows you to specify multiple BIMI records for different email streams or tags associated with the same domain. This is definitely useful if you manage multiple logos for different departments, products or campaigns. And also if you want different logos to appear in different email streams from your domain.
The BIMI selector is placed as a prefix in the DNS record name _bimi and must also be included in the header of the sent e-mail. This is because if it is not included in the email header, the BIMI from the default selector is automatically used.
- This means that in the Hostname DNS record, instead of
_bimi.sendingdomain.com, you would use a specific selector in the formatselector1._bimi.sendingdomain.com.You can name it whatever you want for clarity, for example:marketing._bimi.sendingdomain.com.
In the header of the sent email, the selector must then be specified as follows:
-
BIMI-Selector: v=BIMI1; s=selector1;
For the example mentioned above with the selector named “marketing”, then the entry in the email header will look like this:
-
BIMI-Selector: v=BIMI1; s=marketing;
5. Test the BIMI implementation
Once DNS is set up, it may take several hours (up to 48 hours) for the changes to take effect.
Use tools such as BIMI Inspector to verify that your BIMI record in DNS is configured correctly. Email services may still take some time to display your logo as they will be verifying DMARC and BIMI settings.
BIMI support
Supporting BIMI
Below you can find mailboxes that already support BIMI.
- Apple Mail
- AOL Mail
- au
- Cloudmark
- Fastmail
- La Poste
- Onet Post
- Yahoo! Mail
- Zone Webmail
- ZONER Webmail
Considering BIMI support
Mailboxes that are considering BIMI authentication support.
- List
- Atmail
- BT Group
- Comcast
- Qualita
- GMX mail
- Yahoo! Japan
One of the largest mailbox providers, Microsoft, does not yet support BIMI implementation.
.Alternatives
If you find setting up BIMI and VMC complicated or costly, you can still use these alternatives, which have a similar effect but no longer guarantee the authenticity of the recipient and serve you only “for show”.
1. Google Profile Settings
Google Workspace offers an easy way to display your brand logo in Gmail messages. This is an excellent alternative for businesses using Google because it doesn’t require BIMI settings or a Verified Brand Certificate (VMC). On the other hand, it only works in Gmail and Google ecosystem services, and you may not see the set logo in other email providers’ inboxes.
Settings:
- Sign in to your Gmail
- Click on your profile picture in the top right > Change profile picture > Change
- Select an image and upload it to Google Photos
- Click Next > Save profile picture
2. E-mail signature
Email signatures are a traditional but very effective way to incorporate your brand logo into every outbound email. Most email platforms, including Microsoft Outlook, Google Workspace, and Apple Mail, allow you to create custom email signatures that include your logo. However, it will only be included “inside” the email, so the recipient will not see the logo at first glance.
Settings:
- In the email client, go to the signature settings and create a new signature
- Upload your logo and include any brand-related information (e.g. website, social media links, contact information, etc.)
- Save the signature and use it on your emails
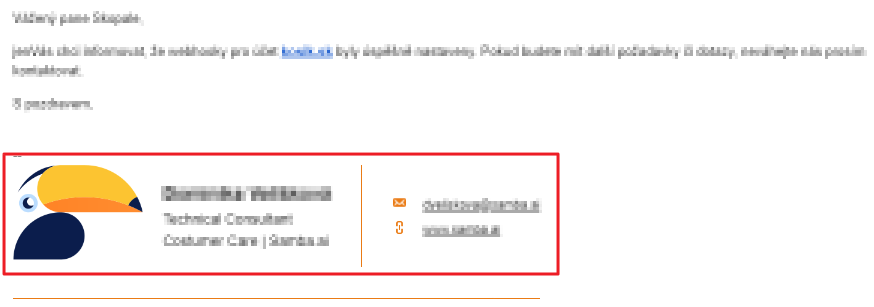
The final look of emails received from you may then look like this (signature in red box):
3. Gravatar integration
Gravatar (Globally Recognized Avatar) is widely used to associate images with email addresses and profiles such as WordPress, GitHub, Slack, Trello or Figma. By linking multiple platforms, you can set up a profile picture (logo) from one place. It may work on a limited basis, and different email providers may not display the profile picture.
4. Microsoft 365
If you use Microsoft 365 at your company, you can customize the display of your brand in your emails and organization profile as follows. This will ensure that your logo is visible to recipients using Microsoft services such as Outlook and Office 365. However, it won’t be visible to other email service providers.


