
In the following article, we will show you how to easily connect your Shoprenter account with Samba using our add-on.
Samba add-on installation
Go to your eshop administration in the Shoprenter and select Apps > Marketing > Samba.ai, or click here.
Using the Install button, install the add-on in your e-shop.
Connection
Immediately after the add-on is installed, you get to the add-on settings. In the main page of the add-on you can proceed to the initial setup.
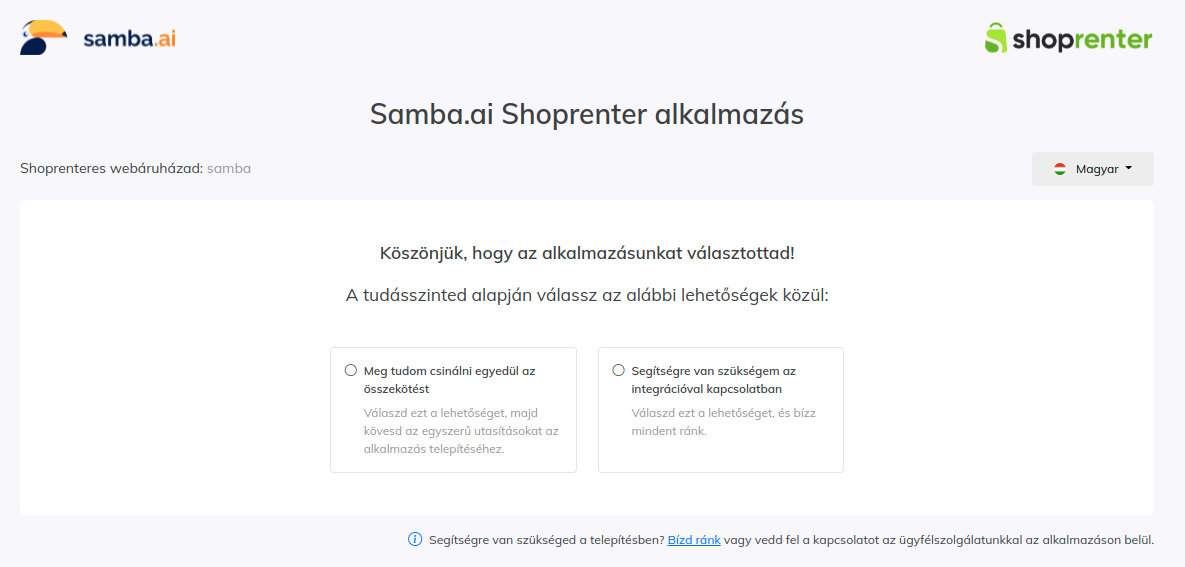
If you need any assistance with setting up the add-on, you can also contact us directly from the settings using the form.
Register to Samba.ai
As part of the add-on setup, you need to fill in your e-shop’s Trackpoint ID, which you can find in your Samba account. If you don’t have an account yet, you need to create one.
Here’s how to register to Samba.ai.
Once registration is complete, you can find your Trackpoint ID in Eshop Settings > Overview.
Customer tracking implementation
Paste your copied Trackpoint ID in the add-on settings in the appropriate window and save.

If you have filled in your Trackpoint ID correctly, all customer tracking scripts will be inserted into your website by the add-on automatically.
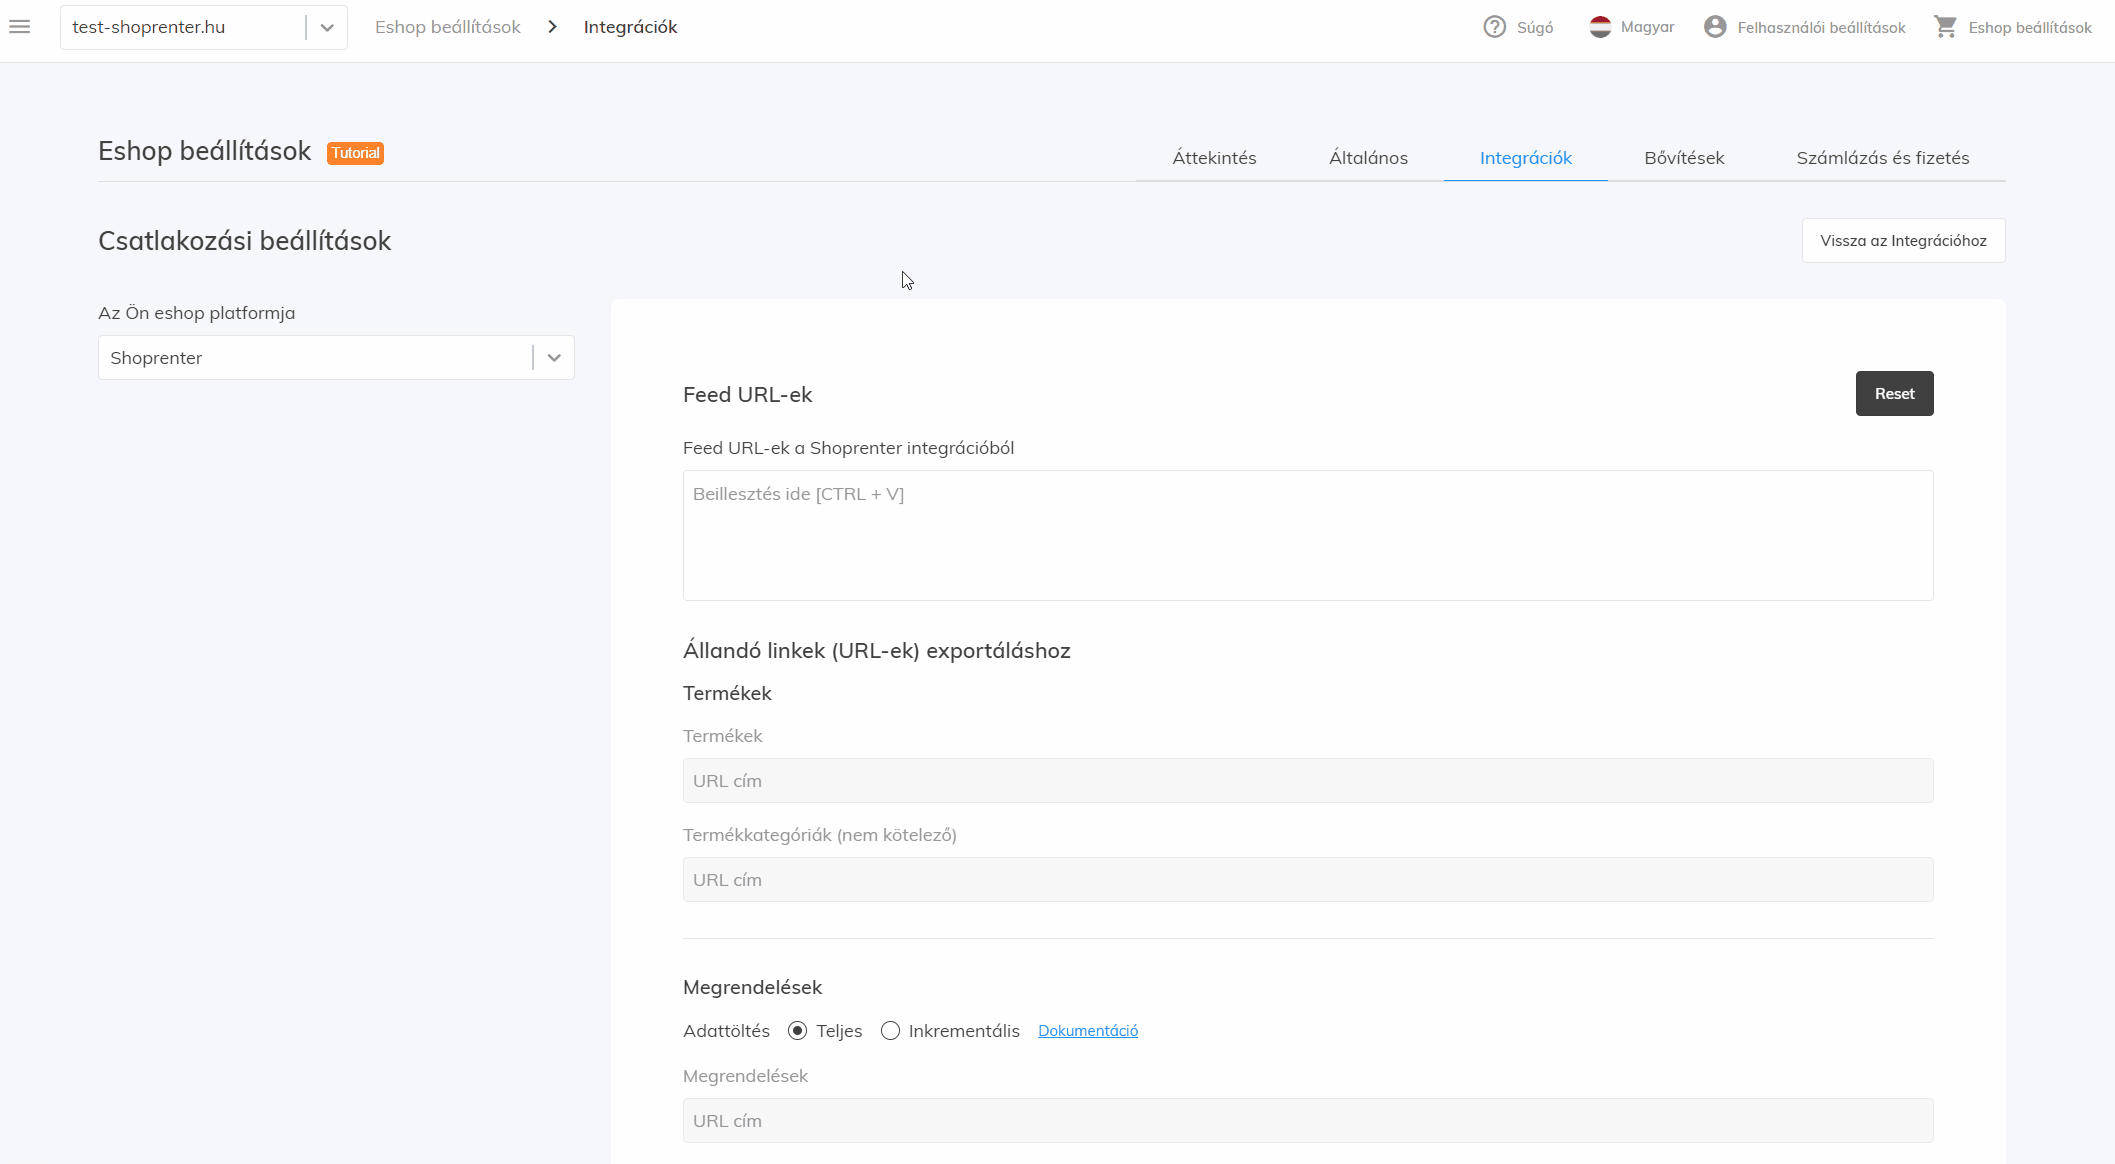
Data feed export & import
In the next step of the add-on, you can copy all necessary data feeds with one click.
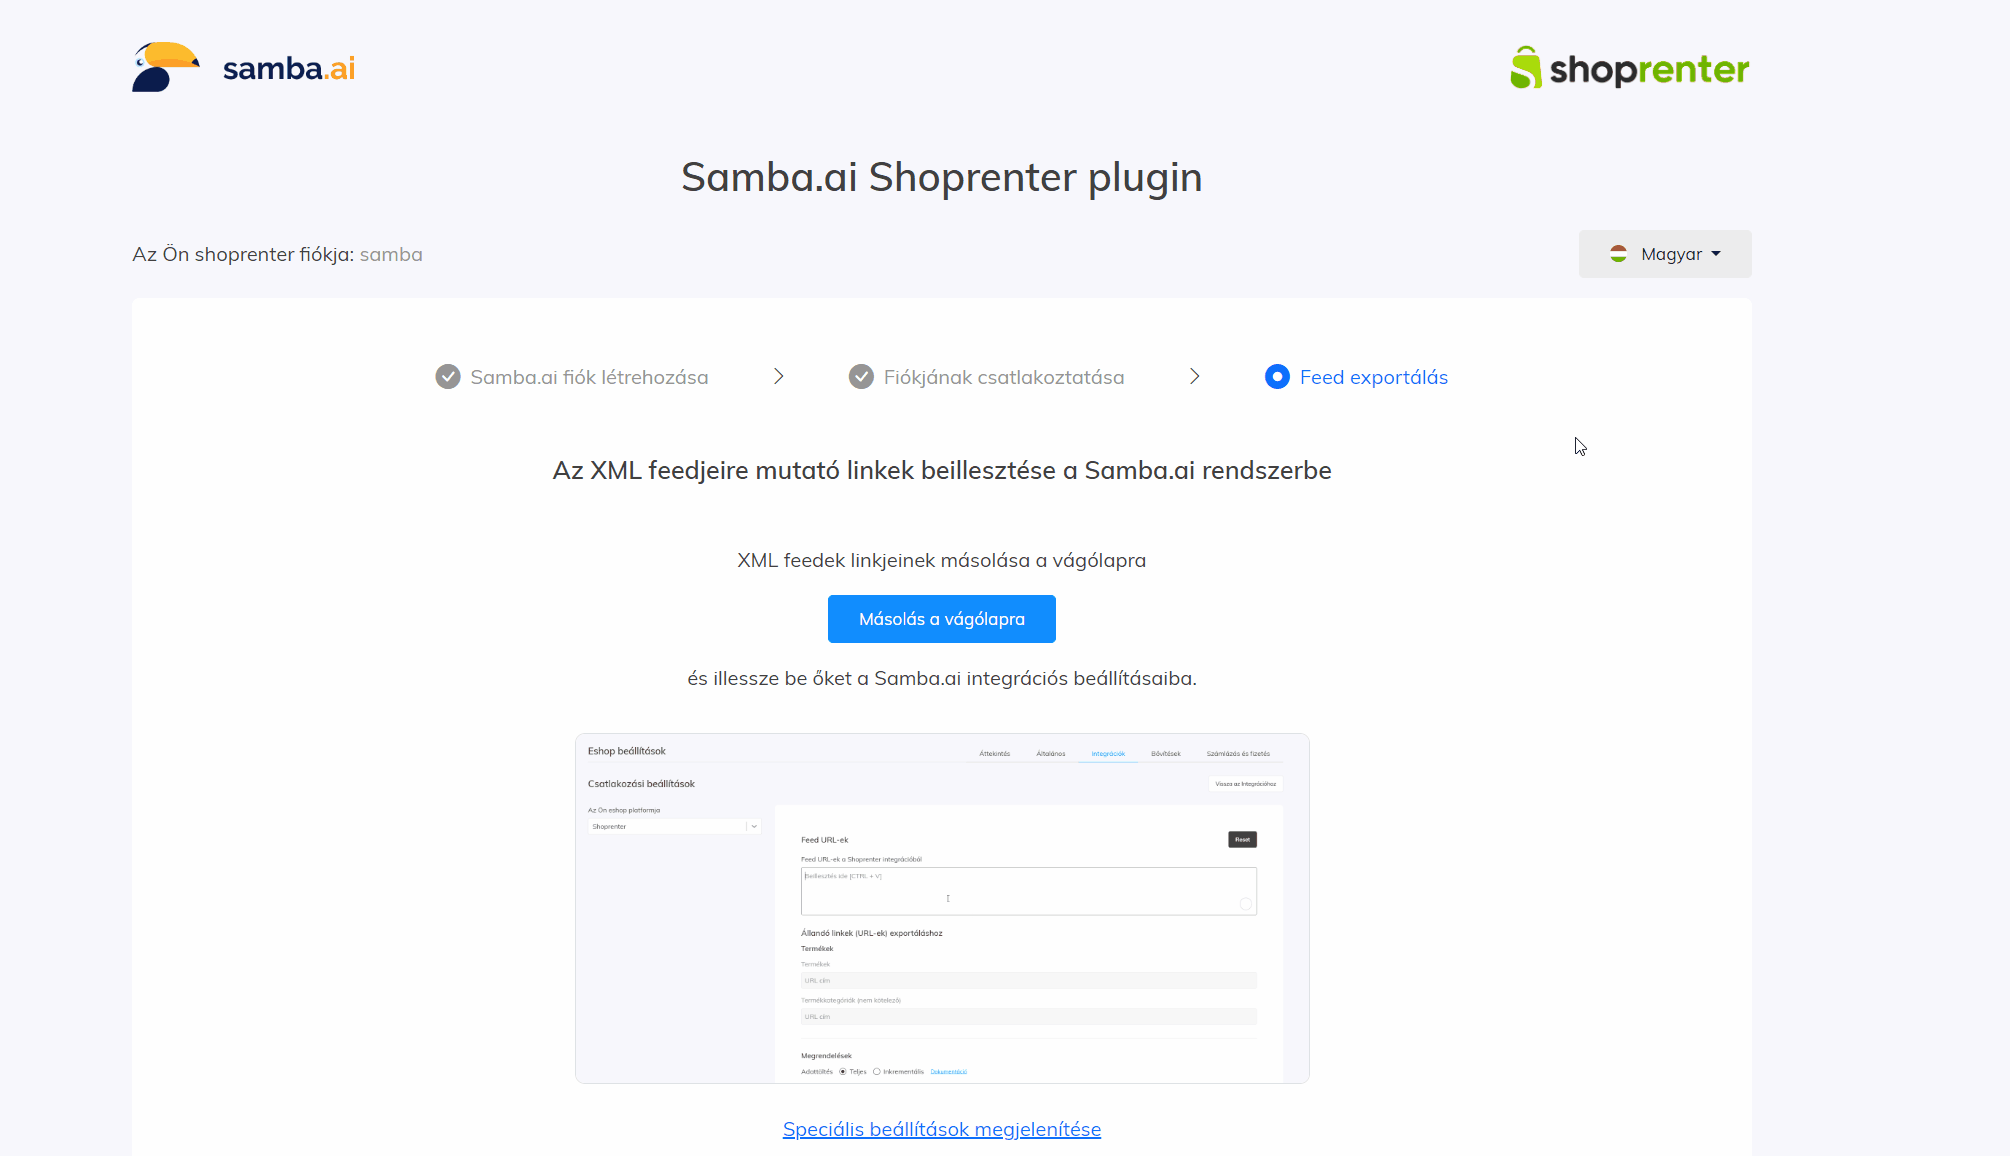
Now go to your Samba.ai account and open Eshop Settings and Integration in the top right corner.
In the Data Integration section, open Connection Settings.
Here, paste the copied feed URLs into the reserved field. Samba will take care of assigning the individual feeds to the appropriate locations.
Rounding of prices
The newsletter is filled with the prices listed in the product feed. However, if you have some prices set to values like 419.72 HU, you can tell Samba to round that price to the number of decimal places you want.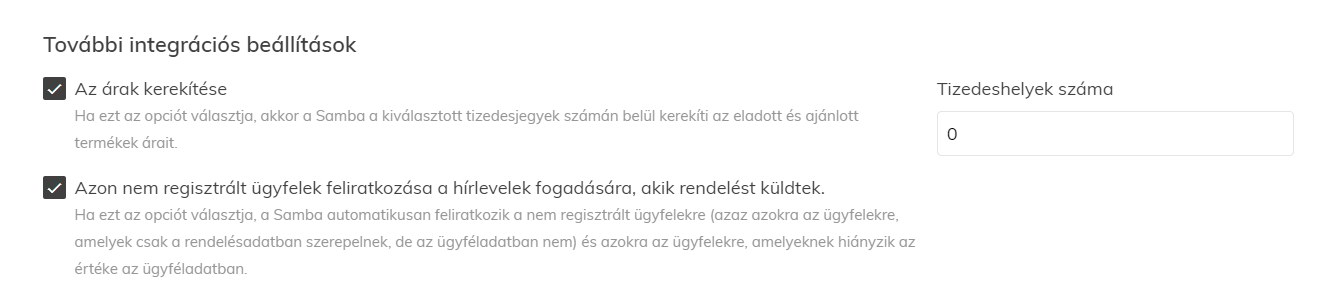
For example, this setting would round prices to whole numbers. The price of 419,72 HU would be rounded to 420 HU.
Once you have your feeds loaded into Samba, save the configuration and click the Refresh button.

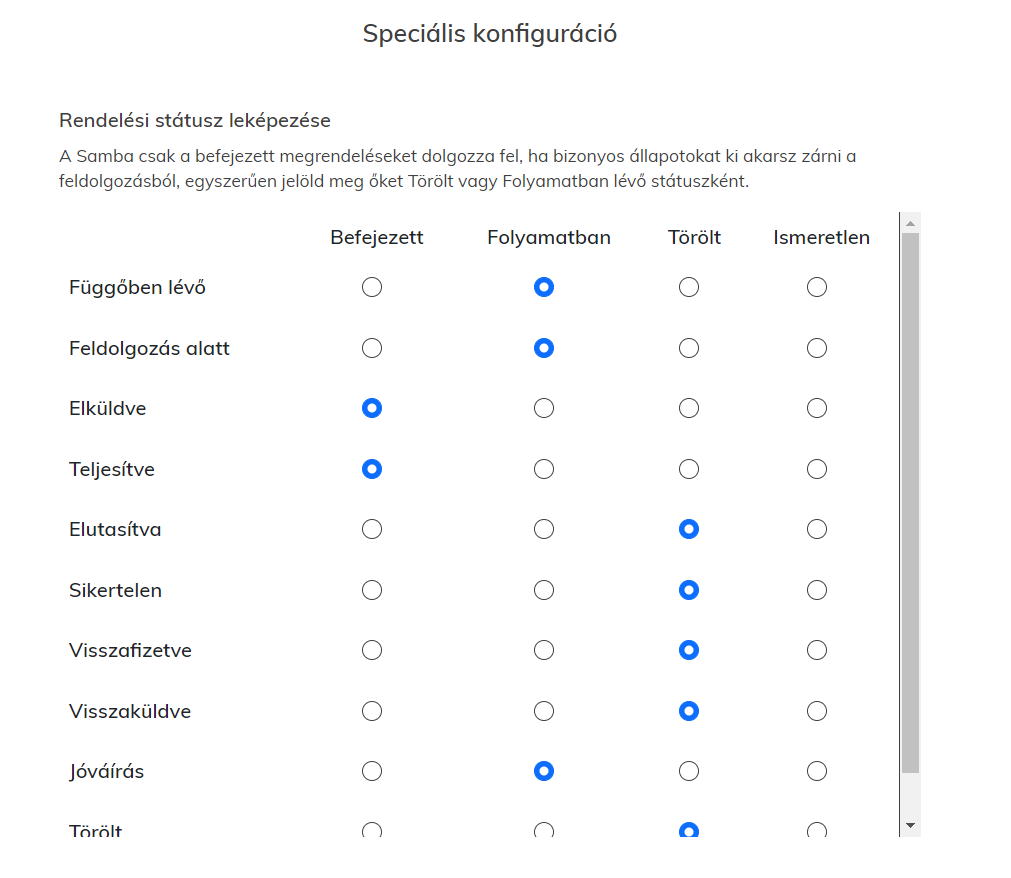
Advanced settings of data feeds
Samba.ai recognizes only 3 basic order states in its data connection.
- Created
- Finished
- only orders marked as such will be analysed in Samba
- Cancelled
Within the add-on, the Shoprenter system states are automatically matched to these base states along with a variety of custom order states. Unrecognized states are automatically marked as Undefined orders by the add-on and sorted into the feed as Created orders.
So if you are missing any orders in Samba, or if you want to manually sort these states, you can do so within the advanced settings of the add-on.
You also have several options in the settings that you can use to influence the behaviour of the product feed:
Use short product descriptions:
- To use short product descriptions instead of long ones. This short option will then be displayed in both Samba and possibly in the email distribution.
Use the variants as separate products:
- With this option, each product variant will be treated as a separate product. Use this setting only if your products are manufactured or customised completely to the customer (Selecting this setting may affect the personalisation of products in Samba).
Once your settings are complete, click Save.
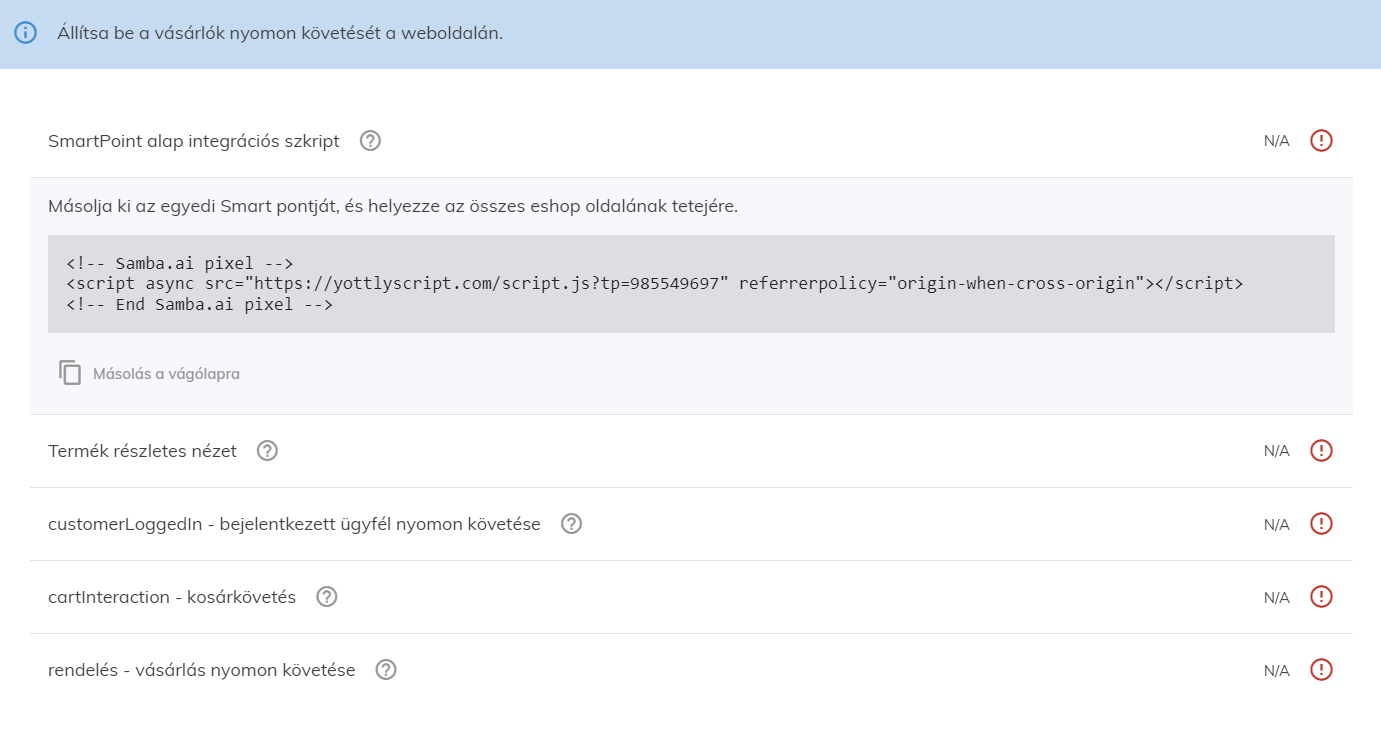
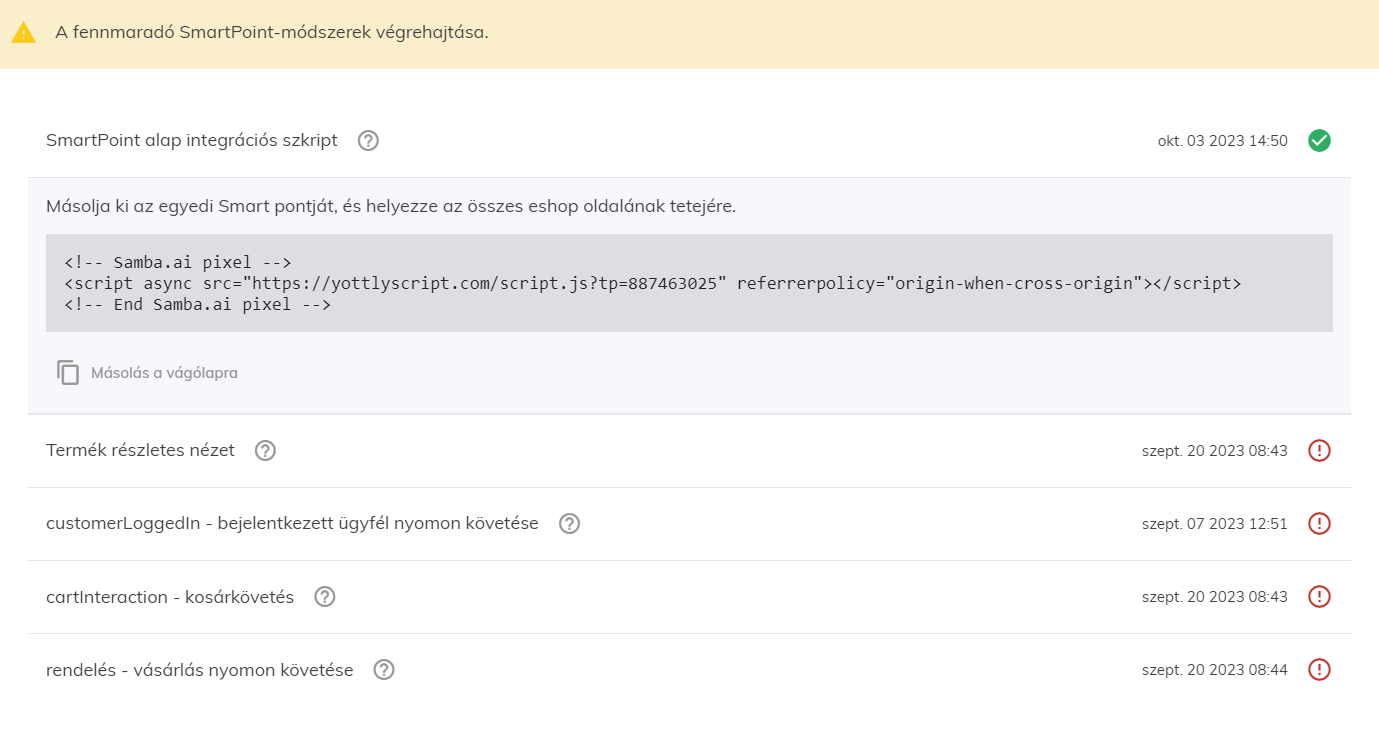
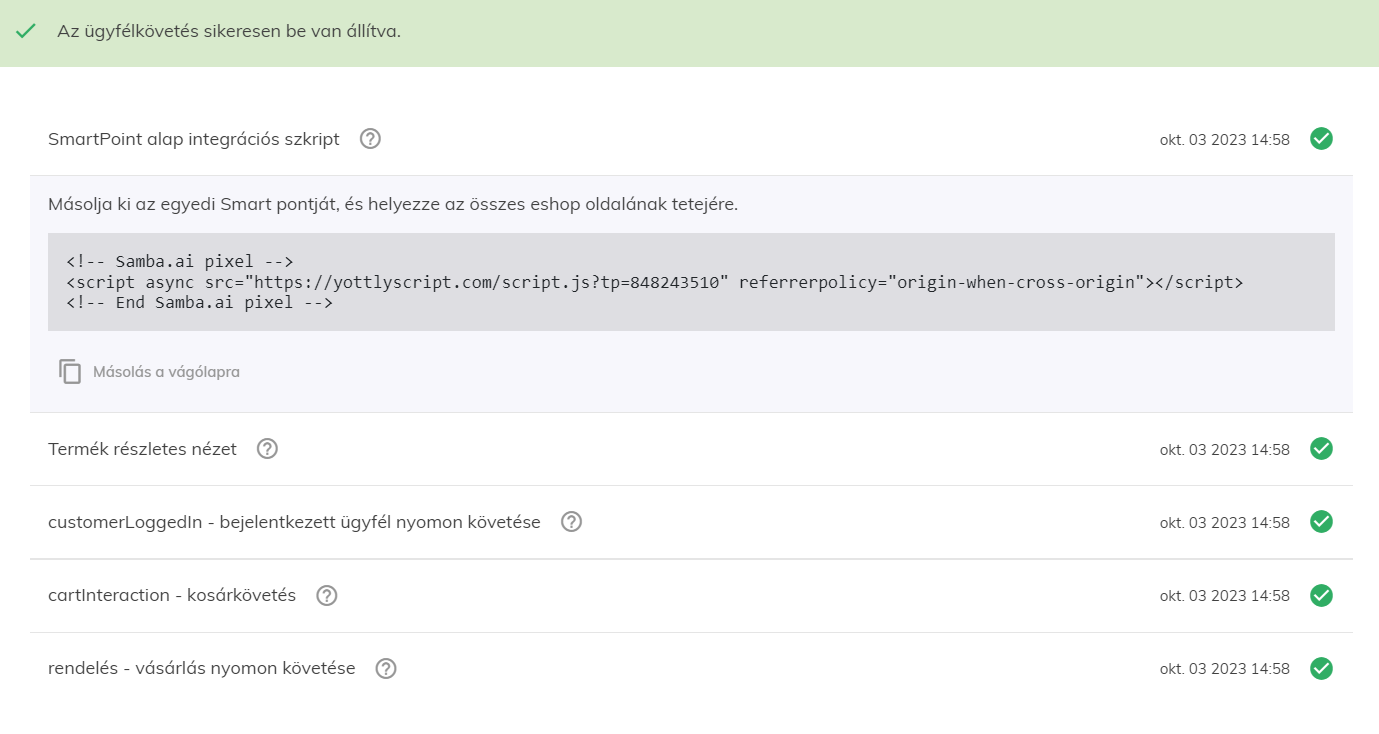
Customer Tracking
Thanks to Samba.ai, you don’t have to set up any customer tracking. Everything is automatically implemented on your website through the add-on.
In your Samba.ai account administration, you can check the success of this implementation in the section Eshop Settings > Integration.
Customer Tracking Implementation States
In Samba, you can observe a total of 3 states of your implementation:
- Blue: Default state. The function has not been implemented yet
- Yellow: Alert status. This status indicates that some part of the implementation is not quite right. It may be an error within one of the customer tracking methods. However, it could also be that the method has just not been running for a while. In any case, we recommend to check everything.
- Green: Everything is set up fine.
 |
 |
 |
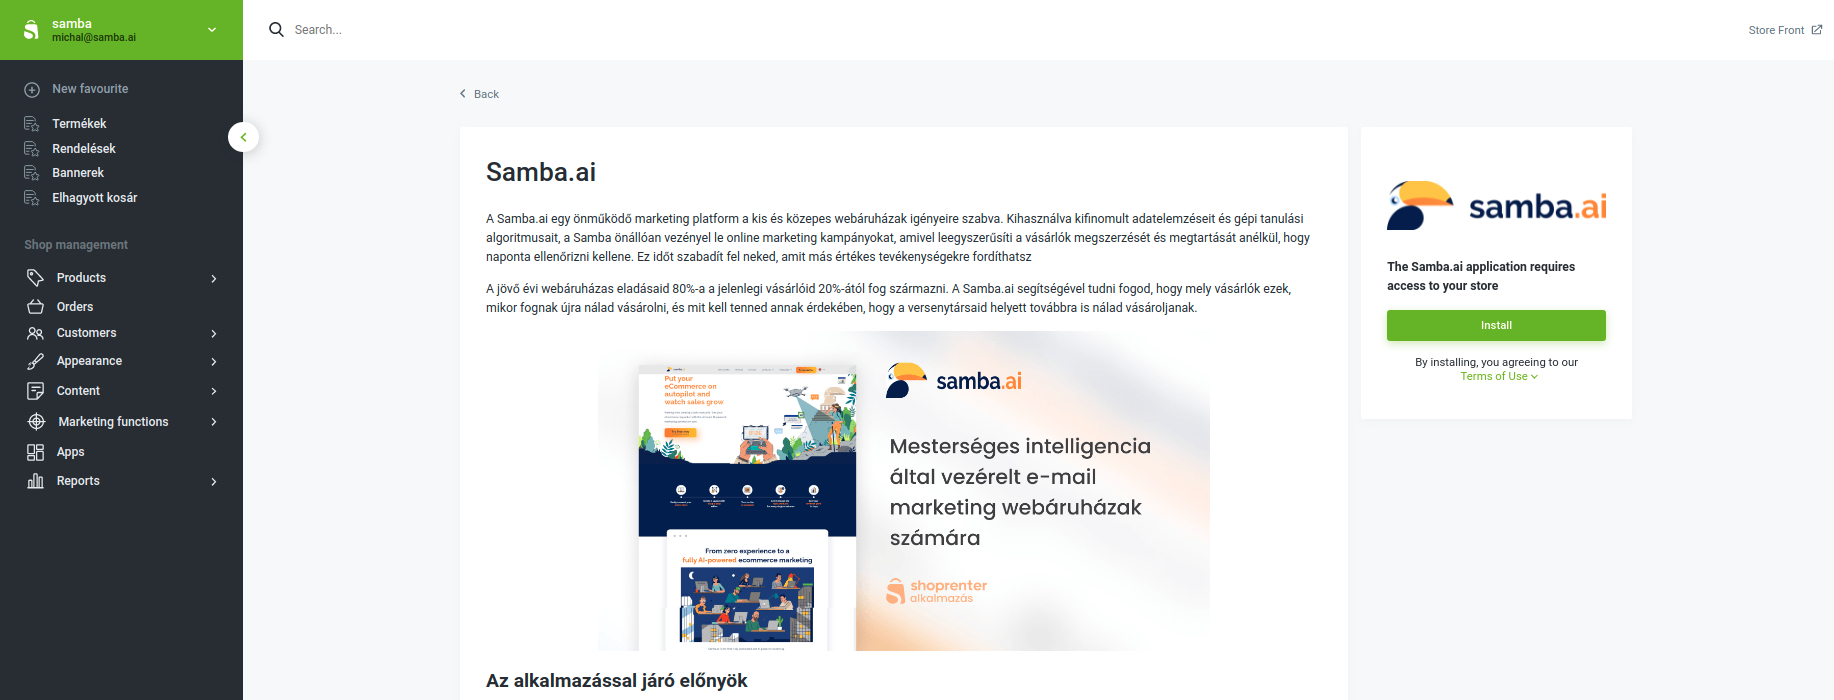
Shoprenter Administration
Simply click directly here or go to your Shoprenter administration, click Apps in the left-side menu. As a next step open the Marketing category and search for the Samba add-on. Using the Details button open the landing page of the Samba add-on.
If you haven’t done so before, press Install in the right-side window to add our add-on to your administration.
Next implementation steps
After you have uploaded your XML feeds to Samba and checked the Customer Tracking functionality, it’s time to move on to the next points of your e-shop implementation.
Specifically, this involves setting up DNS records and connecting with Google Analytics.